Holga Cameras and Experimental Photography 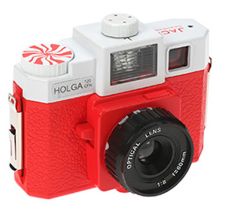 The Holga is something of a legend in photographic circles: a plastic toy camera capable of taking incredible, breathtaking images. For those not in the know, the devotion of Holga aficionados may be downright puzzling. After all, the Holga is cheap (Holga models can be bought for as little as twenty dollars) and it is indeed made entirely of plastic. Even the lens is plastic. Its cheap construction and inferior materials render the Holga susceptible to any number of imperfections and glitches, including blurry images, double exposures, distortion, vignetting, and light leaks that produce flares and streaks. These are just the sort of unwanted effects that would spur most photographers to take a more expensive camera back to the store for a refund. However, these technical hiccups, which would be considered defects in any other camera, are what give the Holga its unique charm. The low-quality plastic lens gives Holga photographs a dreamy, surreal quality that is enhanced by the effects of light leakage and other flaws and malfunctions to which the Holga is prone. No Holga is the same. Each camera comes with its own set of technical peculiarities and faults that produce a distinctive signature of special effects. For this very reason, Holga lovers often own and use several of the cameras, each of which produces images with unique and readily identifiable characteristics. The Holga is something of a legend in photographic circles: a plastic toy camera capable of taking incredible, breathtaking images. For those not in the know, the devotion of Holga aficionados may be downright puzzling. After all, the Holga is cheap (Holga models can be bought for as little as twenty dollars) and it is indeed made entirely of plastic. Even the lens is plastic. Its cheap construction and inferior materials render the Holga susceptible to any number of imperfections and glitches, including blurry images, double exposures, distortion, vignetting, and light leaks that produce flares and streaks. These are just the sort of unwanted effects that would spur most photographers to take a more expensive camera back to the store for a refund. However, these technical hiccups, which would be considered defects in any other camera, are what give the Holga its unique charm. The low-quality plastic lens gives Holga photographs a dreamy, surreal quality that is enhanced by the effects of light leakage and other flaws and malfunctions to which the Holga is prone. No Holga is the same. Each camera comes with its own set of technical peculiarities and faults that produce a distinctive signature of special effects. For this very reason, Holga lovers often own and use several of the cameras, each of which produces images with unique and readily identifiable characteristics.
The Holga is a medium-format camera (6 x 4.5 cm) that uses 120 film. In addition, removing an internal plastic mask in certain models enables the photographer to shoot in 6 x 6 cm or square format. One challenge of shooting in the default 6 x 4.5 cm format is that the Holga has a square format viewfinder, and, even when shooting 6 x 6 cm, there may be significant divergence between the area covered in the viewfinder and the area of the image taken by the camera (a phenomenon known as the parallax effect). With a set shutter speed of 1/100th of a second and aperture of f8, the Holga offers a limited range of shooting possibilities. When using 100 ISO film, shooting outdoors in bright sunlight may be the only feasible option. Using 400 ISO black & white or color negative film will provide more flexibility in terms of exposure and enable shooting under somewhat lower light conditions. Switching the Holgas sunny/cloudy button to sunny narrows the aperture to f11, enabling the use of fast film (100 ISO or faster) in very bright or sunny conditions. Some Holga models come with a built-in flash. Those that do not have a hot shoe on top for a flash attachment, or an external flash unit can be connected using an adaptor. The use of flash can help compensate for the Holgas uniform settings, which favor shooting in brighter light. When using an auto flash, the flash should be adjusted to either f8 or f11 depending on which aperture setting the photographer is using. The flash may fire twice because the contacts on the flash will connect at the moment the shutter opens and again when it begins to close. Holga users often find that using a flash under normal daylight conditions (when flash is generally not needed or used) can produce interesting effects in the resulting images. Getting started with the Holga requires following a few procedural tips, but, once these are mastered, shooting with one of these toy cameras is simple and thoroughly enjoyable. The Holga photographer must decide whether to shoot in the default 6 x 4.cm format or in the square 6 x 6 cm format. Shooting in square format often results in the vignetting effect for which many Holga images are known. To shoot in square format, the Holga user must remove the interior plastic mask. Once the camera back is opened, the mask will be plainly obvious as it is clipped over the center of the cameras interior mechanism. It is important to store the mask in a safe place so that the Holga can be made to switch back to 6x4 cm format when desired. There is a frame counter on the back of the Holga with an arrow that points to either sixteen or twelve. When shooting in the default 6 x 4.5 cm format, the arrow must point to sixteen, and when shooting in 6 x 6 cm format, the arrow must point to twelve. Care should be taken when adjusting the frame counter lever, since the mechanism can sometimes be stiff and applying too much pressure could cause the lever to break. To reduce light leakage, place a piece of black tape over the red safety window on the back of the camera. It is a good idea to shoot a roll of film with the Holga and developing it before taping the window to see whether the light leakage that occurs without the tape creates an aesthetically pleasing effect. Placing tape over the holes in the interior of the camera, located to each side and slightly above the shutter, when shooting in square format will reduce or eliminate the vignetting effect associated with 6 x 6cm Holga images. Film is loaded through the rear of the camera by sliding the metal clips down and taking off the camera back. Film should be loaded and unloaded in an area away from bright light. The 120 film used in a Holga has an empty reel and a reel loaded with film. The side of the film with the empty reel fits into the side of the camera with the wind-on knob. The film leader is then pulled across the camera interior and the end is inserted into the take-up reel. The film is then wound a couple of times around the reel by pushing the reel with a finger or advancing the film with the shutter. Once the film is securely on the reel, the camera back should be promptly replaced. Film should be advanced until the number 1 is visible through the red safety window. If black tape has been removed from the safety window in order to observe the films progress, it can now be replaced. The Holga does not advance film automatically, so the film must be manually advanced after each shot. However, the Holga has no safety mechanism to prevent the photographer from taking a second image before the film is advanced. Thus, failing to advance the film can result in unintentional double or even multiple exposures. On the other hand, the Holga is the ideal camera for a photographer who wants to create an intentional double-exposure for a particular artistic or aesthetic effect. Taking photos with the Holga is a simple process. Because the shutter speed is fixed, and the photographer has little choice with respect to aperture, there is little else to do besides compose the image, point, and shoot. The Holgas fixed-focal-length 60mm lens does provide some flexibility with respect to focusing, allowing the photographer to shoot subjects at four different distance settings: one meter (about three feet), three meters (about nine feet), six meters (about eighteen feet), and ten meters (about thirty feet) to infinity. Best effects with the Holga are generally achieved by moving in as close as possible, filling the viewfinder with the photographic subject, and focusing accordingly. Shutter speed can be modified by removing the shutter spring, which changes the shutter speed from 1/100th of a second to B. On the B setting, the shutter remains open for as long as the photographer keeps the shutter button depressed. This allows the photographer to keep the shutter button open for several seconds in order to take long exposures, especially useful for long exposures in low light conditions or for creating so-called ghost effects. For best results, choose slower speed films, 400 ISO and higher, that have wide exposure latitude. Good black & white choices include Ilford HP5 Plus and chromogenic films such as Ilford XP2 and Kodak CN 400. For color film, 800 ISO is preferable, and a high-color film with high-contrast, such as Fujicolor Professional HNG-II-800 will work best. Infrared film such as Ilford SFX-200 will create interesting effects as long as it is used in bright light conditions outdoors with a red filter (25A) placed over the lens. For faster speed slide film, Ektachrome EPP-100 is a good choice. The key to enjoying a Holga is to use it often and with a spirit of fun. The limitations of the Holga can be liberating. That is the paradox of shooting with one of these unique plastic cameras. Hope for the best, and you will almost always get more than you expected. The following are helpful, informative resources for the Holga user, both new and experienced: Holga: A microsite devoted entirely to the Holga, with pages on the Holgas history and specifications, information on possible modifications, galleries of Holga images, and links for buying Holga models and accessories. Go Holga: A site devoted to tutorials on using the Holga and tips on using the Holga or modifying it to achieve certain photographic and aesthetic effects. Life Through A Plastic Lens: A comprehensive resource page on all things Holga, including a detailed how-to manual, compiled by British photographer Paul Williamson. Holga Inspire: A Holga website sponsored and created by Holga Ltd., the manufacturer of the Holga camera. The site includes a list of online and offline information resources, news items and event announcements, the basic history of the development, manufacturing, and marketing of the Holga, and a gallery of Holga images. The Holga FAQ: A handy list of frequently asked questions about Holgas with detailed and informative answers created and maintained by Holga aficionado Joseph L. Harris. Holga, My Holga: A thorough and easily comprehensible page offering [a] few things absolute beginners should know about Holga. Argonauta Productions--Holga Cameras: A web page with instructions on preparing and using the Holga for beginners, including helpful photographic illustrations accompanying each step, links to articles about certain issues raised in prepping and shooting with the Holga, and links to sites where readers can buy new Holgas and used, already-modified Holgas. Holga Mods: This site will help the Holga photographer modify his or her camera and more effectively use accessories such as filters and flash. The Authoritative Guild to Holga Tun-Up and Modifications: A useful web page with step-by-step instructions for enhancing Holga performance by performing certain modifications. The text is accompanied by very helpful photographic figures and illustrations of the parts and modifications discussed. Holga Blog Photography Magazine: An online blog/photography magazine devoted to the Holga, which includes a link to a PDF Holga manual, reviews of various Holga models and Holga accessories, Holga tutorials, galleries of Holga images, and a range of informative articles from advice on Holga modifications to profiles of photographers who work with the Holga. Light Leaks Magazine: The official website of Light Leaks Magazine, a publication devoted to low fidelity photography, covering the world of simple analogue film cameras, specifically toy cameras such as the Holga. Toy Camera: A website devoted to the use and enjoyment of toy cameras, including, most prominently, the Holga. Four Corners Dark: An online resource devoted to photography with toy camera, particularly the Holga, and other photographic curiosities. The Cult of Holga: An entertaining and informative article published in March 2008 in the British newspaper The Independent regarding the resurgent interest in the Holga. Toy Cameras and the Photographic Image: An article by from HESO magazine on photography using toy cameras, including Holgas, including numerous images taken with Holga cameras.
This article was written by Mike Haldas
| Shop for surveillance camera products |
|---|
| | | |
|---|
|


