HDMI Over Cat6
HDMI Transmission, Extender, and Video Splitter Systems
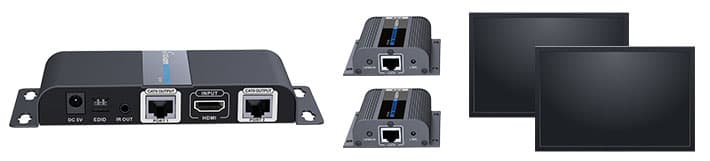
The HDMI over Cat6 systems on this page act as HDMI splitters, video transmitters, and video extenders. These systems split the video signal from one HDMI source to multiple displays. The HDMI signal is transmitted between transmitter and receiver devices via Cat 6 network cable. These systems transmit both video and audio over Cat6. Check out these
installation and wiring diagrams to see how easy they are to install.
NOTE: if you need an HDMI transmission system that supports more than 2 receivers, please check out our new
HDMI over IP / HDMI over CAT5 extender system.
|
|
|
This installation diagram shows how-to setup an HDMI over Cat6 system with an
iDVR-PRO surveillance DVR. Please note that although we are using an iDVR-PRO in our example, any other brand DVR or any other type of HDMI device can just as easily be used. Download the complete installation guide here.
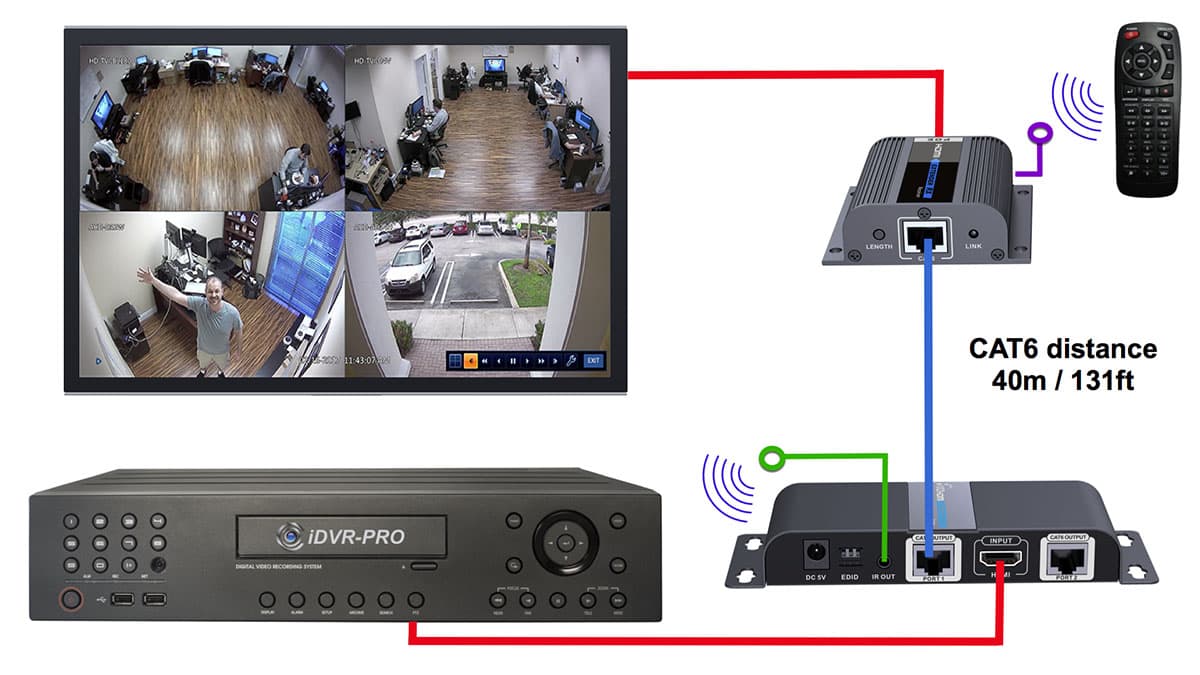
- The red line on the bottom of the diagram is a standard HDMI video cable that connects the surveillance DVR HDMI output to the HDMI input on the transmitter.
- The blue line is a CAT6 cable with standard RJ-45 Ethernet connectors on each end. The CAT6 output on the transmitter is connected to the CAT6 input on the receiver.
- The red line at the top of the diagram is a standard HDMI video cable that connects the HDMI output on the back of the receiver to the TV's HDMI video input.
- The purple line with the circle on the end is the IR receiver. It connects to the HDMI receiver. The IR receiver can be used to capture commands from a wireless infrared remote (like ones used to control a DVR or other device on the transmitter end). For example, the iDVR-PRO surveillance DVR that is used in the above illustration includes a wireless remote control. Users can access all functions of the DVR, such as playing back recorded video and changing camera displays, using the remote in a room where the DVR is not located.
- The green line with the circle on the end is the IR transmitter that sends the signal captured from an IR remote to the DVR. Please note that the IR transmitter must have a direct line of sight to the IR remote input port on the DVR.
- NOTE: use of the IR transmitter and receiver is optional.
- Although a video surveillance DVR is used in this example, these systems can be used for any HDMI device that uses a standard 20~60Hz IR remote.
*Important Installation Note: CAT6 cable between 15 and 40 meters / 50 and 131 feet should be used with this system. Signal may be too strong for shorter cables and too weak for longer.
HDMI to Cat6 Splitter to Multiple Monitors
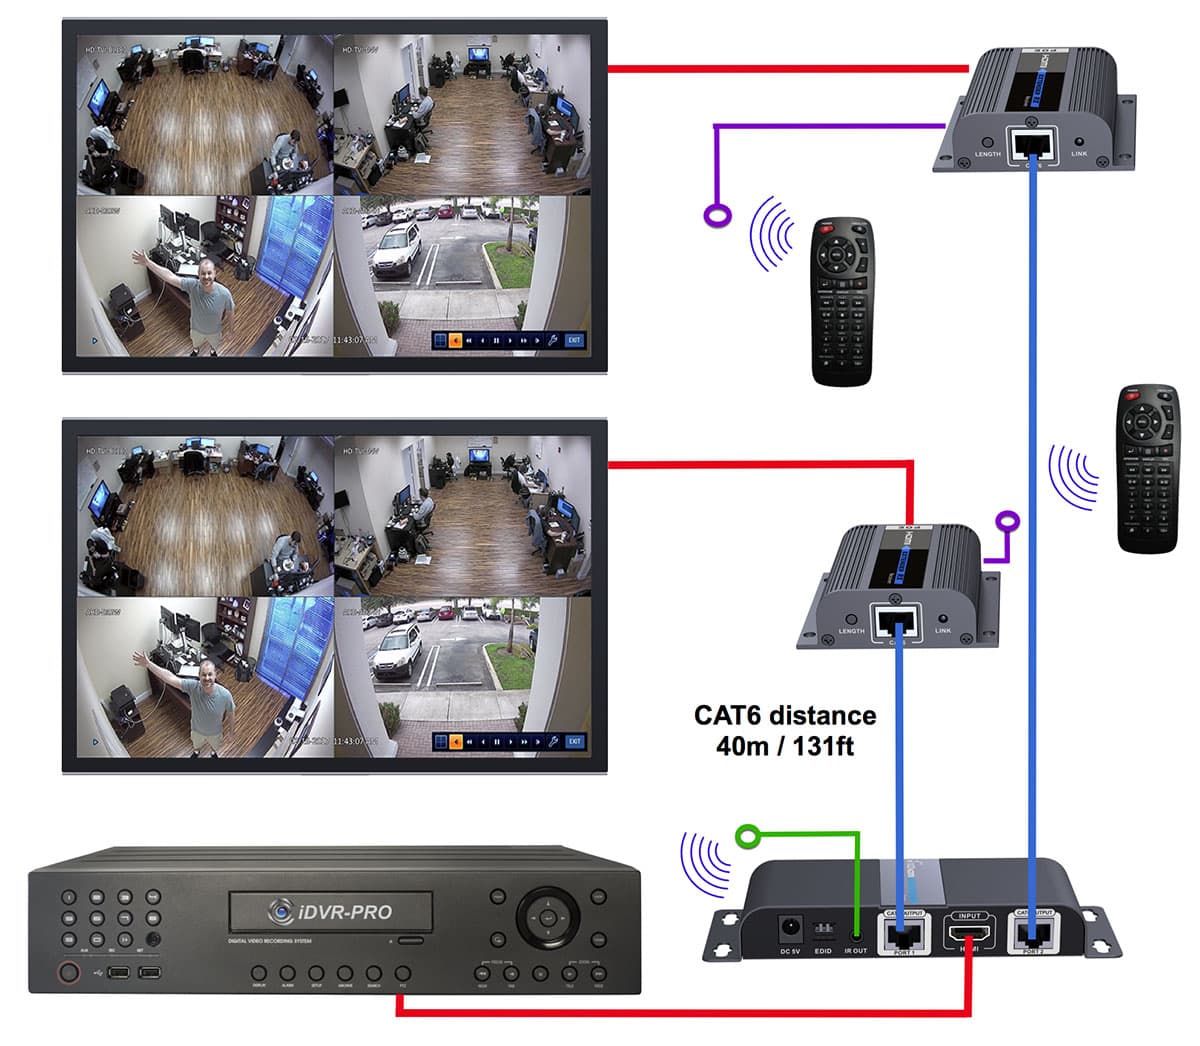
If you want to use Cat6 cable and also split your HDMI signal to multiple monitors, the setup is the same. You just add an additional receiver and wire it the same way. You can control your HDMI device via wireless infrared remote from any location where your HDMI receivers are located. CCTV Camera Pros can supply additional wireless remote controls for the DVRs that we supply.
Click here to
download the complete HDMI over CAT6 installation guide.
Related Articles & How-to Installation Guides
|
|
|


