Watch this video to learn about all the different ways the
Viewtron HDMI IP encoder / IP to HDMI decoder kit can be used with IP camera(s), DVRs, NVRs, and any HDMI video device to display live video on one or more TV monitors over LAN and remotely over the Internet. The Viewtron IP camera to HDMI decoder can be used stand-alone with Viewtron IP cameras. It can also be paired with the Viewtron HDMI to IP encoder so that you can display the entire HDMI output of your Viewtron security DVR / NVR on one or more TV monitors.
Watch this video to learn see how to setup the IP to HDMI decoder to display a live view of one security camera that is connected to a
Viewtron DVR / NVR. Please note that this live display solution works with Viewtron IP camera NVRs, hybrid CCTV DVRs, and directly with IP cameras without a DVR. The decoder can be setup to display more than one security camera. Click here to learn more about setting up this security camera to TV solution.
Here are some of the ways that this HDMI over Ethernet kit can be used.
This installation diagram shows how to install the HDMI-IPKIT to transmit HDMI over LAN IP display a live view of your security camera system on a TV.

This is how it works.
- Your security cameras are connected to your DVR or NVR. In the above image we are using IP cameras hard wired to the PoE ports on a Viewtron IP camera NVR, but our HDMI over Ethernet system also applies to hybrid CCTV / BNC camera DVRs as well.
- The HDMI output of the DVR / NVR connects the the HDMI input of the IP-HDMI-E1 encoder / transmitter. The HDMI signal is encoded so that it can be sent over the IP network.
- The RJ-45 Ethernet port on the back of the DVR / NVR is connected to one of the ports of your network switch or router.
- The IP-HDMI-D4 decoder is connected to the same network switch or router. It receives the IP video signal and decodes it back to a standard HDMI video signal.
- The HDMI output of the IP decoder / receiver connects to your TV monitor.
This installation diagram shows how to install the HDMI-IPKIT with a network switch to transmit HDMI over IP network to multiple TV monitors. This is also known as a one-to-many installation because there is one transmitter feeding many receivers. Although only two receivers are used in this example, there is no limit to how many can actually be used.

This is how it works.
- Your security cameras are connected to your DVR or NVR. In the above image we are using IP cameras hard wired to the PoE ports on a Viewtron IP camera NVR, but our HDMI over Ethernet system also applies to hybrid CCTV / BNC camera DVRs as well.
- The HDMI output of the DVR / NVR connects the the HDMI input of the IP-HDMI-E1 encoder / transmitter. The HDMI signal is encoded so that it can be sent over the IP network.
- The RJ-45 Ethernet port on the back of the DVR / NVR is connected to one of the ports of your network switch or router.
- Multiple IP-HDMI-D4 decoders are connected to the same network switch or router. They all receive the IP video signal and decodes it back to a standard HDMI video signal.
- The HDMI outputs of the IP decoder / receivers each connect to a dedicated TV monitor.
Spot Monitor for IP Cameras
Watch this video to see how Mike setup the IP-HDMI-D4 as a spot monitor for IP cameras installed at his house. The unique two camera multiplexer view looks great with two of these Viewtron
180 degree security cameras.
This installation diagram shows how to install multiple HDMI-IPKITs to create a many-to-many HDMI over network IP. This is known as a many-to-many installation because there are multiple transmitters and multiple receivers on the same local area network.

This is how it works.
- There are two security camera DVRs in this installation.
- The HDMI output of each DVR is connected to it's own HDMI transmitter.
- The RJ-45 Ethernet port of the two HDMI transmitters are connected to the same network switch using CAT5 or CAT6 cable.
- Two HDMI receivers are connected to the same network switch,
- One receiver (RX) is paired with each transmitter (TX). Please note that multiple receivers could be paired with each transmitter. There is no limit.
- The HDMI output of each receiver is connected to a TV monitor.
In addition to enabling live TV display over IP on a LAN (local area network), our Viewtron HDMI over Ethernet solutions can also be setup to send an HDMI signal over the Internet to a remote TV monitor. This is done by setting up port forwarding on your router so that the IP signal from the HDMI encoder can leave your local network and travel across the Internet.

This is how it works. Please note that in the above diagram the space on the left that has a gray background is a separate physical site and network from the space on the left with the white background.
- The installation has 4 security cameras connected to the DVR / NVR. This is the site on the left with the gray background.
- The HDMI output the DVR is connected the Viewtron IP-HDMI-E1 encoder.
- The Ethernet port of the HDMI encoder is connected to network router using CAT5 or CAT6 cable.
- Port forwarding is setup on the router so the Viewtron IP-HDMI-D4 can connect to it from remotely over the Internet.
- The remote location where the remote TV display is located is on the right with the white background. The remote site has a network router / modem also.
- The VIewtron IP-HDMI-D4 decoder is connected to that router and setup to connect to the IP-HDMI-E1 at the security camera system location using that site's Internet / WAN IP address and port forwarded network port.
- The HDMI output of each decoder / receiver is connected to a TV monitor.
- The TV now displays a live security camera view of the entire HDMI output of the DVR at the remote camera location on the left (gray).
This installation diagram shows how to install the HDMI-IPKIT using a direct CAT6 connection for a one-to-one application. This is also known as a peer-to-peer connection. The communication between the HDMI encoder and decoder are not going through a shared local network. No network switch or router is required.

This is how it works.
- Your security cameras are connected to your DVR or NVR. In the above image we are using IP cameras hard wired to the PoE ports on a Viewtron IP camera NVR, but our HDMI over Ethernet system also applies to hybrid CCTV / BNC camera DVRs as well.
- The HDMI output of the DVR / NVR connects the the HDMI input of the IP-HDMI-E1 encoder / transmitter. The HDMI signal is encoded so that it can be sent to the decoder.
- The Viewtron IP-HDMI-E1 is hard wired directly the the IP-HDMI-D4 decoder. There is no network switch or router.
- The IP decoder receives the IP video signal and decodes it back to a standard HDMI video signal.
- The HDMI output of the IP decoder / receiver connects to your TV monitor.
This installation diagram shows how to install the HDMI-IPKIT with AHD to HDMI converter / decoders to transmit 1080p video from an AHD security camera (HD CCTV) over an IP network using a switch.

This is how it works starting from the upper left (at the camera).
- The HD-D180 dome 180 camera connects to the BNC video input on the HDCV-3-T BNC to HDMI converter. Please note that the HD-CV-3-T also supports HD-TVI and HD-CVI cameras, however, being that we only have an HDMI to AHD converter / decoder, we can only support AHD cameras at this time. Any of these 1080p AHD cameras will work with this setup.
- The HDMI output of the HDCV-3-T connects to the HDMI input of the HDMI-IPKIT Transmitter (TX).
- The RJ-45 Ethernet port on the HDMI-IPKIT Transmitter connects to the network switch or router using CAT5 or CAT6.
- The RJ-45 Ethernet port on the HDMI-IPKIT Receiver (RX) connects to the same network switch or router using CAT5 or CAT6.
- The HDMI output on the HDMI Receiver connects to the HDMI input on the AHD-CV12 HDMI to AHD converter.
- The BNC / AHD video output on the AHD-CV12 connects to one of the BNC video inputs on the Viewtron surveillance DVR. These RG59 BNC jumper cables can be used.
This installation diagram shows how to install the HDMI-IPKIT as part of an AHD wireless transmitter system. This wireless design is useful for installations where one or more security cameras are mounted in a separate building from the DVR and main system. A WIFI-EH9500 wireless bridge can be used in conjunction with an HDMI-IPKIT and AHD to HDMI encoder / decoder to create a wireless AHD transmitter.

This is how it works starting from the upper left (at the camera).
- The building on the left contains the main system and DVR. Although they do not appear in the above diagram, the building on the left would most likely have security cameras hard wired to the DVR. This is an AHD DVR (hard wired HD BNC cameras using coax cable).
- The customer requires a single camera on a separate building (on the right). This may be a detected garage or barn for example.
- The AHD security camera on the right is hard wired to an HDCV-3-T AHD to HDMI converter using RG59 coax cable. This camera can be installed indoors or outdoors.
- The HDMI output of the AHD to HDMI converter connects to the HDMI input of the HDMI-IPKIT transmitter.
- The network / Ethernet port of the transmitter connects to the Ethernet port of the WIFI transmitter - part of this WIFI-EH9500 wireless camera system bridge.
- The wireless receiver (RX) on the building on the left receives the video signal over WIFI.
- The Ethernet port on the wireless receiver connects to the Ethernet port on the HDMI-IPKIT receiver.
- The HDMI output of the RX connects to the HDMI input on the AHD-CV12 HDMI to AHD converter.
- The BNC output of the HDMI to AHD converter connects to one of the BNC video inputs on the iDVR-PRO DVR.
HDMI IP Receiver

The above images show
HDMI to LAN decoder / receiver that is included with the HDMI-IPKIT. On the front of the case you can see the 12V DC power input, RJ-45 Ethernet connection, HDMI output port.
HDMI IP Transmitter

Here is a close up of the front of the
HDMI to LAN IP transmitter / encoder. You can see the 12V DC power input, RJ-45 Ethernet port, and HDMI input port.
Complete Security Camera Systems
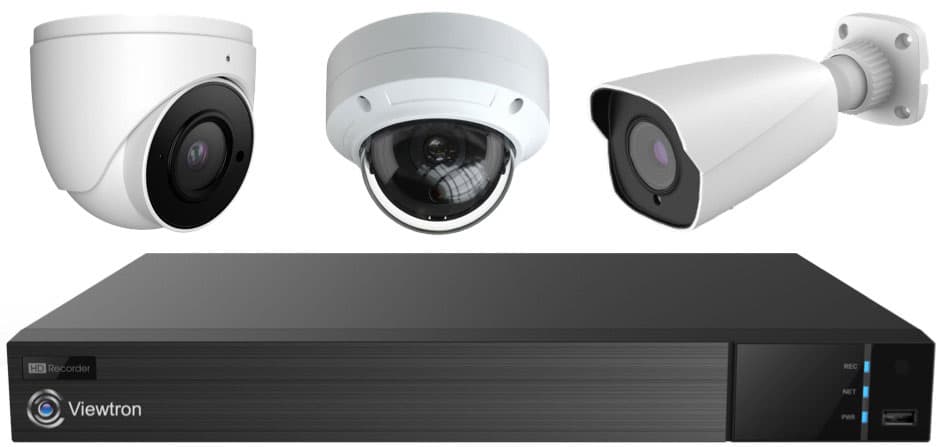
Did you know? CCTV Camera Pros can provide complete security camera system designs and quotes? We can include security cameras, cables, connectors, power supplies, monitors, and HDMI live display kits (like the ones on this page). We can even mix and match different resolution IP cameras and our AI security cameras. We can provide you with a custom design quote with as many cameras as you need and a mix of any combination of camera model(s) based on your project requirements. Please
request a quote when you are ready or feel fre to just ask us any questions you may have.

BBB Rating & Reviews

CCTV Camera Pros is proud to have an
A+ rated with the Better Business Bureau. We also maintain a 5 star online review rating with ResellerRatings.com.

CCTV Camera Pros is proud to be a US Veteran Owned small business. Our co-founder,
Mike Haldas, served in the United States Marine Corps 1993-1997.

Viewtron security products are NDAA compliant. That means that they are not manufactured by any of the manufacturers on the NDAA (the National Defense Authorization Act) list of banned manufacturers. Viewtron NVRs do not use any materials from banned manufacturers either. A Viewtron security camera systems may safely be purchased for government use. You can download
CCTV Camera Pros NDAA letter of guarantee here.
|