Surveillance DVR Setup & Support
JPEG2000 & Dual Codec DVRs
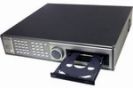 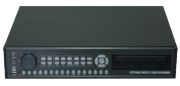
These instructions cover both the older JPEG surveillance DVR pictured on the left above as well as the new dual codec H.264 JPEG DVR that is pictured on the right. The setup and menu system on these two DVRs as just about the same. The model on the right is newer and has some slight variances that are noted in each set of instructions below. The main difference is that the new unit streams H.264 MPEG-4 while recording JPEG images and requires a new DVR viewer application called the Integrated remote station to take advantage of this.
Initial DVR Setup- The instructions should be followed first before performing any other operations using your DVR. The instructions show you how to setup your DVR to factory default settings, initialize you hard drive, and setup the time & date.
Remote Surveillance Viewer Setup (JPEG2000 Legacy model pictured on the left above) - These instructions are for the show you how to setup your JP DVR for remote Internet viewing using the DVR viewer software that comes with the DVR.
Integrated Remote Station Transmitter Bandwidth Troubleshooting - These instructions show you how to compensate for your Internet connections specific bandwidth speed. The page also contains some best practices for reliable remote connections to your DVR.
Recording Quality Setup- Instructions on adjusting the DVRs record quality setting. Basic, Normal, Enhanced, Fine, and Super Fine qualities are supported.
Motion Detection Camera Recording- Instructions on setting up JP surveillance DVRs to record on motion detection.
Motion Detection Alarm Buzzer- Instructions on setting up the alarm buzzer to activate when motion is detected on some or all of your security cameras.
Record Speed Setup- JP surveillance DVRs can be configured to skip frames on recording to conserve disk space.
Video Search & Playback - Our JPEG DVRs provide 3 methods of search and playback. These instructions cover all three methods.
Surveillance Video Backup - Instructions on how to backup video to a USB drive or CD so that you can turn the video footage over to the police or someone else.
Audio Surveillance Microphone Setup- These instructions show you how to connect and setup and audio microphone for use with your JP DVR.
PTZ Camera Setup
PTZ Control Setup- JP surveillance DVRs can be used to control PTZ cameras using the wireless remote control or DVR controls directly on the unit.
Hard Drive Installation
DVR Hard Drive Installation- Instructions on installing a replacement hard drive into your DVR.
Instructions also cover adding a 2nd Hard Drive to your DVR. JP DVRs contain 2 hard disk drive slots, each capable of up to 750 GB each for a total of 1.5 terrabytes. Folow these instructions to add a second hard drive to your DVR.
Follow these instructions to reset the master password on the JPEG2000 and JPEG2000 H.264 Dual Codec series DVRs. Press the menu button on the DVR. When prompt for a password, press the follow buttons on the DVR in this order: STOP --> PLAY --> STOP--> SEARCH --> PTZ --> PIP -->1 --> 2 --> OK (or Enter). You will be logged into the DVR as the administrator. Select Configuration from the System Menu. Then, select password Setup from the confuration menu. The password setup screen will display your current password.
JPEG2000 AJP Video Player Instructions
JPEG2000 AJP Video Player Instructions - The instructions featured in this article explain how to play AJP files using the Integrated Remote Software video player.
|


