DVR Surveillance Initial Setup Instructions
 |
CCTV Camera Pros JP Surveillance DVRs should initially be setup following the below instructions. If you have not already done so, it is necessary to initialize your DVR before proceeding with any other surveillance operations.
Before you begin, the following assumptions are made:
|
- Your DVR is unpacked and plugged in.
- At least one security camera is plugged into your DVR and your DVR is powered on (probably for the first time).
Please follow these setup instructions to run an initial setup of your DVR:
- Initialize DVR Factory Default Settings
- Reset/Clear the DVRs Hard Drive
- Setup the DVR Time & Date
The first step in setting up your DVR is to start with the factory defaul settings. To do this, follow the below instructions.
- Press the menu button on your DVR or remote control.
- Enter the password for your DVR. If you have not already set the password, the default password is blank so just press enter.
- The DVR main System Menu should now be displayed as seen below.
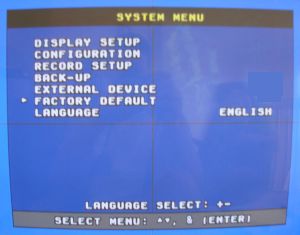
Using the controls on the DVR or the remote control, select Factory Default and press enter.
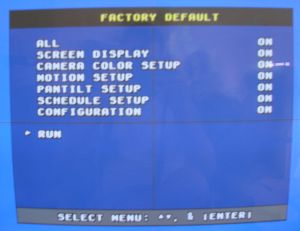
- On the factory default screen, select the All option and press enter. This will turn all of the factory default to On. Select the Run command and press enter. After this runs, all of the settings on your DVR will be reset to the factory default.
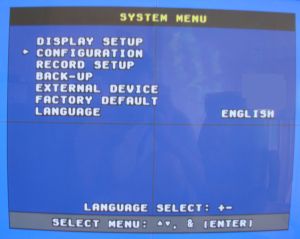
- Press the Menu button to return to the System Menu.
The next thing that you should do is initialize your hard drive. This wil format your hard drive and prepare it for use.
- If you are not already logged into your DVR, please login.
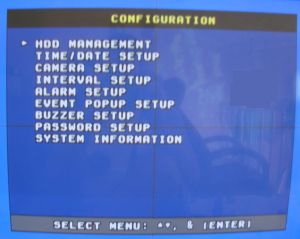
- From the System Menu, select the Configuration option and press enter.
- On this Configuration screen, select HDD Management and press enter.
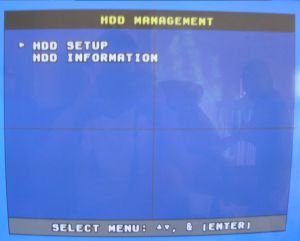
- On the HDD (Hard Disk Drive) Management screen select HDD Setup and press enter.
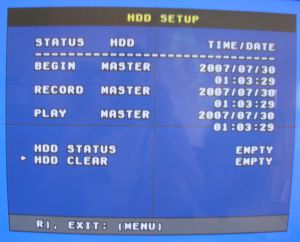
- On the HDD Setup screen, select HDD Clear and press enter. This initializes the hard drive on your surveillance DVR and prepares it for use.
- Press the menu button to return to the main System Menu.
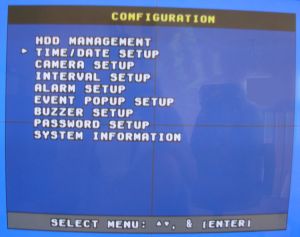
- From the DVR's System Menu, select the Configuration option and press enter.
- On the configuration scree, select Time/Date Setup and press enter.
- On the Time/Date Setup screen, use the up and down arrow buttons on your DVR or remote control to navigate up and down the menu. Use the + / - (positive and negative) buttons to adjust the values of the time and date settings. When you are done press the menu button to save and return to the previous setup screens and to exit the setup menu of the DVR and return back to the security camera view.
|
|
|


