Surveillance DVR Record Setup (frame skip rate)
 JP surveillance DVRs can be setup to skip over frames when recording to conserve hard disk space. JP surveillance DVRs use JPEG images to record video. This means that the DVR is recording a series of JPEG images. Just like the images on this web page. It is not necessary to record every single image to see motion video. Of course the more images you record, the more smooth the video looks. This setup involved configuring how many frames you will allow to be skipped. You can setup different skip rates for the different types of recording: Alarm, Motion, and Continuous. For these instructions, we will configure the motion detection recording skip rate. JP surveillance DVRs can be setup to skip over frames when recording to conserve hard disk space. JP surveillance DVRs use JPEG images to record video. This means that the DVR is recording a series of JPEG images. Just like the images on this web page. It is not necessary to record every single image to see motion video. Of course the more images you record, the more smooth the video looks. This setup involved configuring how many frames you will allow to be skipped. You can setup different skip rates for the different types of recording: Alarm, Motion, and Continuous. For these instructions, we will configure the motion detection recording skip rate.
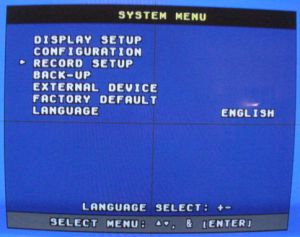
- From the DVRs System Menu, select Record Setup.
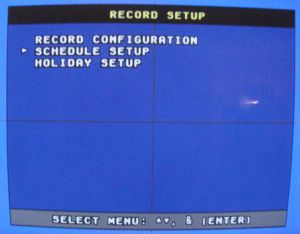
- On the Record Setup screen, select Record Configuration.
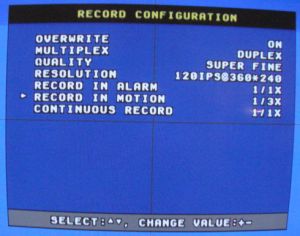
- On the Record Configuration screen, select Record In Motion and use the + and - keys on the remote to adjust the number of frames to skip during recording.
The recording speed works as follows:
- 1/2x means record frame, skip frame, record frame, skip frame
- 1/4x means record frame, skip, skip, skip, record frame, skip, skip, skip
If your resolution is set to 120 IPS (images per second) @ 360x240 as in the above screen:
- 1/1x = 120 IPS
- 1/2x = 60 IPS
- 1/3x = 40IPS
- etc
So, if you set the record rate to 1/2, you basically decrease the space used by your hard drive by 50%.
|
|
|


