|
DVR Remote Surveillance Setup
The instructions to setup the DVR viewer are broken up into the following sections, which include router and network setup instructions. You will be guided step by step through all sections. There are links to each section below, in case you left off at a certain point and want to start where you left off.
CCTV Camera Pros JP surveillance DVRs as been replaced by the iDVR-PRO. iDVR-PRO surveillance DVRs include remote surveillance software for Mac and Windows. The new DVRs also include free mobile apps for iPhone, iPad, and Android mobile devices that support remote security camera viewing as well as playing back video that has been recorded to the DVR's hard drive.
Click on the below images to see why we think the iDVR-PRO is CCTV Camera Pros best CCTV DVR.
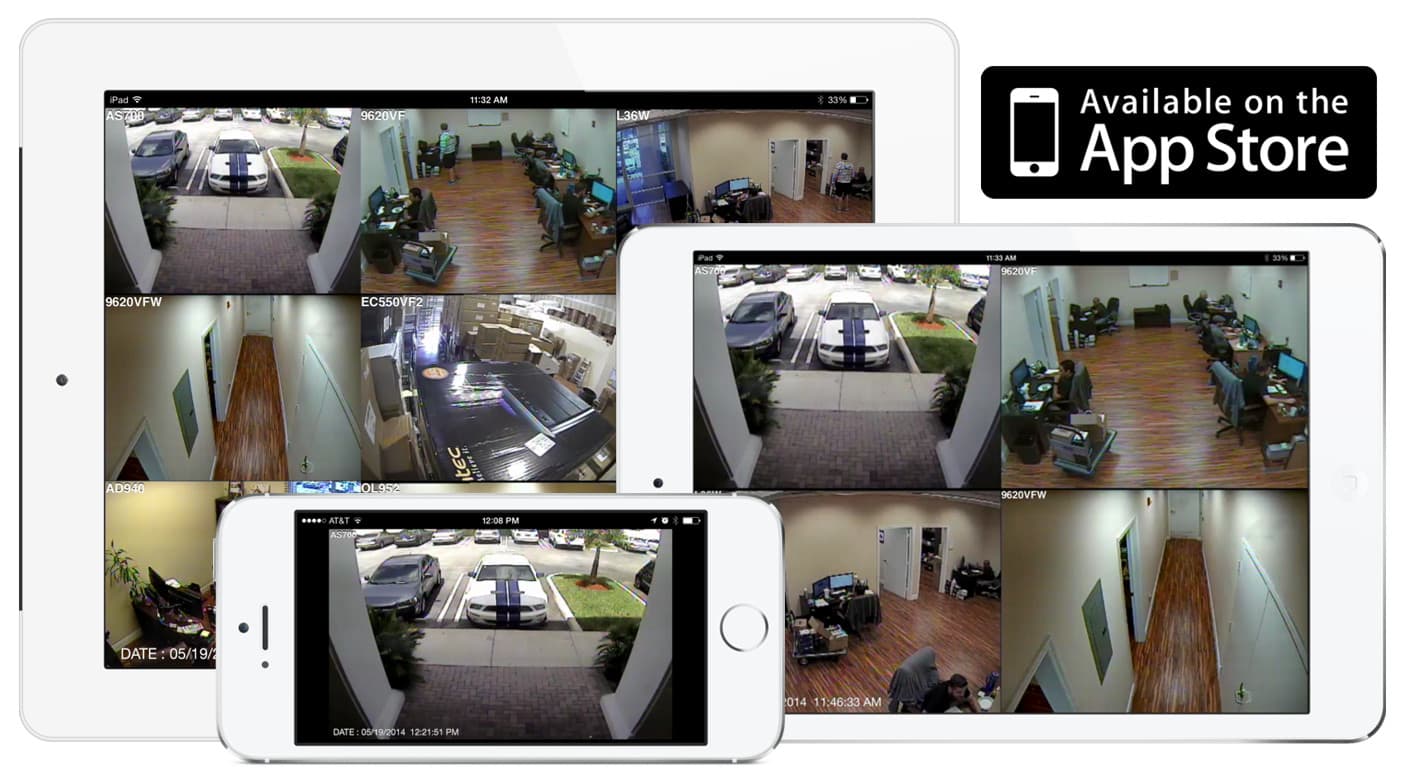
iPhone / iPad Compatible
|
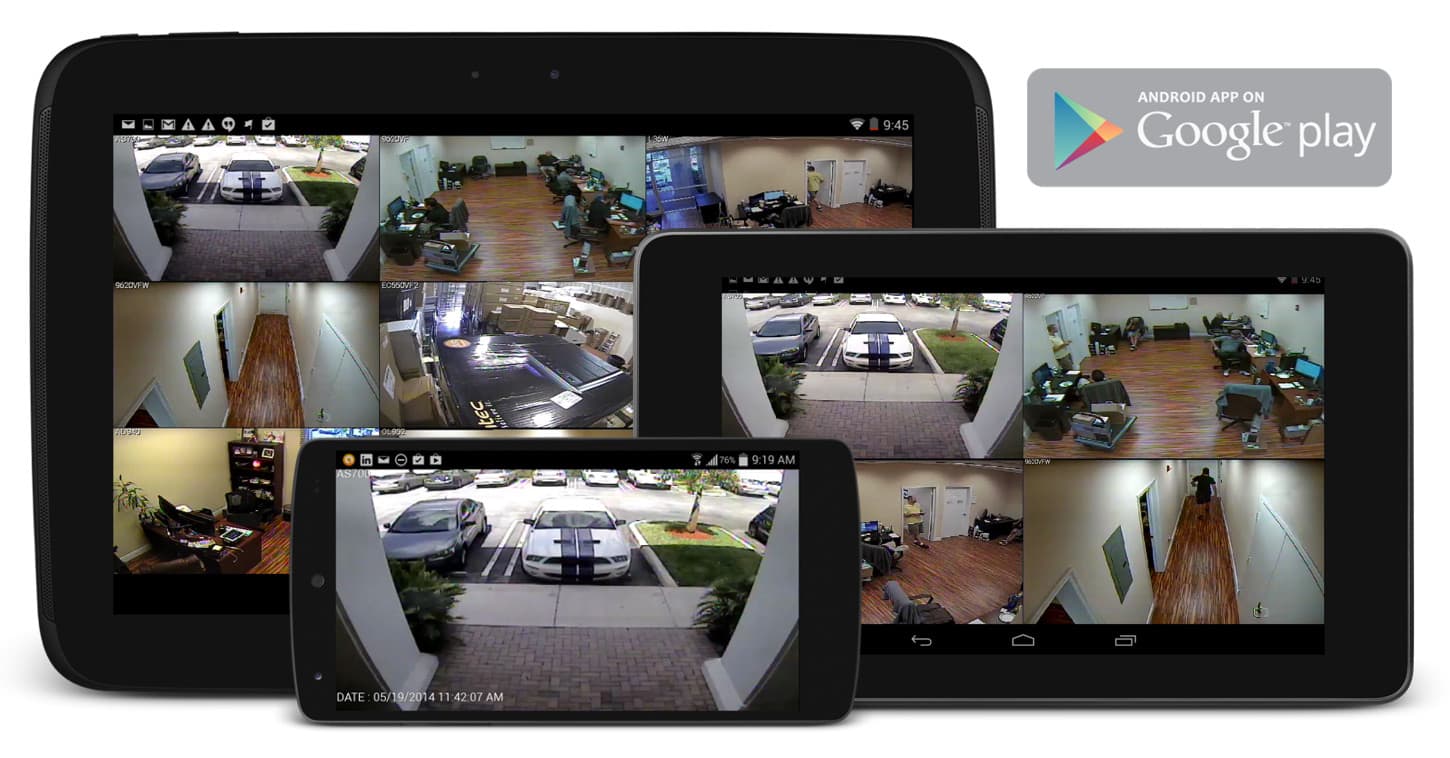
Android Compatible
|
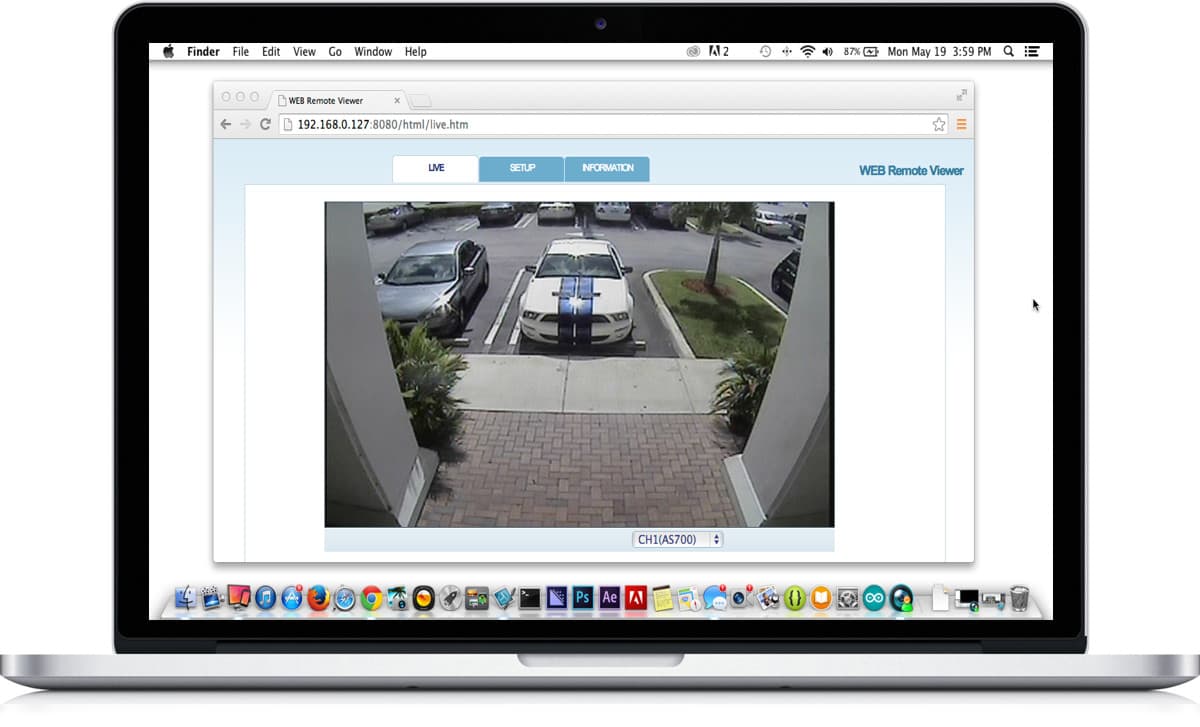
Mac Compatible
|
Click here for an overview of remote surveillance DVRs and to see some screenshots from a real world gas station surveillance installation.
Please follow these setup instructions:
- Creating and Configuring a Dymamic DNS Account
- Setting up Dynamic DNS on your Router
- Setting up Port Forwarding on your Router
- Setting up a Static DHCP IP address for your DVR
- Installing the DVR Viewer Software on your Personal Computer
If your DVR will be connected to a network that uses a dynamic IP address (most cable and DSL connections), you need to setup a free service to manage the DNS for you so that you can access your DVR remotely. Click here to setup your free dynamic DNS service. You can return to this screen by user your browsers back button to continue after setting up your free dynamic DNS service.
Dynamic DNS is used to when the Internet connection you will be using for your DVR uses a dynamic IP address. If you are unsure if your Internet service provider (ISP) provides you with a dynamic or static IP address, please call or email your ISP's technical support department. CCTV Camera Pros has instructions for D-Link and LinkSys routers. The instructions are based on certain models but are likely the same or close to the same for other models of D-Link and LinkSys routers and switches. If you need specific instructions for you router, please consult the manual that came with it and look under the section that has to do with Dynamic DNS support. Most modern router/switches support dynamic DNS.
Port forwarding needs to be setup on your router so that a computer on the Internet can communicate remotely with your surveillance DVR. Click here if you want to learn more about how port forwarding works. Follow the below instructions to setup port forwarding.
- From your DVRs System menu, select External Device.
- On the External Device menu, select TCP/IP Setup.
- On the TCP/IP Setup screen, select DHCP setup and press enter.

- On the DHCP setup screen, confirm that the DHCP mode is set to automatic. If it is not, adjust it so that it is. With the DHCP mode set to automatic, your DVR will allow your router to assign it an IP address.
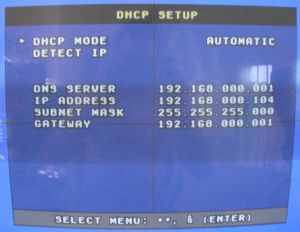
- While still on the DHCP setup screen, select Detect IP and press enter. The screen should refresh. Note the IP address. This is the internal IP address that your router has assigned to your DVR. This is the IP address that you will setup port forwarding for.
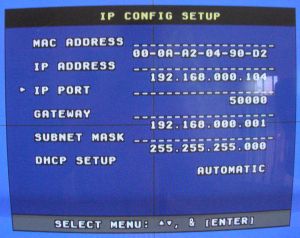
- Press the menu button to return to the TCP/IP setup screen.
- On the TCP/IP setup screen, select IP config setup and press enter. On the IP config setup screen, confirm the port number of your DVR as seen below. The default port is 50000.
- Press Menu several times until you exit out of the DVR menu system.
- Now that you know your DVR IP address and port, you need to log into your router's admin interface to setup port forwarding. Please follow the below instructions for the router that you have. Remember to use port 50000 and the IP address that you previsously noted from your DVR in your setup.
If you do not have one of the routers listed, please consult the manual for the router that you .
It is a good idea to make sure that your router always assigns the same IP address to your DVR. If your router needs to be restarted or if there is a power failure, there is risk that your DVR will be assigned a new IP address. This will make the port forwarding setup that you just finished useless. Follow these instructions to setup a static IP address for your DVR.
The remote viewer software that comes with our JP surveillance DVRs is for Windows based computers only. Follow these instructions to install the software and connect to your DVR for remote video surveillance viewing.
- Download the latest DVR remote viewer software here. Save the file to the computer that you want to view your security cameras from.
- After the download is complete, run the Remote_Viewer setup and follow the instructions. The installation will create an icon on your Windows desktop.
- Double-click on the remote viewer icon to start the program.
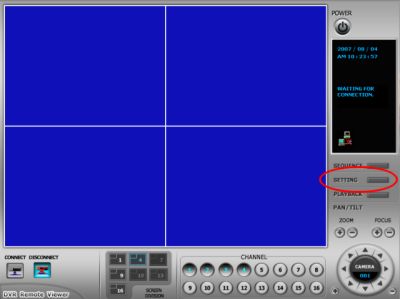
- The DVR viewer will open like the image below. Click on the settings button.
- The remote viewer setup will open as seen below.
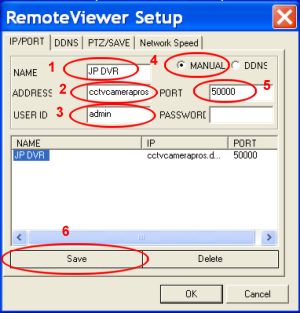
- Enter a name for your DVR in the name field. This can be any name that you choose.
- Enter the hostname that you previously setup with dyndns.org and also configured on your routers dnynamic DVS settings.
- Enter the User ID that you use to login to your DVR. The default is "admin". The default password is blank. If you setup a password for your DVR, enter your password in the password field.
- Select Manual.
- Enter 50000 for the port.
- Click on the save button. The DVR you just added will appear in the list on this screen.
- Click OK.
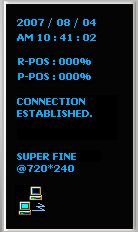
- After you click OK above, you will be brought back to the DVR viewer main screen. Click on the connect button in the lower left as seen below.

- When your DVR viewer connects, your surveillance cameras view will appear and you will see the status of the connection in the upper right.
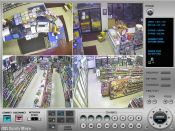
- If you have security cameras hooked up, the viewer will look like this:
|