Free Dynamic DNS Service Setup - No Longer FreeUnfortunately, the Dynamic DNS service provided by dyndns.com is no longer free, however, the good news is that it only costs $29.99 per year. DynDNS or DDNS is a service that allows you to configure a domain name, such as www.mydvr.com to route to a dynamic IP address, such as those typically provided by cable and DSL internet access providers for Internet access. A dynamic IP address means that your Internet connection is assigned a different IP address each time you connect or logon. It is recommended that you purchase a router/switch that supports DDNS natively and that you connect the router or switch to your cable or DSL modem. There are other providers of free dynamic DNS service, but CCTV Camera Pros recommends Dynamic Network Services, Inc (dyndns.com) because it has been around for a long time and we have tested it thoroughly for our surveillance equipment. Follow these setup instructions to create and configure an account with dyndns.com. NOTE: if your internet connection supports a static IP address, it is not necessary to setup Dynamic DNS. If you are unsure, please contact your internet service provider.
- Go to Dynamic Network Services website at www.dyndns.com and sign up for an account
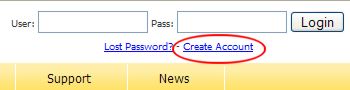
- On the home page click on the Create Account link as seen below:
- Fill on all of the required fields on the sign up page and submit the sign up form.
- The confirmation screen will let you know that an account confirmation email will be sent to you. Wait a few minutes to check your mail.
- When you receive the email, click on the link to confirm opening your account with DynDNS, then login to your account. The confirmation link will being you to a login link. After that, you can login from the dyndns.com home page anytime.
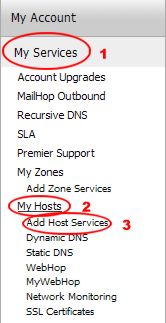
- Once logged into your account, 1) Click on the "My Services" link, 2) then the "My Hosts" link, 3) then the "Add Host Services" link as seen below:
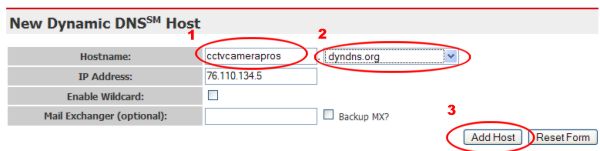
- The New Dynamic DNS Host screen will open. In the hostname field, 1) create a prefix and 2) select a domain name from the dropdown box. The page will automaticall detect your IP address, which you can leave for now. The other fields can be left blank. 3) Click on the "Add Host" button as seen below.
- If successful, a screen will be displayed to let you know that the hostname was created.

Now that your dynamic DNS service is setup, you should configure your router/switch to automatically update the dynamic DNS service each time your Internet connection's IP address changes. CCTV Camera Pros has instructions for D-Link and LinkSys routers. Please follow the below links to configure your router.
LinkSys Router Setup - Dymanic DNS
D-Link Router Setup - Dymanic DNS
|


