DVR Viewer Network Setup for MPEG4 Surveillance DVRs
|
All of our MPEG4 series DVRs come with Windows based DVR viewer software. The software was included on a CD that came with the DVR when it was being sold. The last released version of the software can still be downloaded here:
MPEG-4 Series DVR Viewer Software. The DVR viewer software allows a user to control all of the functions of the DVR using a windows based computer instead of directly from the DVR. Because it is based on Microsoft Windows, the user interface of the DVR viewer is generally better and easier to use than the interface of the DVR. The setup instructions begin here. The latest DVR and software information is here.
|
Important update! CCTV Camera Pros MPEG4 series DVRs have been replaced by the iDVR-PRO. iDVR-PRO CCTV DVRs include DVR viewer software for Mac and Windows. These surveillance DVRs work with the latest HD over coax security cameras and include free mobile apps for iPhone, iPad, and Android mobile devices.
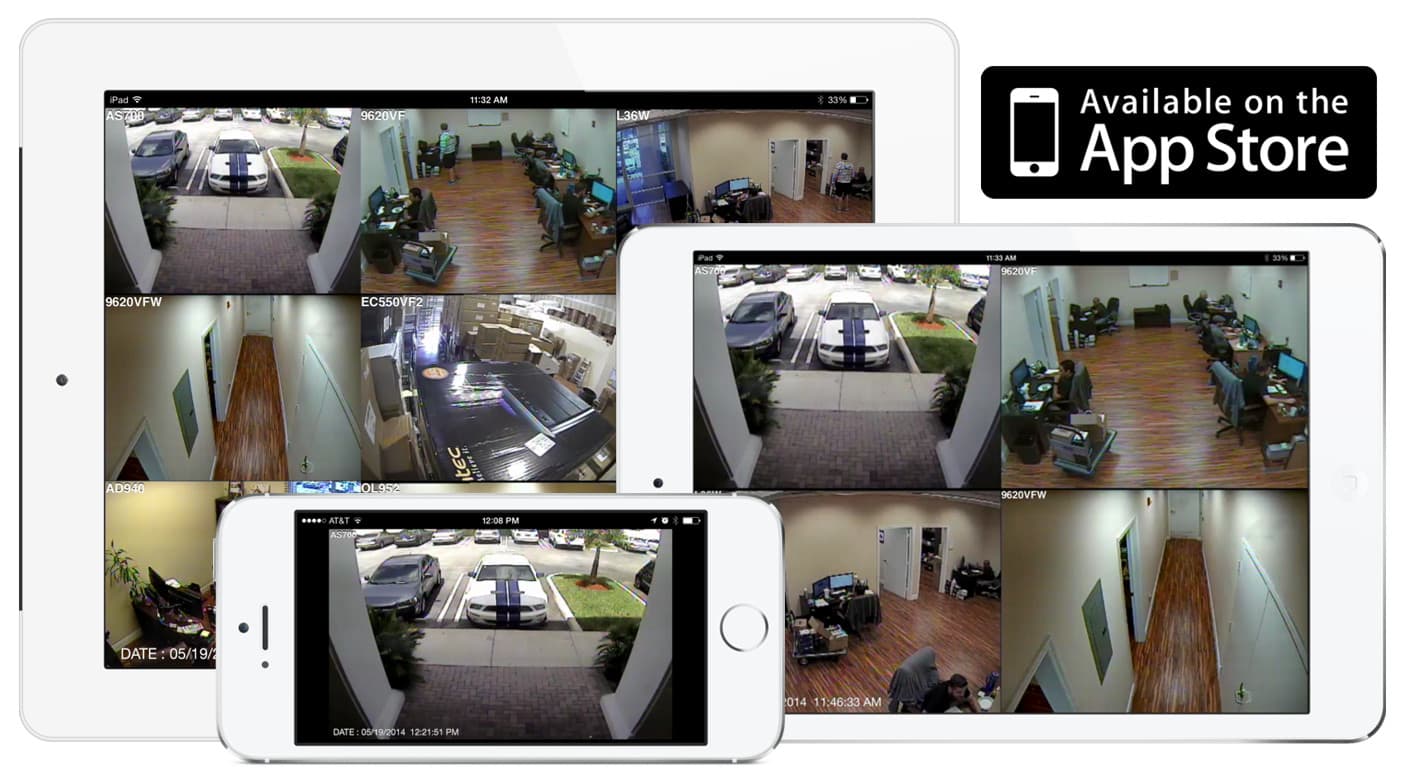
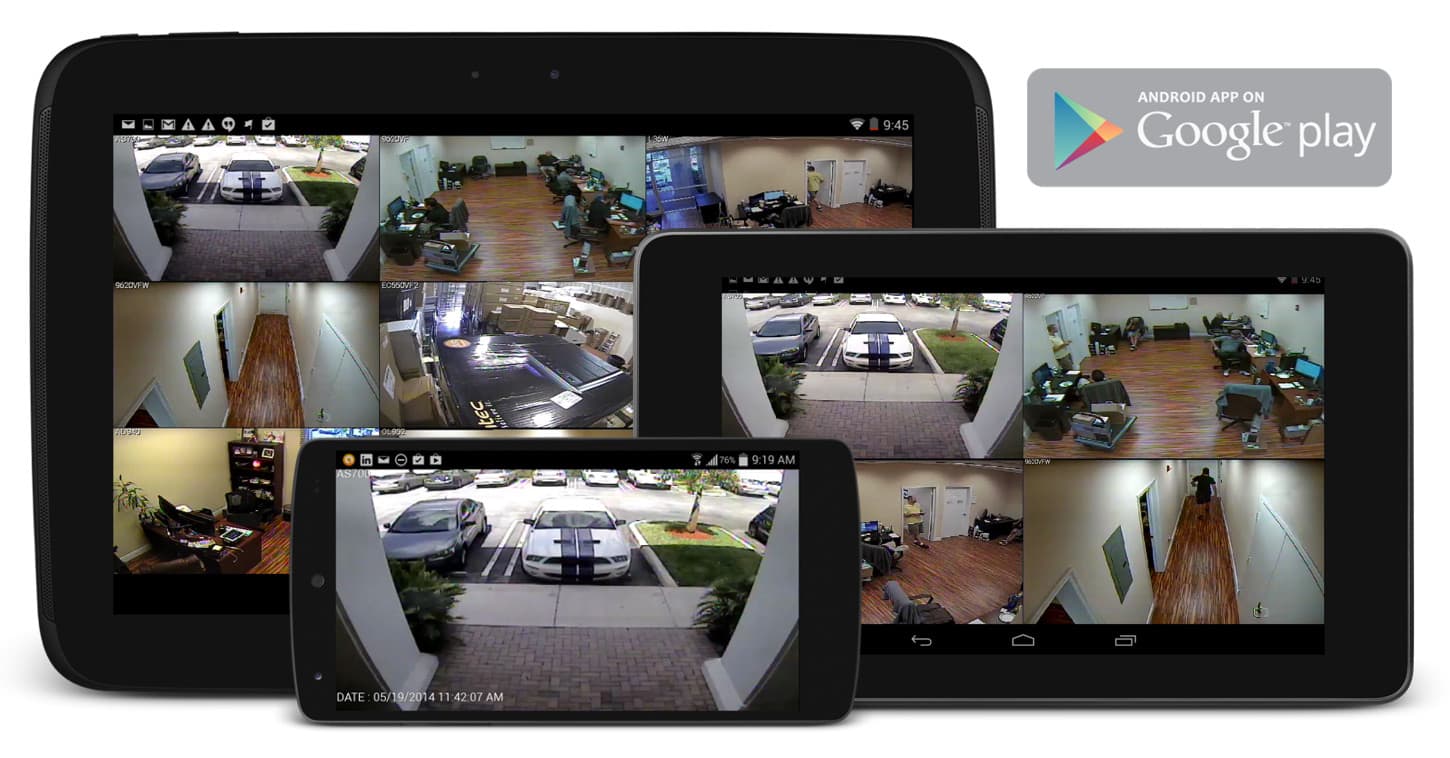
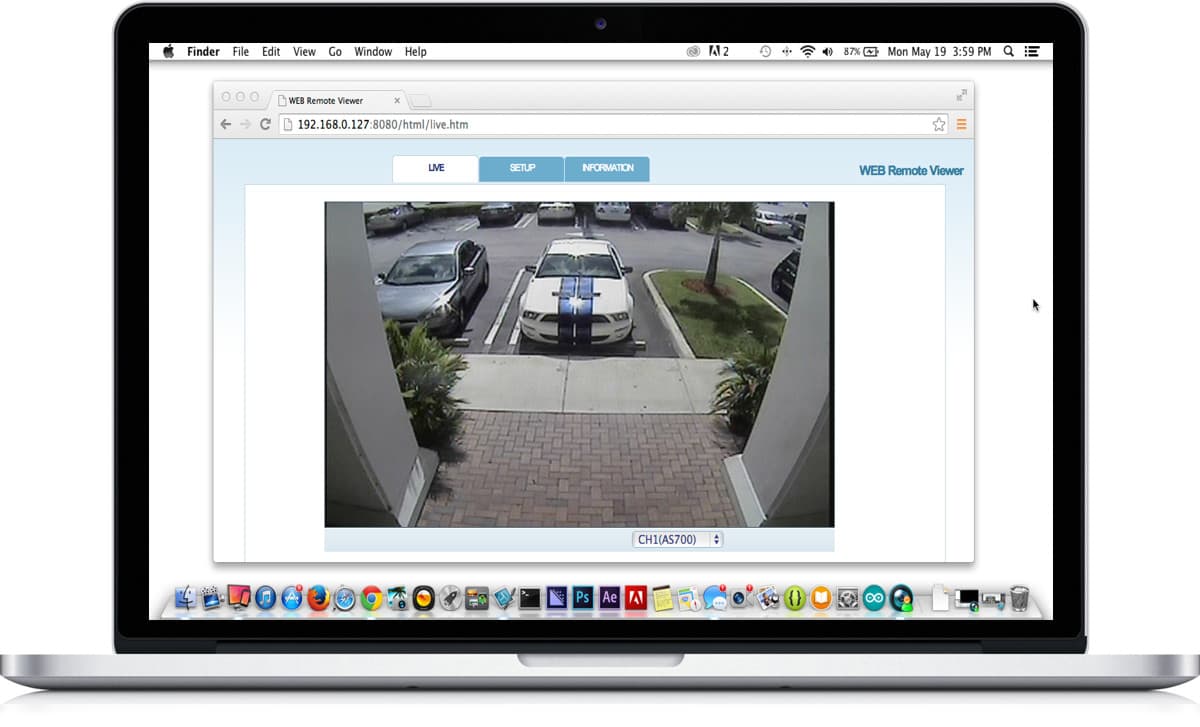
Click on the below images to see why iDVR-PRO has become CCTV Camera Pros best selling stand alone CCTV DVR.
iPhone / iPad Compatible
|
Android Compatible
|
Mac Compatible
|
For these instructions, the connection from the computer running the remote viewer software to the DVR is made via a LAN (Local Area Network) by connecting the DVR to the same network that your computer is on. For most users, this means that you connect the DVR to the same router that your computer is connected to. Please follow these instructions to setup the DVR viewer for MPEG4 Series DVRs:
- From your computer, download and install the latest DVR software from here: MPEG-4 Series DVR Viewer Software. The download is in zipped format. Using Windows XP, double-click on the .zip file after it downloads, then double click on the setup.exe program to install.
- Connect your DVR to the same router or switch that your computer is connected to. This is done with a standard cat-5 Ethernet cable. Also, connect your DVR to a monitor if you have not already done so. Power the DVR on.
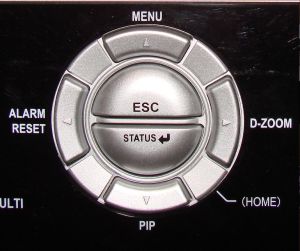
- Locate the IP address of your DVR now that it is connected to your network. On your DVR, push the the "MENU" button (reference the below image to help locate buttons). Then, click on the right arrow button on the DVR next to the "D-ZOOM" label until the LINK menu is highlighted on the screen. On the screen select the first option in the LINK menu which is NETWORK and push the "STATUS" button on the DVR. The screen will display the IP address that your DVR is connected to and the port that it is listening on. Note these two items.
- Click the "ESC" button on the DVR twice to exit the NETWORK menu. Then, select "SAVE AND EXIT" on the screen and click on the "STATUS" button on the DVR to exit.
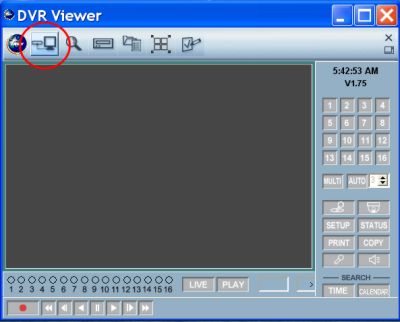
- Now we will jump over the Windows PC that you are using. The DVR viewer that you installed on your PC created an icon on your Windows desktop (please reference the below image to help locate). Double-click on that icon to open the DVR viewer.

- You will be prompt for the userid and password to access. Leave the password blank and click "OK". The DVR viewer should then open.
- Click on the DVR List button as seen below:
You will be prompt for a password which again you can leave blank and click "OK".
- The DVR list will open as seen below.
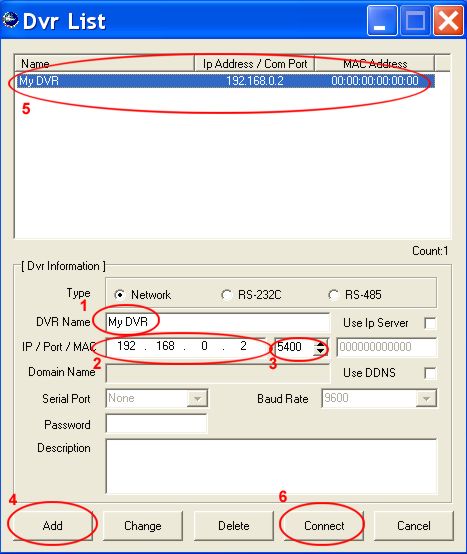
Follow these steps to add your DVR to the list:
- Enter a name for your DVR. This can be anything you choose.
- Enter the IP address of the DVR
- Enter the port of the DVR
- Click on the "Add" button
- The DVR should now appear in the DVR list
- Click on the connect button
- You will be prompt for a password to connect to the DVR. The default password is "11111111" (8 ones). Enter the password and click "OK".
You are now connected to the DVR.
|


