|
DVR Alarm Relay Output Setup | iDVR-PRO CCTV DVRs
 iDVR-PRO CCTV DVRs have alarm relay output ports that support the ability to connect external devices such as audio sirens and alarm strobe lights to video surveillance systems. The alarm outputs on the DVR can be configured to be triggered by an event such as camera motion detection, door, and window alarm contacts. Each alarm output is a basically a relay circuit that switches from one position to the other and is set to be normally open or closed. iDVR-PRO CCTV DVRs have alarm relay output ports that support the ability to connect external devices such as audio sirens and alarm strobe lights to video surveillance systems. The alarm outputs on the DVR can be configured to be triggered by an event such as camera motion detection, door, and window alarm contacts. Each alarm output is a basically a relay circuit that switches from one position to the other and is set to be normally open or closed.
The setup guide below will walk users through how to setup alarm outputs on iDVR-PRO8 and iDVR-PRO16 CCTV Surveillance DVRs.
DVR Alarm Output Overview
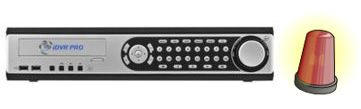
The security application used in these instructions uses a 12v DC powered strobe light. The goal is to turn the strobe light on when an alarm is triggered. For this application, we will use a door contact connected to the alarm input of the DVR to trigger the output.
Please note that the DC transformer used to power the strobe light / siren is only used to power the siren and has nothing to do with the power supply of the DVR. The concept is that the strobe light sits dormant / un-powered until the alarm goes off. When the alarm goes off, the relay is closed / enabled and allows power to flow to the strobe light, which turns it on.
WARNING: DVR alarm relays have a maximum power rating. The alarm outputs of iDVR-PRO DVRs have a maximum power rating 125VAC / 60VDC, 2 AMP. This rating should accommodate almost all standard burglar alarm equipment, but you should check the specification of each device to be sure.
The digital output has the following power rating: 5V TTL level max 25mA.
If you are using these setup instructions to guide you on integrating alarm devices on other types of surveillance DVRs (not an iDVR-PRO8 or iDVR-PRO16), is strongly recommended that you consult the manual of your DVR to understand the maximum power that your DVR alarm outputs can use. Using an alarm device that draws more power than the relays of your DVR are rated at will cause damage to the relay terminals and / or can ruin the entire DVR.
DVR Alarm Output Wiring
The siren in this example uses a 12v DC power supply. These typically have a single 3.5mm plug on the end of the cable. If your DC transformer has a single plug (instead of separate positive and negative wires), you can use a PT-4 pigtail power lead to convert the plug to separate positive and negative wires.
- Connect the positive wire from the power supply to one of the AO terminals of the alarm-out port.
- Connect the negative wire from the power supply to the negative cable of your output device (in this case a strobe light).
- Connect the positive wire from the strobe light to the GND terminal of the alarm-out port.

DVR Alarm Output Configuration
In this example, we will use the input from a door sensor to trigger the alarm relay output (with strobe light connected to it). Please read these setup instructions for details about how the alarm input was configured for the magnetic door / window sensor.
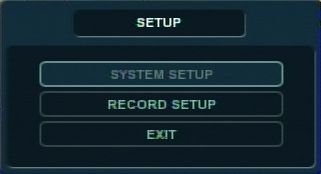
- First, select the Menu icon at the bottom of the DVR home screen. Then select System Setup. (Shown Below)

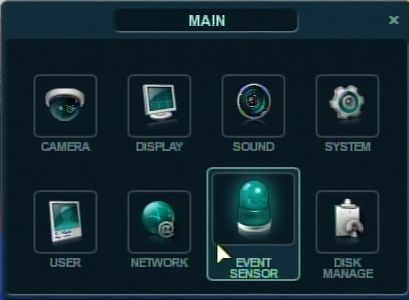
- Now select Event Sensor. (Shown Below)
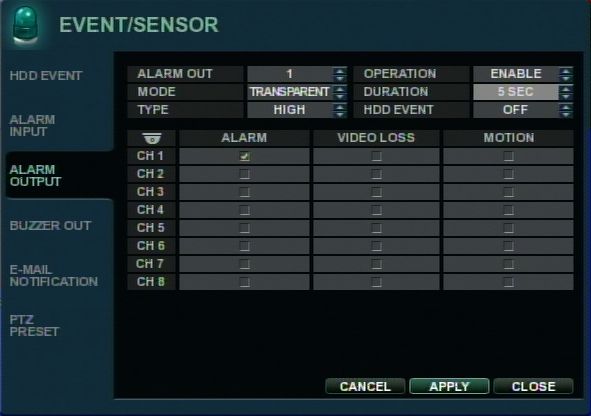
- On the Event Sensor menu, select the Alarm Output tab on the left. Now configure the following settings. Click Apply once complete. (Shown Below)
- ALARM OUT : Choose which alarm output to configure.
- OPERATION : The selected alarm output can be enabled or disabled.
- MODE : Can be either TRANSPARENT (the output is active only when the trigger criteria is present)or LATCHED (the output is active for a set period of time after a trigger).
- DURATION : In LATCHED mode, the time that the alarm output remains active after it has been triggered.
- TYPE : Can be set to high (0V to +5V when activated) or low (+5V to 0V when activated).
- HDD EVENT : Determines whether a hard drive event triggers the alarm output.
- Your alarm output is now configured.
About the Author
 This article was written by Mike Haldas, co-founder and managing partner of CCTV Camera Pros. If you have any questions related to it or anything related to CCTV or IP video surveillance, please Mike at [email protected]. This article was written by Mike Haldas, co-founder and managing partner of CCTV Camera Pros. If you have any questions related to it or anything related to CCTV or IP video surveillance, please Mike at [email protected].
|


