|

Zavio NVC NVR Network Setup
Zavio Network Video Recorders are can be remotely accessed from a number of devices, including iPhone, Android, and PCs. The instructions featured in this article explain how to setup the Zavio NVC series network video recorder for remote access.
Network Setup
1. First, click the Menu icon in the lower portion of the screen. (Shown Below)

2. Then, click the Network icon, followed by Network Settings. (Shown Below)

3. Under the Setup tab, set LAN 1 to DHCP. Then write down the IP Address, as you will be using it later in this article. (Shown Below)

5. Now we will perform the port forwarding of the router connected to the Zavio NVC NVR. Please select the brand of your router below for specific instructions on port forwarding.
Linksys
DLINK
Netgear
Comcast SMC
Comcast TC8305C
Zyxel
2Wire
6. Now we will need to make sure the ports are open. You can do so by going to http://dvrport.net
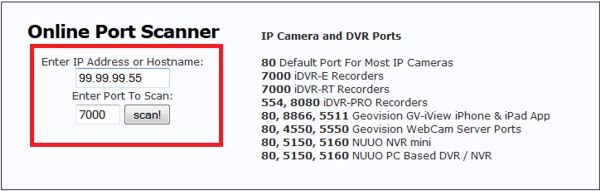
7. The remote IP address will automatically populate under the Enter IP or Hostname, you will leave this info as is. Change the Enter Port To Scan field to read 80 and press Scan.
Note: If the port is open you will use the remote IP address you get from the http://dvrport.net . However, you will need to type it in as follows via a web browser - http://remoteipaddress, eg. if your IP address is 99.99.99.55 then it should look like this when you type it into your web browser - http://99.99.99.55
Note 2: If the ports are showing closed and you have a DSL provider, you will need to call your provider and have them bridge the modem to your third party router. This is a standard procedure.
|


