|
Motion Detection Recording Setup for iDVR-E CCTV DVR

The instructions featured in this article explain how to setup motion detection recording for the latest version of the iDVR-E surveillance DVR. If the instructions below do not match your iDVR-E, please refer to the legacy version of the motion recording setup article - Legacy iDVR-E Motion Detection Record Setup.
Motion Recording Setup Instructions
Please follow the instructions below to setup motion recording on the latest version of the iDVR-E CCTV DVR.
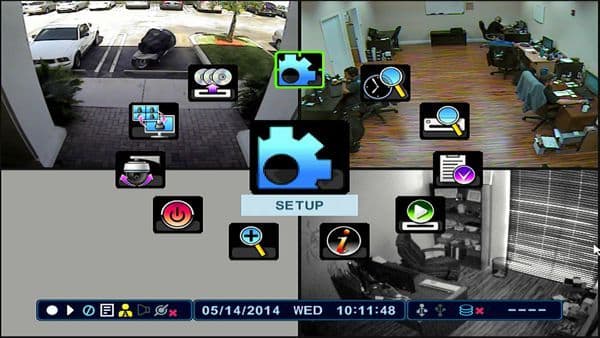
- First press the Menu button on your iDVR-E and select Setup. (Shown Below)
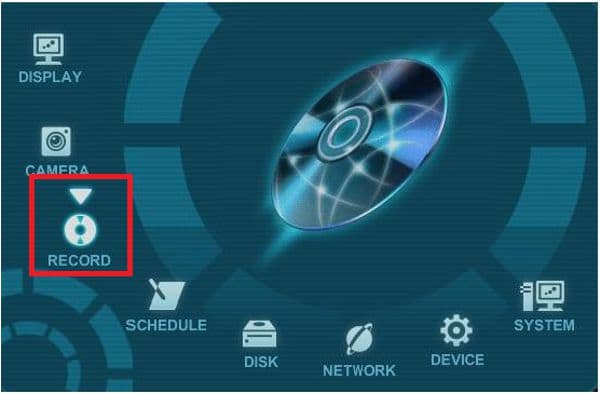
- Now scroll over and select the Record icon. (Shown Below)
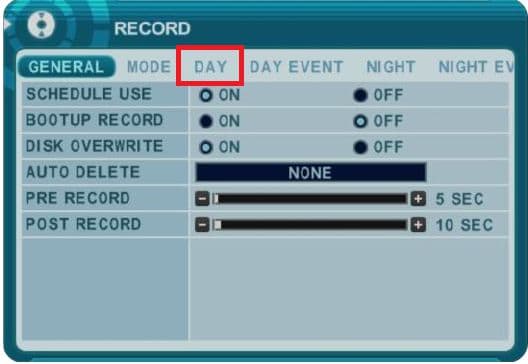
- On the Record menu, select the Day tab. (Shown Below)
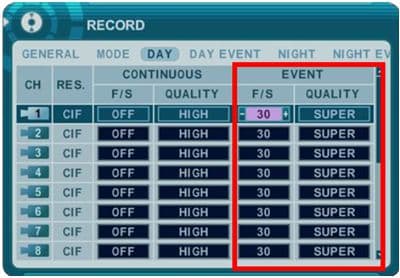
- Now under the Event tab, make sure that the F/S (Frames per Second) is set as well as the Quality. Then under the Continuous tab, switch F/S to OFF to disable continuous recording. (Shown Below)
- Go to the Day Event tab and enable Motion on all of the cameras you would like to record on motion. (Shown Below)
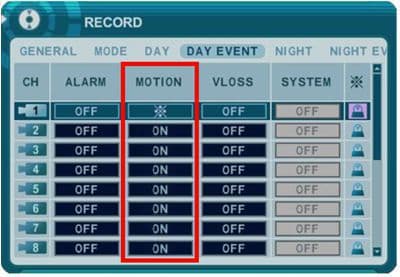
- Your DVR is now set to record on motion.
iDVR CCTV DVRs
These instructions apply to the following model CCTV DVRs: iDVR-E4, iDVR-E8, iDVR-E16, and iDVR-RT16. Click here of on the image below to
learn more about these video surveillance DVRs.

 About the Author About the Author
These setup instructions were written by
Mike Haldas. Mike is the co-founder and managing partner of CCTV Camera Pros. Please send questions to mike@cctvcamerapros.net.
|
|


 About the Author
