IP Camera Test Monitor POE Setup
The MON-IP7 and MON-7HD IP camera test monitors have a PoE (Power Over Ethernet) port that allows the installer to power the IP camera that they are testing. This allows installers to adjust the angle of view and focus of the IP camera prior to running permanent network cable. This feature can also be used to troubleshoot a possibly defective camera that is not being powering on when connected to the network POE switch / injector.
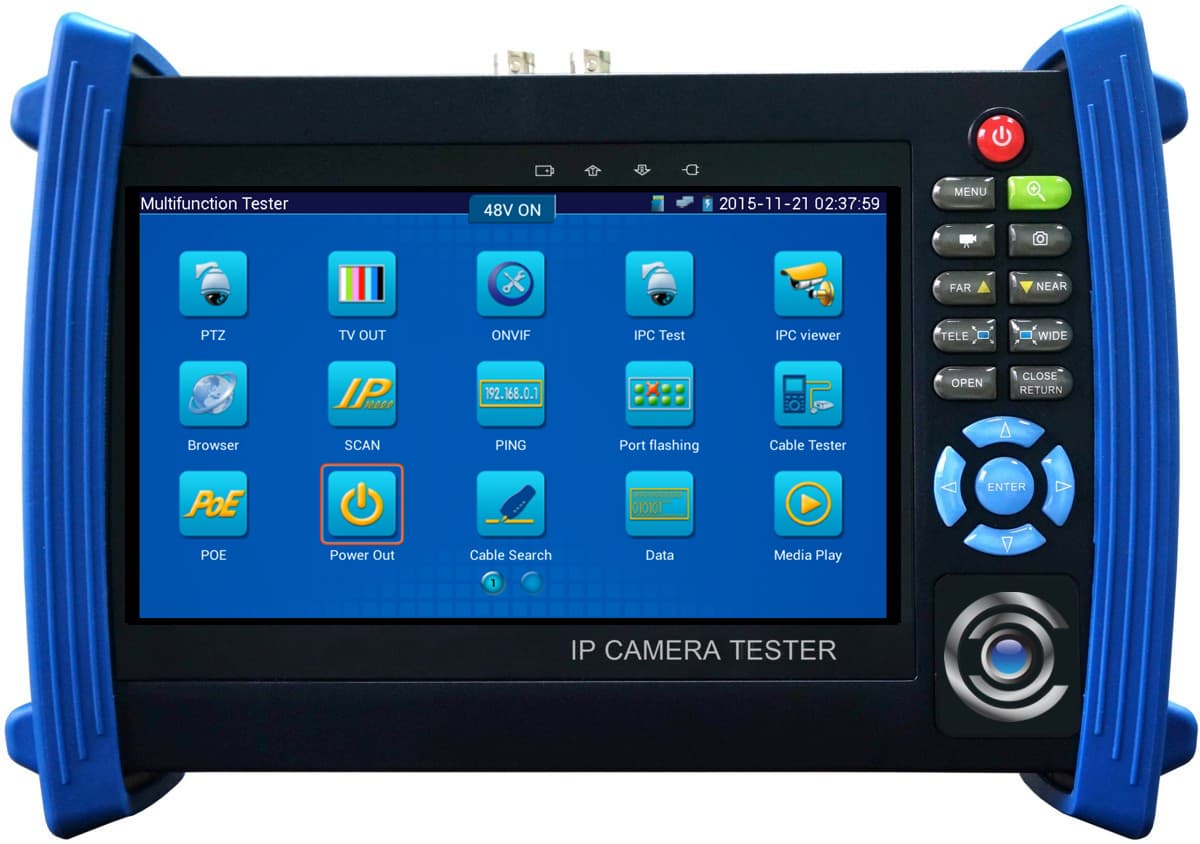
These are the two test monitors that this article and PoE feature is applicable to. They are basically the same product except in addition to IP camera and analog CCTV cameras, the MON-7HD also supports HD security cameras (AHD, HD-TVI, and HD-CVI cameras). All other functions are identical.
You can find
all IP camera test monitors that we supply here.
Connect IP camera to PoE power from test monitor
In order to power and view your IP camera using the LAN / POE port on your test monitor, please make sure that the camera is set to a
Static IP Address. The camera will not be recognized if it is using a DHCP IP Address because the monitor does not have a DHCP server to assign the camera an IP address. Make sure that the camera is connected to the LAN / POE port on the monitor and follow the instructions below. (Shown Below)
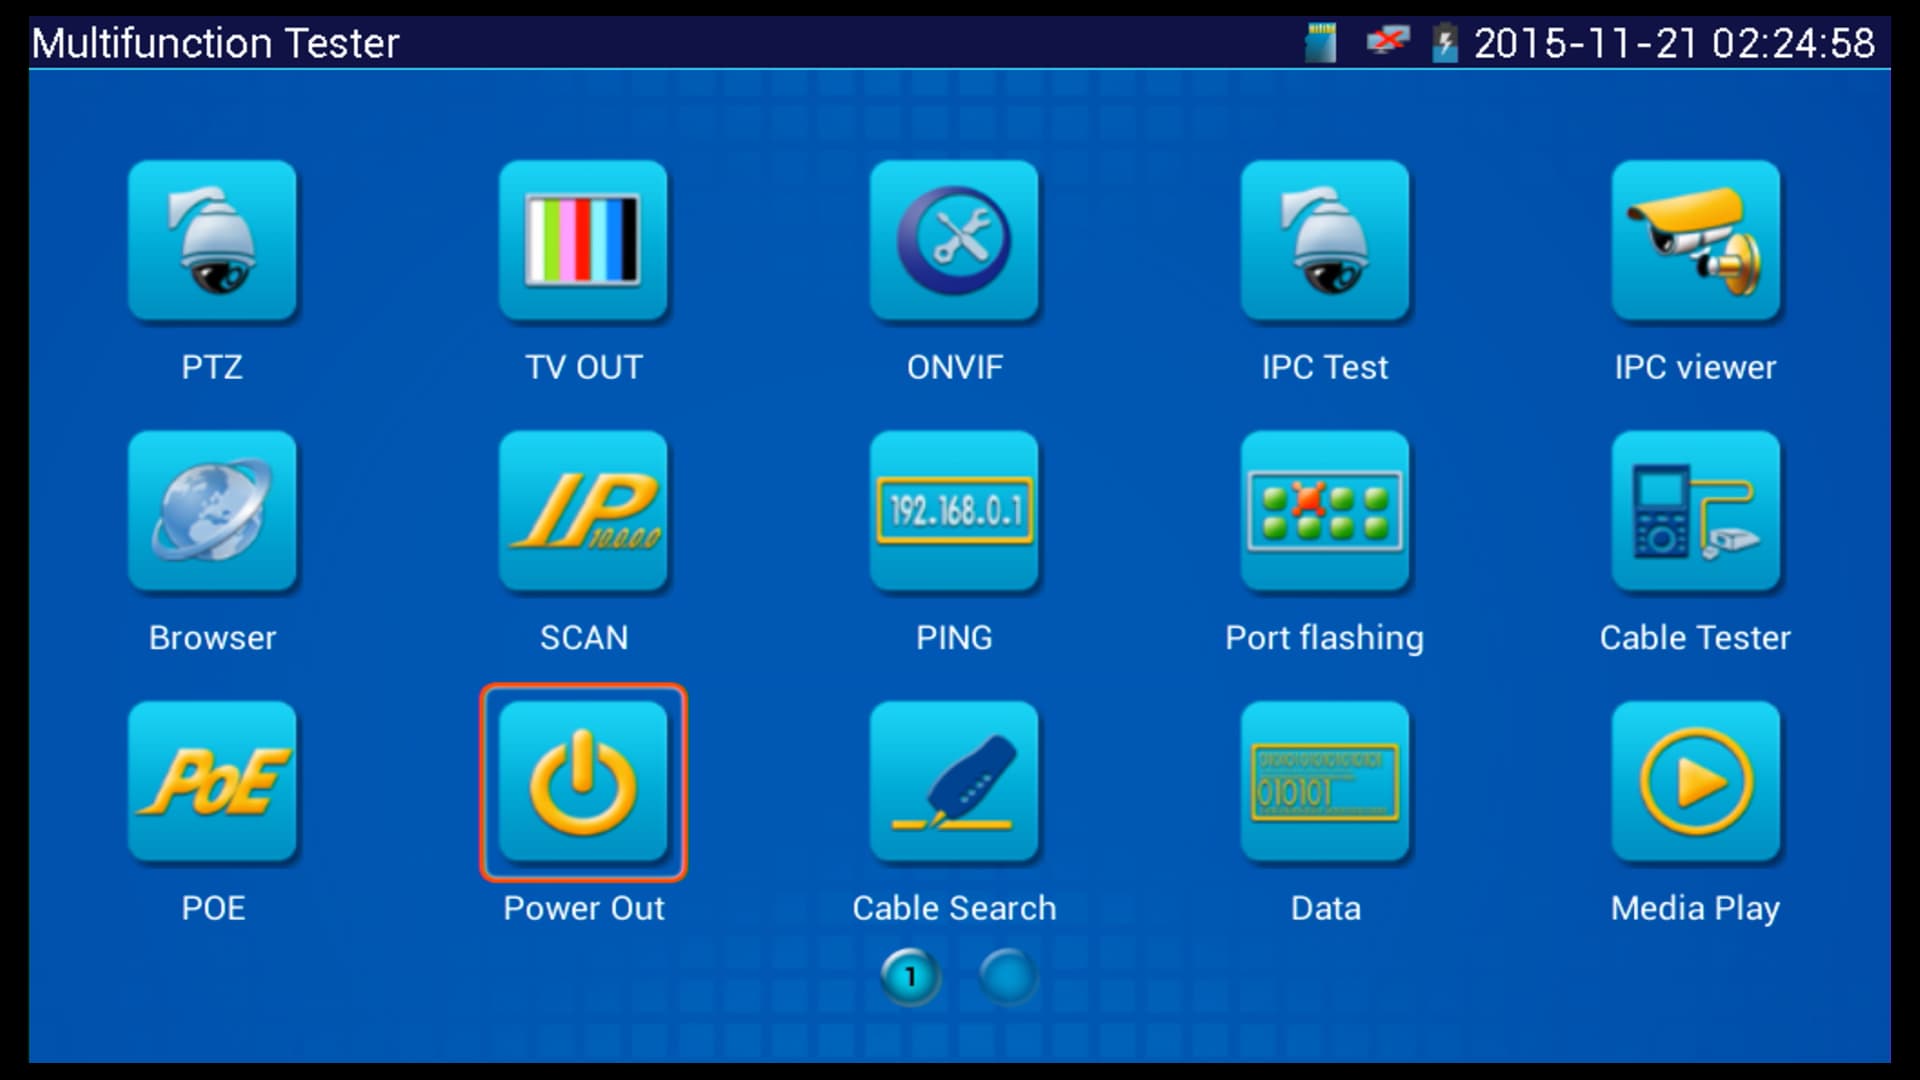
First, select the
Power Out icon on the monitor. (Shown Below)
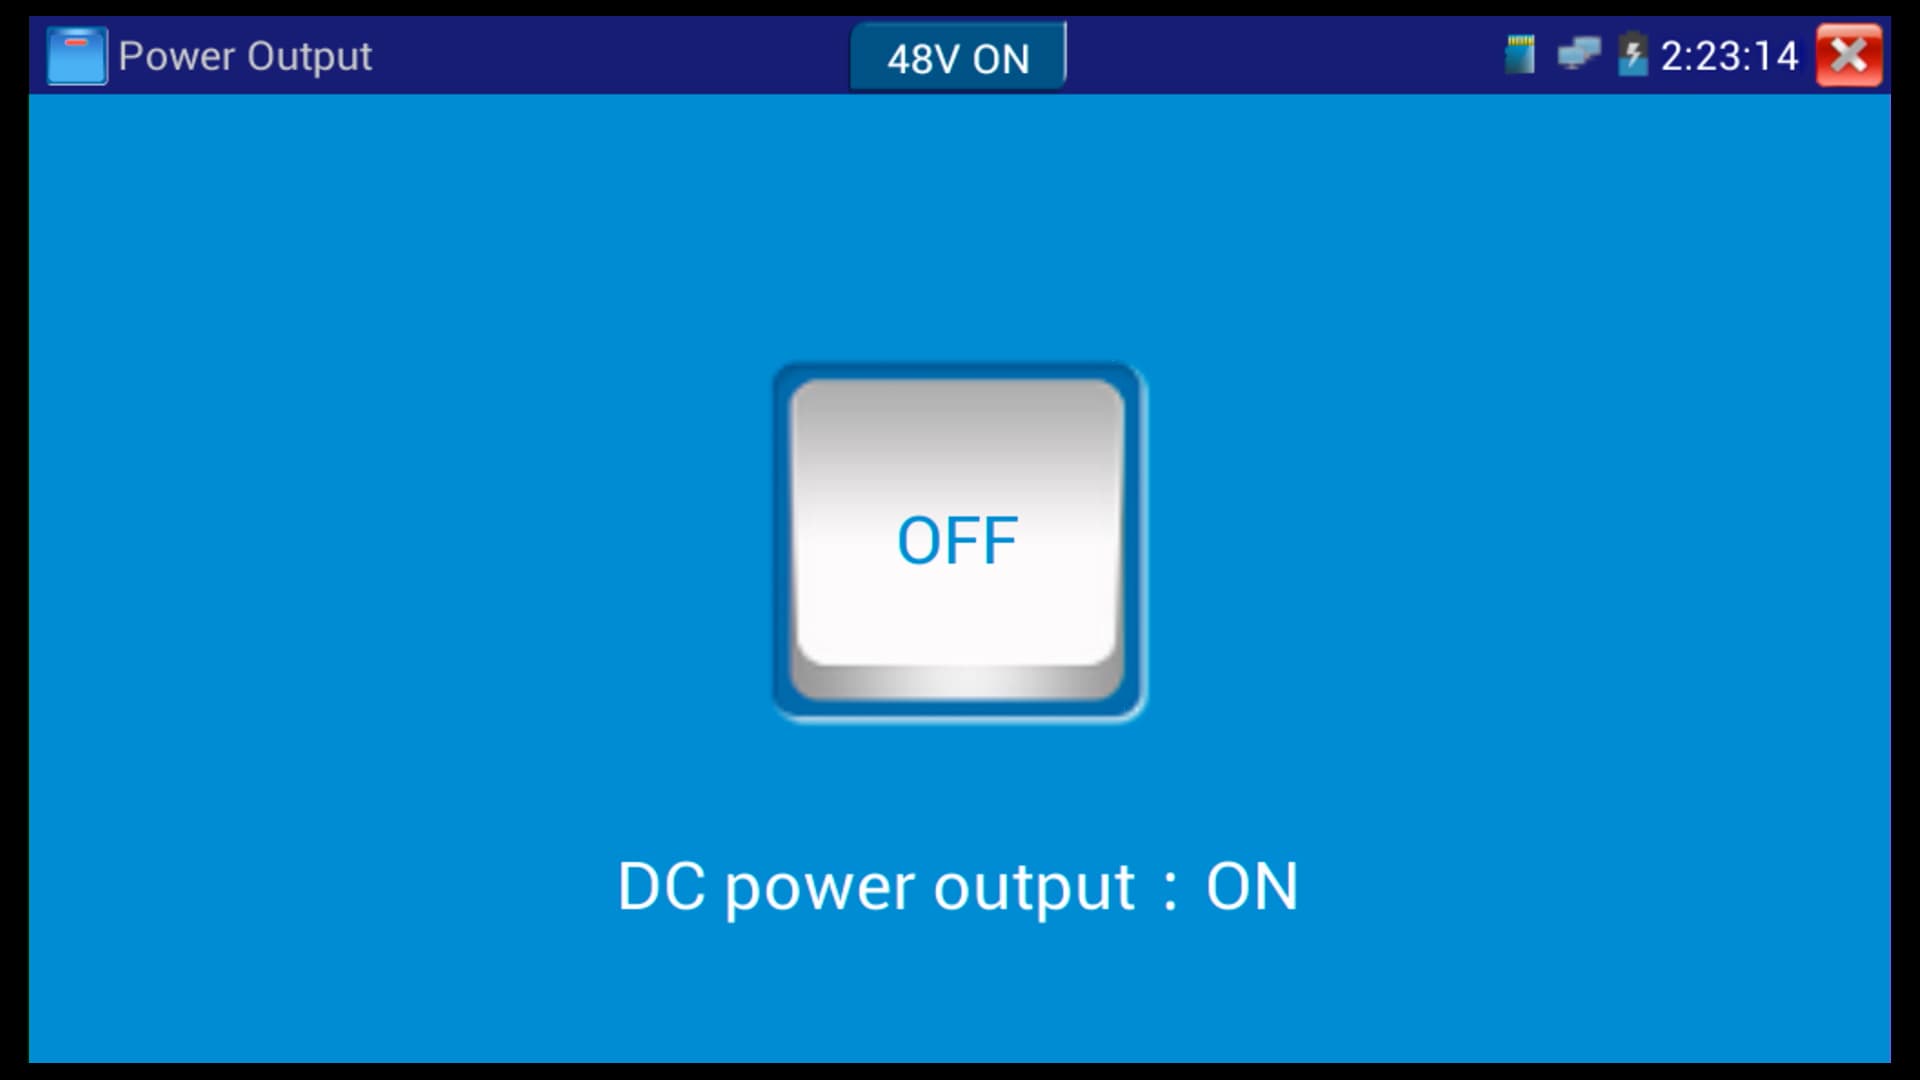
Then press the power icon so that
DC Power Output is set to ON. You will also see 48V ON in the upper portion of the screen to confirm. Press the X in the upper right to return to the Main Menu. (Shown Below)
Back on the
Main Menu, press the Settings icon. (Shown Below)

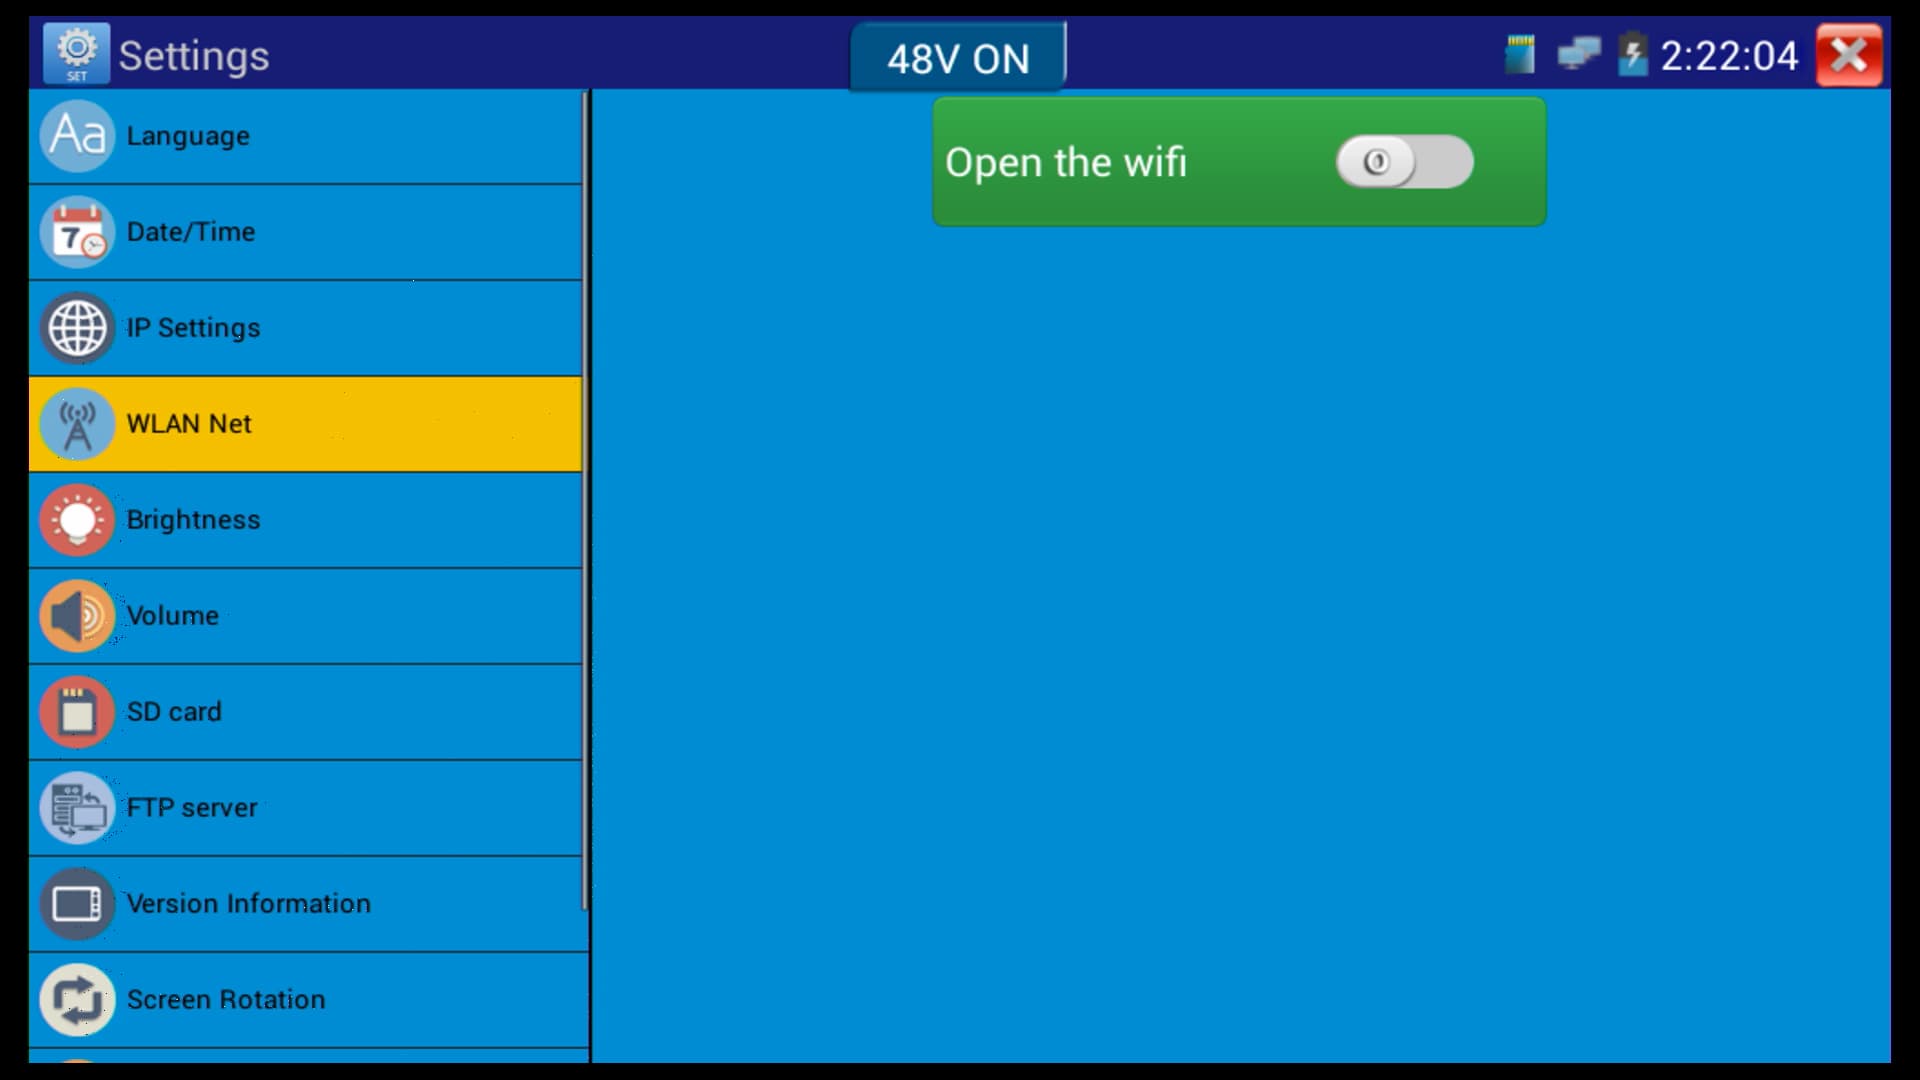
Now select
WLAN Net from the sub menu on the left. Make sure that the WiFi is switched OFF. The LAN port will not work if the WiFi is switched ON. Press the X in the upper right corner to exit this menu. (Shown Below)
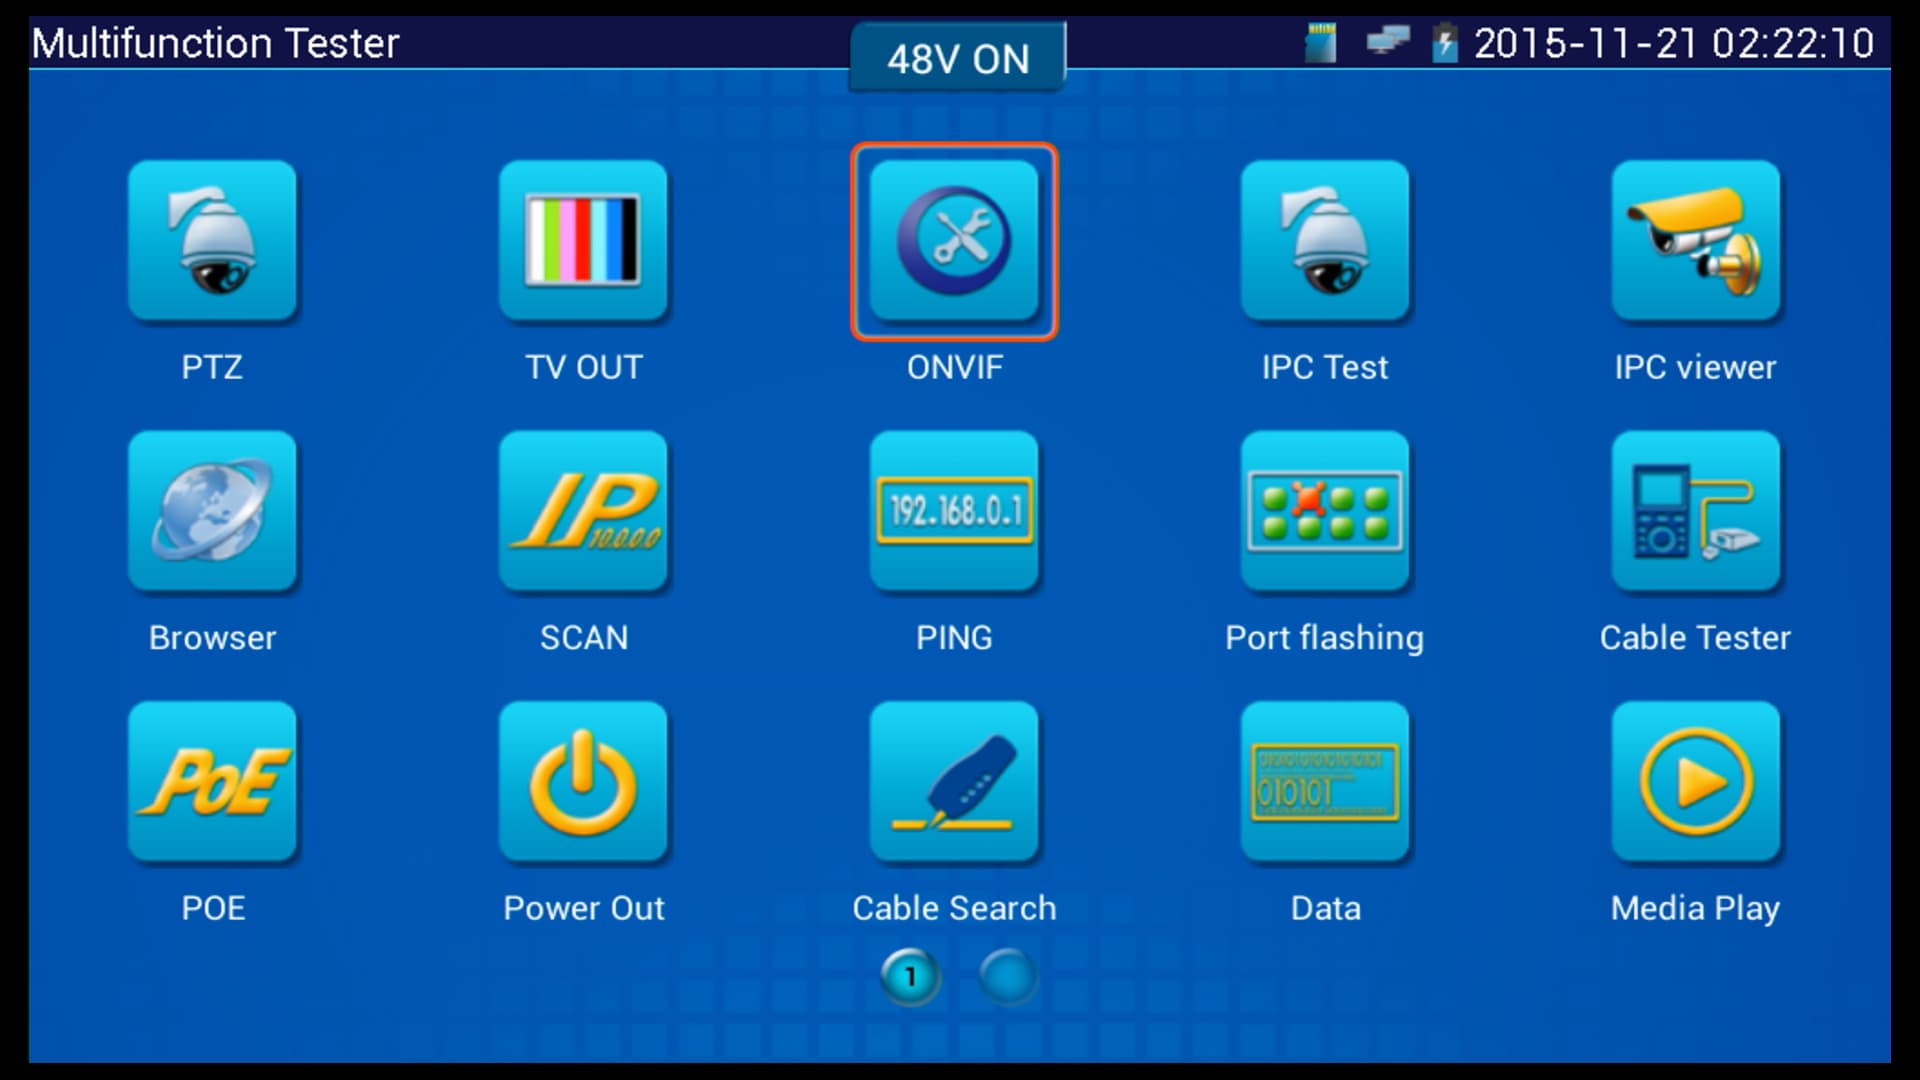
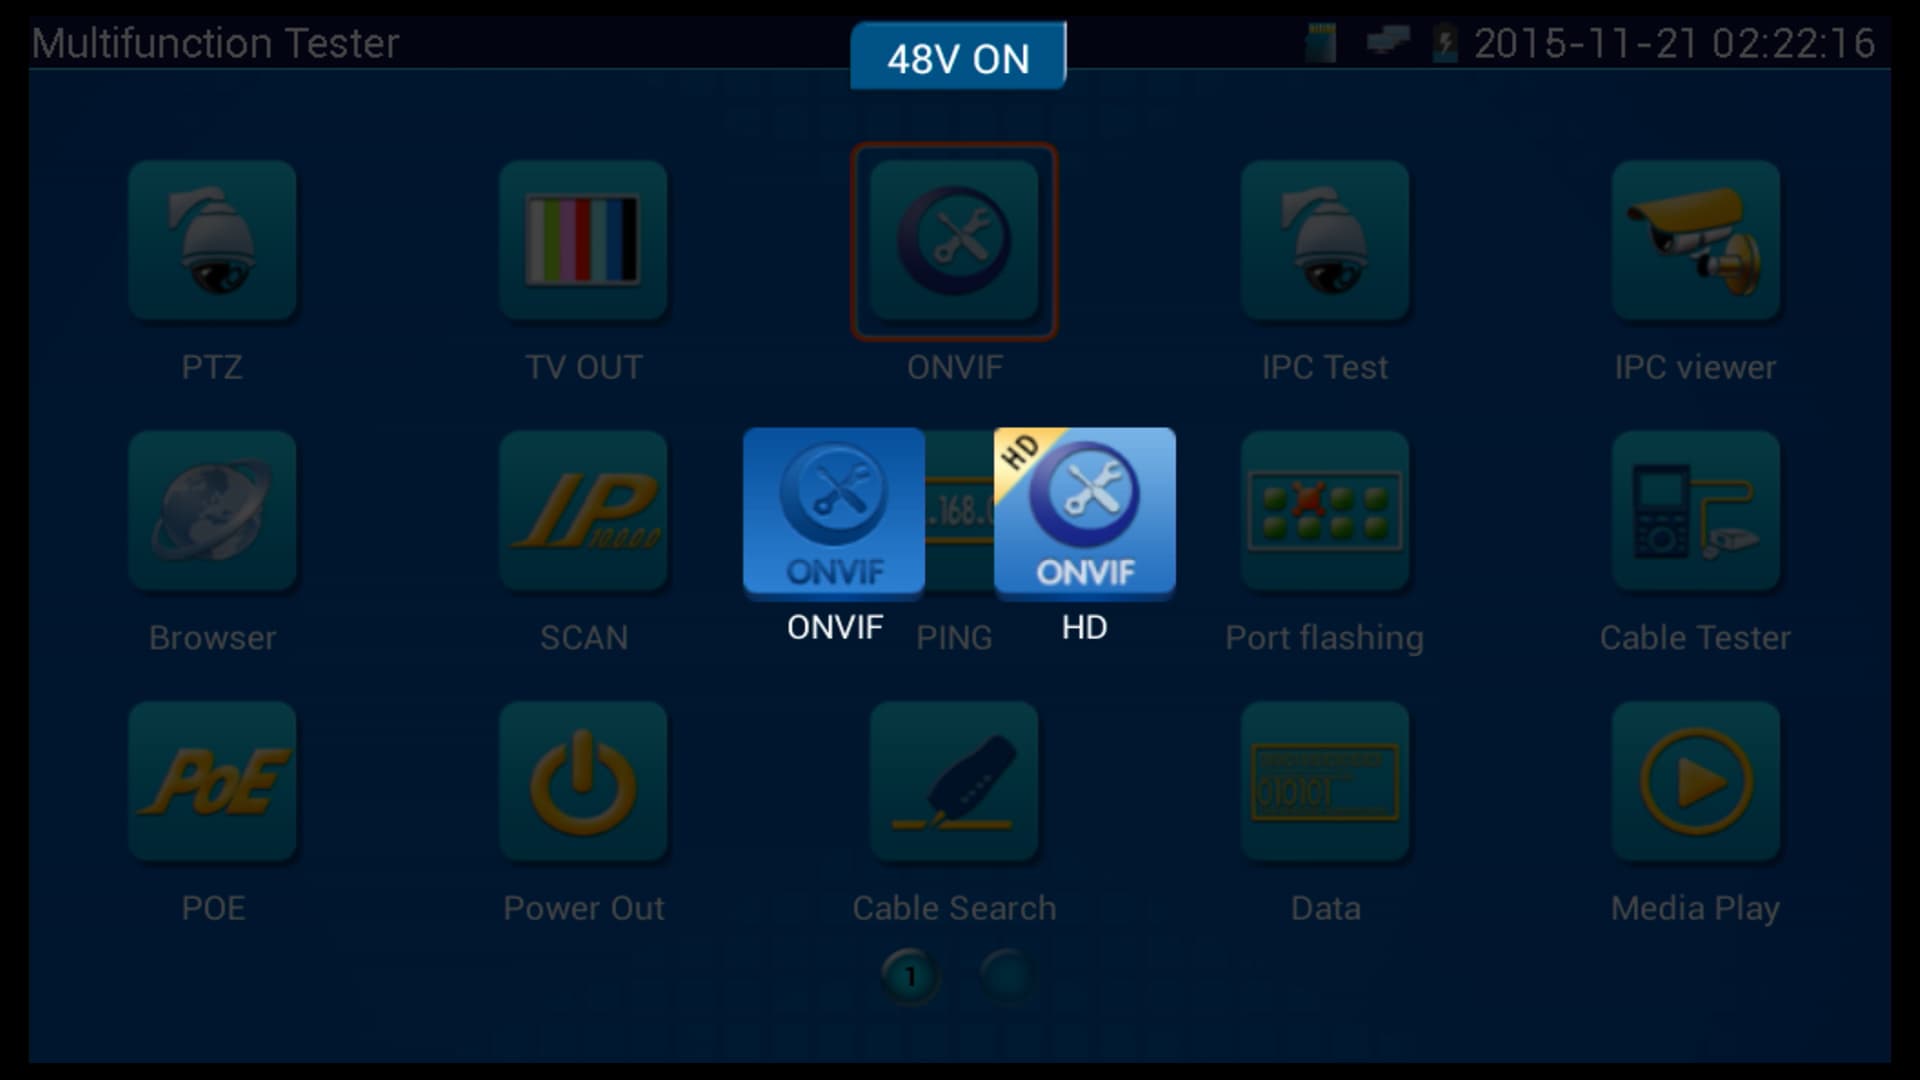
On the Main Menu, select the
ONVIF icon, followed by ONVIF again (Do not select ONVIF HD). (Shown Below)
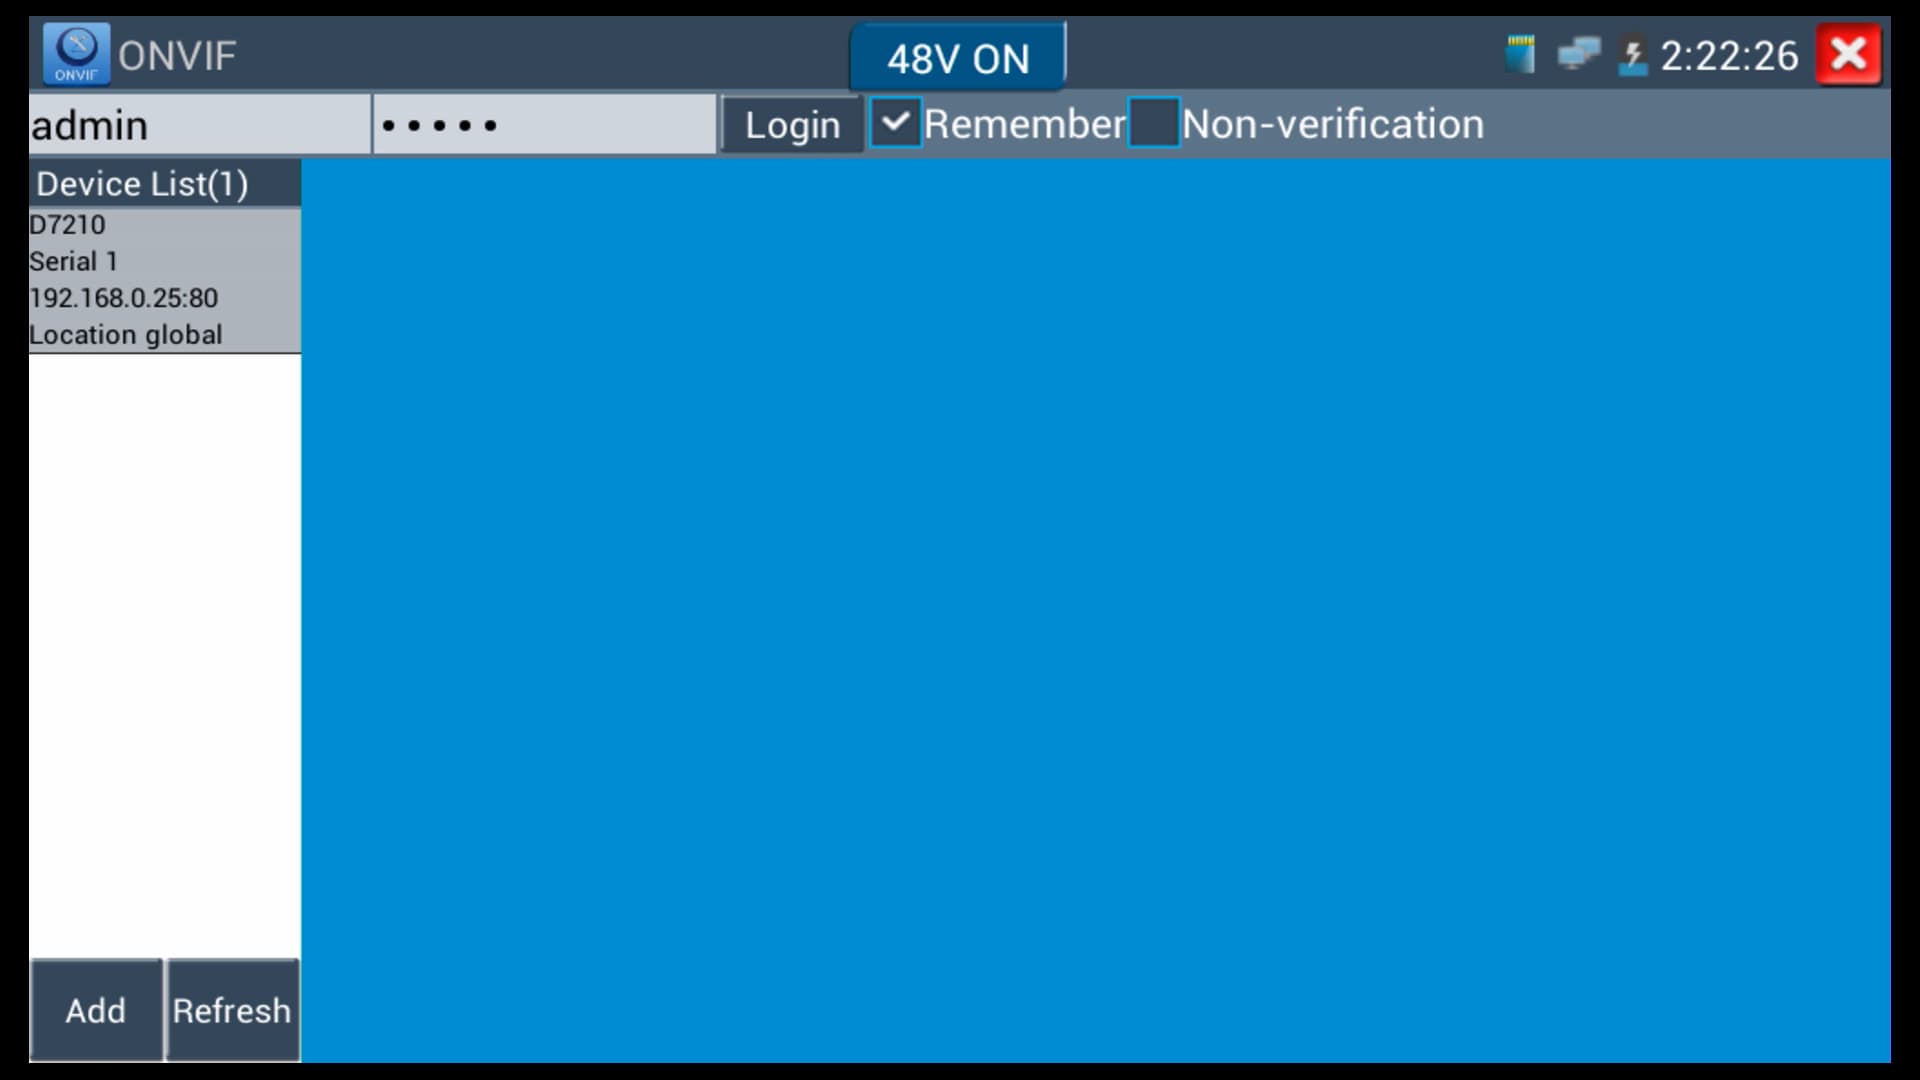
Then the camera connected to the monitor will appear on the left column. Before select the camera, enter the
Username and Password of the camera, and press Login. (Shown Below)
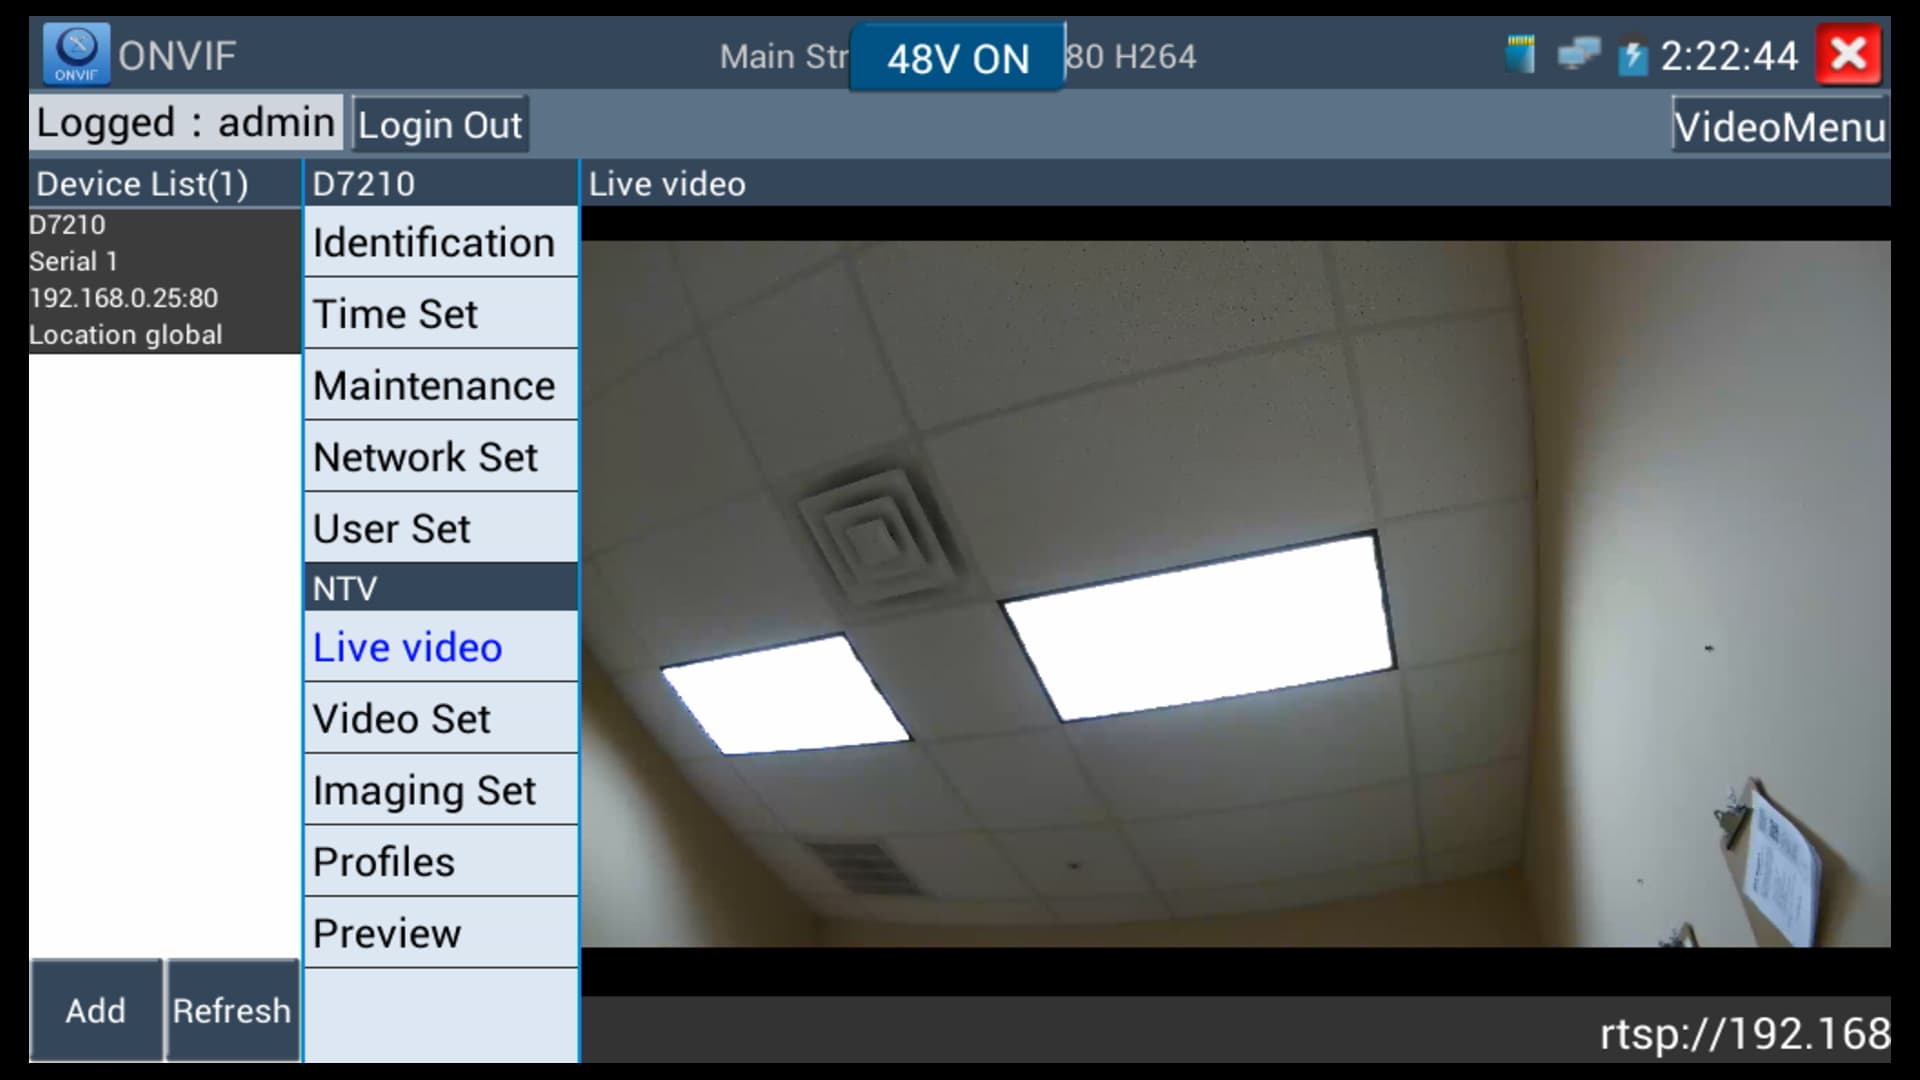
Lastly, select the camera, and press the
Live Video icon to view the camera. (Shown Below)

These setup instructions were written by
Mike Haldas, co-founder and managing partner of CCTV Camera Pros. If you have any questions about them or anything related to video surveillance systems and equipment, please email me at [email protected].
|


