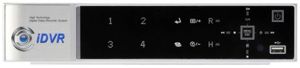
You are here: Home > Support & Knowledge Base > iDVR Support > EMS E-Map Setup

iDVR-E Series Surveillance DVR EMS E-Map Setup

iDVR Pro Surveillance DVR

The iDVR-E Series Surveillance DVR's are remotely accessible using the Enterprise Management Software (EMS). The Enterprise Management Software has a feature known as E-Map. E-Map allows users to place their cameras on a map or picture, such as the blueprint of the location in which the cameras are located. They can then select each camera to view the live video feed and playback.


EMS E-Map Setup

The instructions below explain how to set up an E-Map using the Enterprise Management Software.

1. Make sure that you have downloaded and configured the Enterprise Management Software for remote access. If you have not done this, please visit our Remote Access (EMS) article.

2. Now log into the EMS program. In the upper left portion of the screen click the E-Map icon. (Shown Below)


3. Once in the E-Map, select the Background icon in the upper right to choose the map or picture you wish to use. (Shown Below)


4. Now drag the cameras from the left column and place them where you want on the map or picture. (Shown Below)


5. Then select a camera on the map or picture and right click it. Select Live on the top menu to display the live video feed. (Shown Below)


EMS E-Map Playback


1. Select a camera on your map or picture and right click it. On the pop-up menu select Remote Search. (Shown Below)


2. The Search menu will appear. Here select the Date and Time, then click Play to view the playback. (Shown Below)