|
 Nuuo Titan NVR Recording Setup Nuuo Titan NVR Recording Setup
The instructions featured in this article explain how to set up the various recording modes of the Nuuo Titan NVR. These modes include continuous, schedule and motion recording. The examples in this article were done using an NT-4040 NUUO Titan Network Video Recorder
First, log in to your Nuuo Titan NVR by entering the IP address into an Internet Explorer web browser on a PC connected to the same network as the NVR. Then follow the instructions of your desired recording mode below.
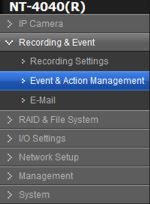
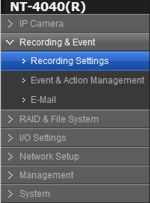
Motion / Event Recording 1. On the left column, locate and click the Recording & Event tab followed by Event & Action Management. (Shown Below)
2. Select a camera from the left column followed by clicking the Motion from Camera box.
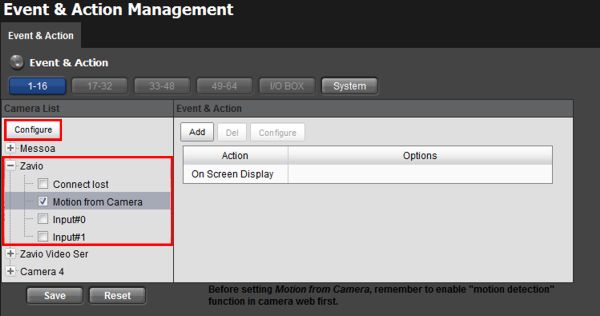
3. Now click the Enable Event check-box. Then select whether you would like to have it always active or active only during your specified time. Then click OK to save the settings. (Shown Below) 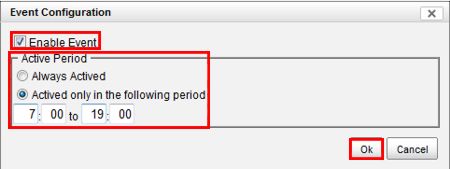
4. Once you do this for all of your cameras, click the Save button.
5. Now follow either the Continuous or Schedule Recording instructions below to complete the setup.
Continuous Recording
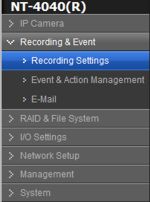
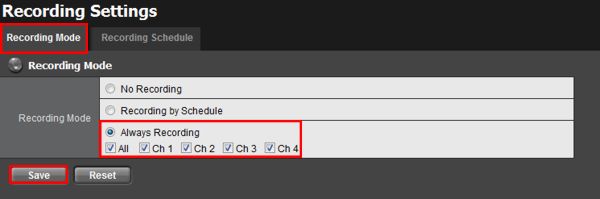
1. On the left column, locate and click the Recording & Event tab followed by Recording Settings. (Shown Below)
2. Then under the Recording Mode tab, click the Always Recording button and check the cameras you wish to record continuously. Click Save to initiate the settings. (Shown Below)
Schedule Recording
1. On the left column, locate and click the Recording Event tab followed by Recording Settings. (Shown Below)
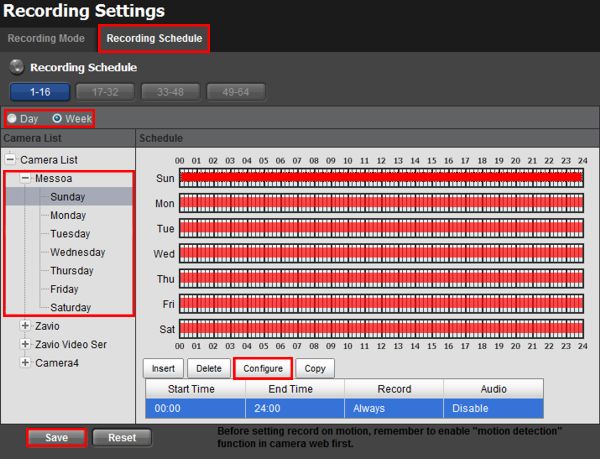
2. Under the Recording Schedule tab, select either Day mode for the same schedule every day or Week mode, which will enable you to set a different schedule for each day of the week. Then select a camera from the left column followed by a day. Once you have the desired camera and day selected, click the Configure button toward the bottom of the screen. (Shown Below)
3. On the Schedule Configuration menu, select the Start and End time of your desired schedule. Then choose the Pre and Post Record time lengths (Pre Record - How many seconds the NVR records prior to an event. Post Record - How many seconds the NVR records after an event.). Then select either Always Record or Record on Event under Mode (Always Record - Will continuously record during the set schedule time. Record on Event - Will only record during the set schedule when an event such as motion is triggered.). Then choose whether or not you would like to enable audio recording. Once you have all the settings configured for your application, click the OK button (Shown Below) 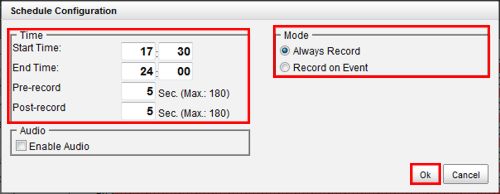
4. Repeat the steps above for as many cameras as you need. Click the Save button under Recording Schedule once you have configured all of your cameras.
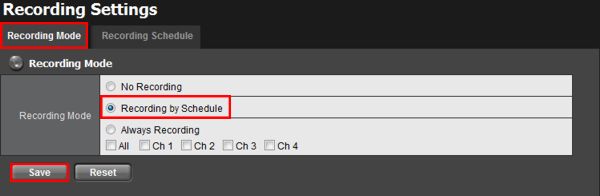
5. Now under the Recording Mode tab, click the Recording by Schedule button and click Save. (Shown Below)
6. Your Nuuo Titan NVR is now recording based on your configured schedule.
|


