|
 Nuuo Titan NVR PTZ Camera Setup Nuuo Titan NVR PTZ Camera Setup
The instructions featured in this article explain how to setup and control a PTZ camera on the Nuuo Titan network video recorder. The examples in this article were done using a Zavio P5110 Pan Tilt IP Camera and an NT-4040 NUUO Titan Network Video Recorder
1. First, make sure that your Nuuo Titan NVR and your IP PTZ camera are on the same network. Next, make sure that they are both powered on and running.
2. Now log in to your Nuuo Titan NVR by entering the IP address into an Internet Explorer web browser on a PC connected to the same network as the NVR.
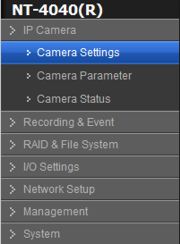
3. Once logged in, locate and click the IP Camera tab on the left column. Then click Camera Settings within that tab. (Shown Below)
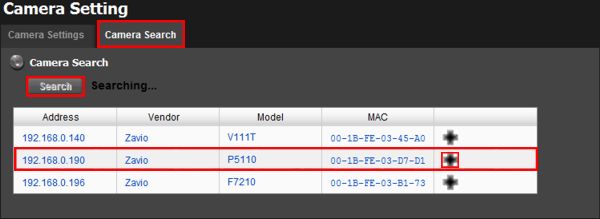
4. Click the Camera Search tab. Then click the Search button to find your IP PTZ camera. Once it appears, click the Plus icon to add it to your NVR. (Shown Below)
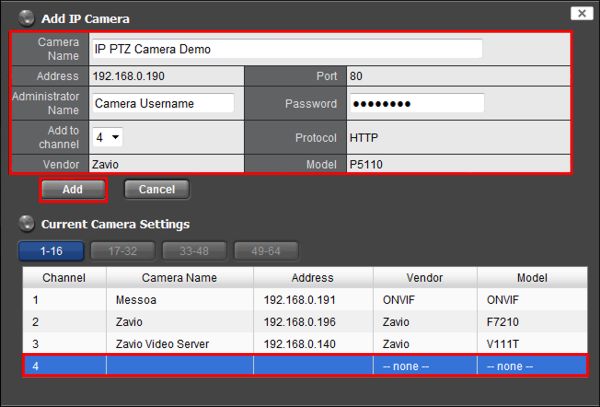
5. Now enter the Camera Name, Username, Password and which channel you would like to add the camera. Click Add once you have all the information entered. (Shown Below) A message will appear stating that the camera was added successfully.
6. Then click the Video icon to enter the live view mode of the Nuuo Titan NVR. (Shown Below) 
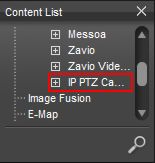
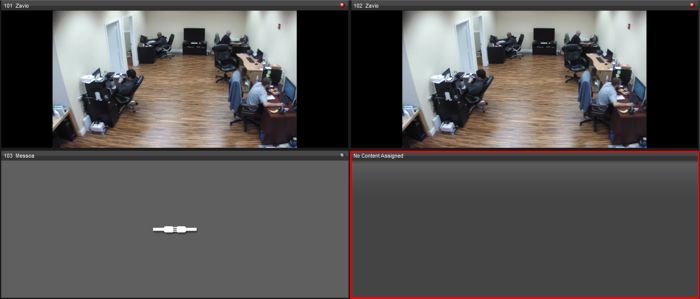
7. On the left column under Content List, left click and drag the IP PTZ Camera and place it into an empty space on your live view grid.

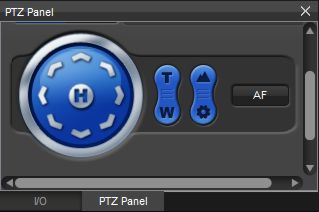
8. Now locate your PTZ Control Panel and click on the IP PTZ Camera gird. The circle on the left controls your main pan and tilt operations such as left, right, up, down and etc. The next button over controls your PTZ's zoom capabilities. To the right of the zoom button is the focus adjustment. The final button to the right is an autofocus feature that automatically focuses the lens. Use these controls to operate your IP PTZ Camera on your Nuuo Titan NVR. (Shown Below)
|


