|
 Nuuo Mini NVR Setup Time / Date Nuuo Mini NVR Setup Time / Date
The instructions featured in this article explain how to set up the date and time of the Nuuo Mini Network Video Recorder. The examples in this article were done using an NV-2040 NUUO Mini Network Video Recorder
1. Launch an Internet Explorer web browser on a PC on the same network as the Nuuo Mini NVR. Then enter the IP address of the Nuuo Mini NVR into the web browser and click enter. (The IP address of your Nuuo Mini NVR can be found in the Nuuo Installation Wizard) 2. You will then be asked to enter the Username and Password. (If this is your first time logging into the Nuuo Mini NVR, you will be asked to install Active X Controls. Go ahead and install them) (Shown Below) 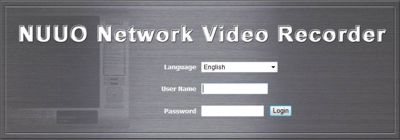
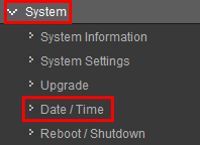
3. Now on the main Nuuo Mini NVR screen, click on System on the left column followed by Date / Time. (Shown Below)
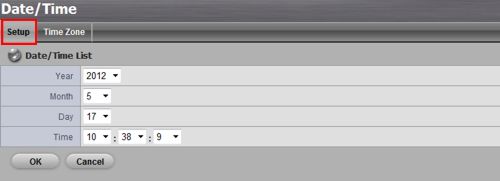
4. Under Setup, select the correct Year, Month, Day and Time. Click OK once entered. You will be prompted to restart the NVR system. Go ahead and proceed with the restart. (Shown Below)
5. Then under Time Zone, select the correct time zone for the NVR's location. Click OK once entered. You will be prompted again to restart the NVR system. Go ahead with the restart. (Shown Below) 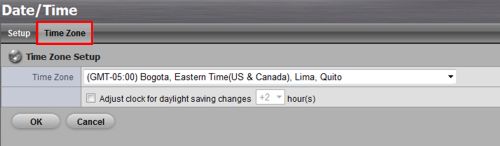
6. Your Nuuo Mini NVR is now set up with the correct date settings.
|


