Geovision Surveillance DVR Dynamic DNS Setup

Geovision Surveillance DVRs have a built in Dynamic DNS service which allows users to register a domain name that may be used to login to their DVR instead of trying to keep track of a dynamic IP Address. Most residential and small business Internet connections are typically cable or DSL. Many times cable and DSL Internet connections use a dynamic IP address which means that when you modem restarts, your ISP may assign a different IP address to your connection. If you are using your Internet connection IP address to access your Geovision DVR from remotely over the Internet when this happens, you will lose your connection. Obtaining your new IP address will require someone to login to a service on that network. By using the DDNS service provided by Geovision, you can choose a hostname such as "mydvr.ddns.com" and use this hostname instead of your IP address to access the DVR remotely. When / if you IP address changes, the service updates the DNS record of your host name (mydvr.ddns.com) for you so you never lose connectivity.
Geovision Dynamic DNS Setup
The instructions below explain how to setup Dynamic DNS on your Geovision Surveillance DVR.
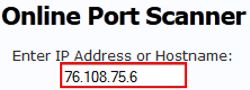
1. First, you must locate your Remote IP Address. To do this please go to http://dvrport.net, your Remote IP Address will be displayed as shown below. Write this down for future reference.
2. Now download the Geovision DDNS - Geovision-DDNS-Setup.exe Then launch the program.
Note: For Geovision DVR systems, Dynamic DNS is pre-installed. To locate it, click the Start button, followed by All Programs. Then click on the DDNS folder and run Dynamic DNS Service.
3. Once you launch the Dynamic DNS program, you should see the menu below.
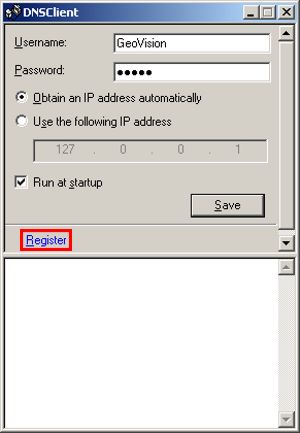
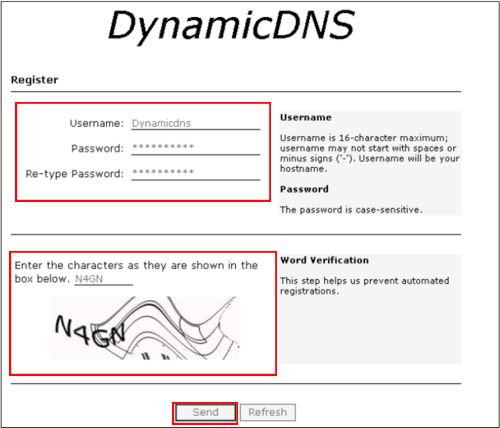
4. Now click Register and the menu below will appear. Here you will enter your desired Username, Password and Retype Password. Then enter the Word Verification as shown below. Once all the information is entered correctly, click Send. (Enter only letters and numbers, the password is case sensitive)
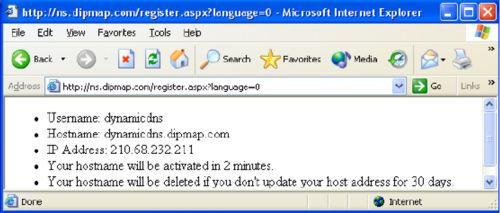
5. A confirmation message should appear. (Shown Below)
6. Now enter the registered Username and Password in the DNS Client prompt below. Check off Run At Startup and then click Save.
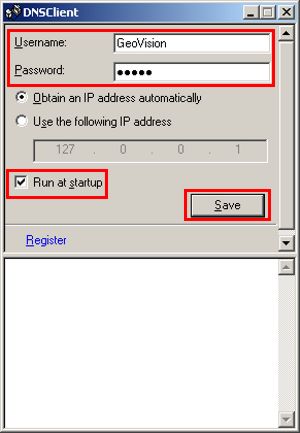
Your Dynamic DNS is now setup, you can now use your Username in place of the IP Address.
|
|
|


