|
Alarm Sensor Input Setup | iDVR-PRO CCTV Surveillance DVRs
 iDVR-PRO CCTV DVRs have alarm sensor input ports that allow installers to integrate various types of external burglar alarm devices with video surveillance systems. The alarm sensors can be configured to trigger an event / alarm on the DVR and have the DVR take some type of action. iDVR-PRO CCTV DVRs have alarm sensor input ports that allow installers to integrate various types of external burglar alarm devices with video surveillance systems. The alarm sensors can be configured to trigger an event / alarm on the DVR and have the DVR take some type of action.
It is typical for the action to trigger video recording using one or more CCTV cameras connected to the DVR. The following types of alarm input sensors are supported by iDVR-PRO8 and iDVR-PRO16 surveillance DVRs: PIR motion sensors, magnetic door contacts, smoke detectors. These sensors can also trigger sounding a siren that is connected to the alarm relay output of the DVR. The below setup guide will show installers how to setup alarm inputs on an iDVR-PRO Surveillance DVR.
DVR Alarm Sensor Input Wiring
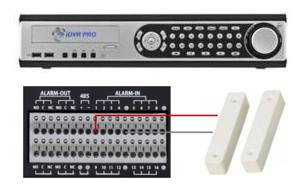
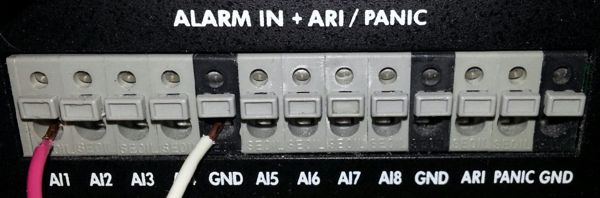
- Connect the alarm input device that you will be using to one of the alarm-in ports on the IO terminal block on the back or your DVR. The inputs are numbered 1-8 or 1-16 depending on your DVR model and the ports labeled "GND" are a shared ground port, which means that you can connect the ground of more than one device to it.
DVR Alarm Configuration
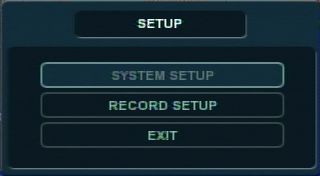
- First, select the Menu icon at the bottom of the DVR home screen. Then select System Setup. (Shown Below)

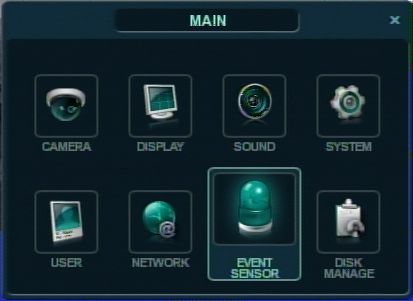
- Now select the Event Sensor option on the menu. (Shown Below)
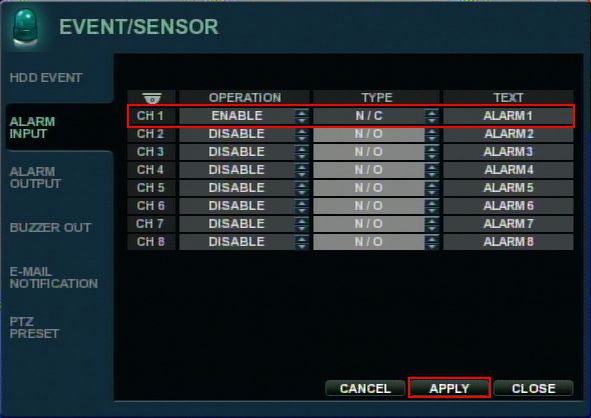
- Then go to the Alarm Input tab on the left. Now select Enable under the Operation tab for the correct channel (If your alarm is connected to alarm input 1 then you will need to enable it under Ch 1). Under the Type tab, select either N / C (Normally Closed) or N / O (Normally Open). This will be determined based on the type of sensor being used. We are using a door contact for this article so we have it set to normally closed that way when the door is opened the alarm triggers. The Text option is for your reference, i.e front room, shed, etc. Click Apply once complete. (Shown Below)
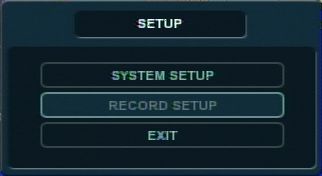
- Now select the Menu icon at the bottom of the DVR home screen. Then select Record Setup. (Shown Below)
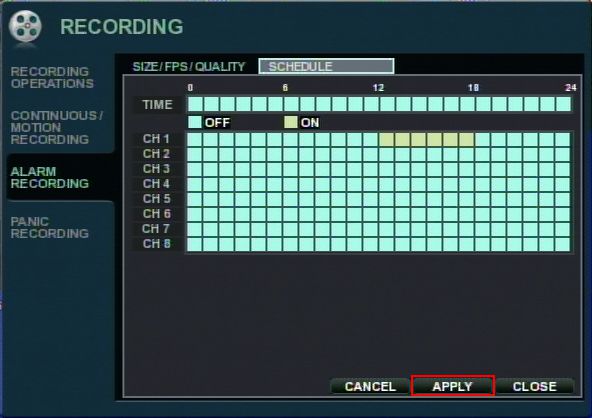
- On the Recording menu, select the Alarm Recording tab on the left. Then under Schedule, select the time(s) for the alarm channel that you wish to have the alarm recording set for. Each colored square represents one hour, the blue color means that there is no recording for that hour and the yellow means that there is recording for that hour. (Shown Below) Your alarm input setup is now complete. If you wish to send an email when the alarm is triggered, please refer to the iDVR-PRO Surveillance DVR Email Alert Setup
About the Author
 This article was written by Mike Haldas, co-founder and managing partner of CCTV Camera Pros. If you have any questions related to it or anything related to CCTV or IP video surveillance, please Mike at [email protected]. This article was written by Mike Haldas, co-founder and managing partner of CCTV Camera Pros. If you have any questions related to it or anything related to CCTV or IP video surveillance, please Mike at [email protected].
|


