The following instructions will demonstrate how to setup the Vivotek VS7100 video encoder with a manually assigned IP address within your local area network (LAN).
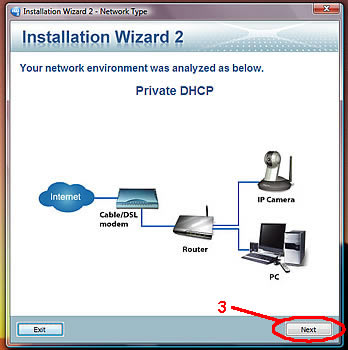
1. Place the Vivotek CD in you CD ROM tray and install the Vivotek Installation Wizard 2 2. Connect the power adapter to the unit and connect the unit to your network switch / adapter via CAT5 cable 3. Run the Installation Wizard 2 to analyze your network environment and detect devices, then Click "Next"
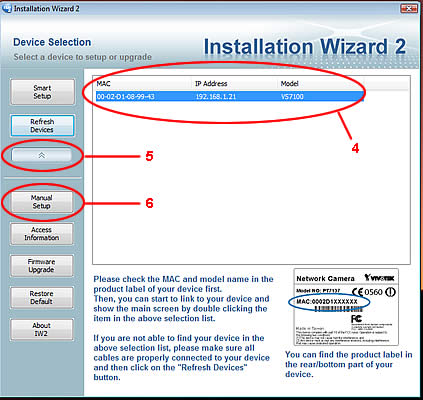
4. Select the device you wish to configure 5. Click the drop-down menu button 6. Click the "Manual Setup" button
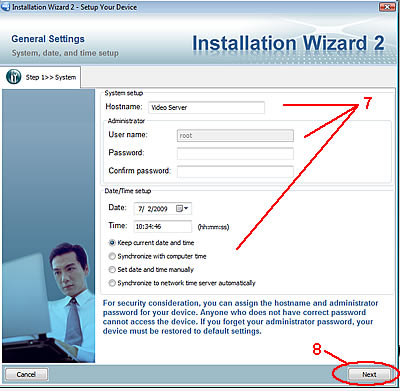
7. On the General Settings page, set Hostname (you may leave the default "Video Server" or type a name of your choice) Create and confirm a password of your choice 8. Click "Next"
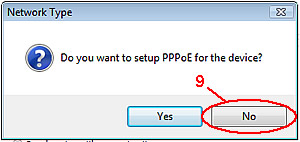
9. When prompted to setup PPPoE, Click "No"
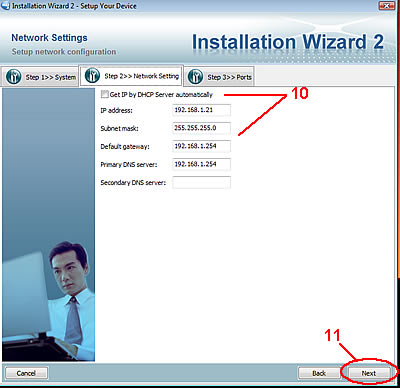
10. Un-check the "Get IP by DHCP Server automatically" and input IP address, Subnet mask, Default gateway, Primary and Secondary DNS server of your choice following proper Internet Protocol naming conventions. 11. Click "Next"
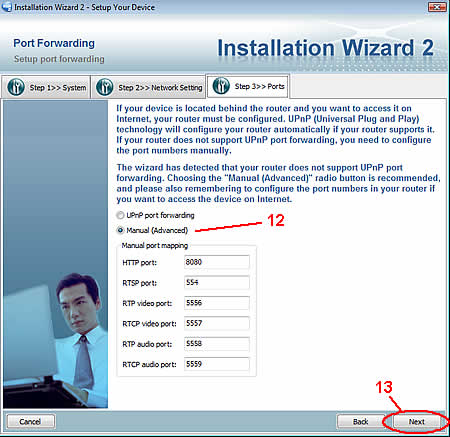
12. Leave default "Manual (Advanced)" radio button selected and default port numbers as they are 13. Click "Next"
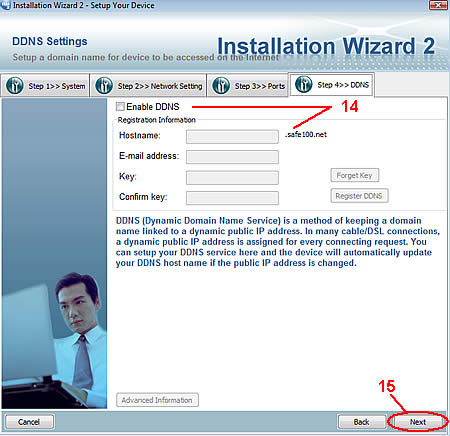
14. Leave "Enable DDNS" check box unchecked and all other fields blank (default) 15. Click "Next"
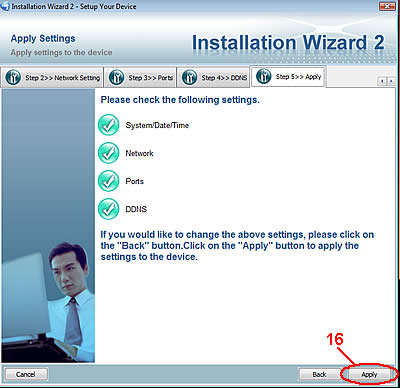
16. Click "Apply"
Your VS7100 Video Encoder / Server is now configured with the IP address and settings for your LAN. You may open your Internet Explorer browser, type in the IP address that you assigned and will be able to connect to your Video Encoder via the web page interface.
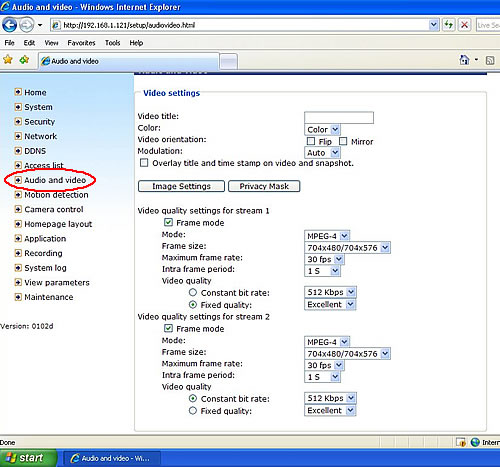
Recommended Video Settings
Click "Audio and video" in left navigation menu
* NOTE: If you are getting a duplicate image in the 704 X 480 Frame size, make sure you have "Frame mode" enabled by checking the box. We hope these instructions have helped you in your video encoder setup. Please call us at 888-849-2288 if you need further assistance or if you want help designing a video surveillance system that's right for you.
Be First to know of our deals and promotions. Sign up for our mailing list: