Viewtron BNC DVR Setup
A Getting Started Guide for Viewtron Hybrid BNC DVRs.
It is recommended to read this guide and watch these videos to assist you with the initial setup of your Viewtron DVR. CCTV Camera Pros also refers customers to this page before they purchase Viewtron DVRs so they are familiar with the installation process.
Setup Topics
Here are the setup topics that are covered in this article in the order they should be performed.
After you unpack your new DVR, locate the power supply and USB mouse that is included. Connect the mouse to the USB port on the front or back of the DVR. The USB mouse is the easiest way to navigate the user interface of the DVR. You can also use the IR remote control if you prefer. Please note that a wireless remote is not included by default.
Next, connect a monitor to your DVR. Even if you do not plan on keeping a monitor connected to your DVR because you will manage your DVR over your network, the initial setup still requires a monitor to be connected. You can use the HDMI or VGA port to connect a monitor. The following monitor resolutions are supported: 1024x768, 1280x1024, 1920x1080 (1080p), 3840x2160 (4K).
Connect the power supply included with your DVR to the power input on the back of the DVR, then to a power source (wall outlet). There is a power switch on the back of the DVR. Switch it on and the DVR will boot up.
Troubleshooting Tip: By default Viewtron NVRs will automatically detect the resolution of your monitor. Occasionally, the resolution auto-detect feature does not work for some TVs / monitors. If you do not see any video when you boot up your NVR in the next step, try holding down the right mouse button for 5 seconds to cycle through the resolutions on the NVR. Each time the NVR beeps, it is moving to the next resolution. If that one does not work, press and hold the right mouse button again for 5 seconds. If you have cycled through all 4 resolutions and you still do not see any video, please try a different monitor.
When your DVR finishes booting up, you need to login before you can access the menu system. The default login is as follows:
- User ID: admin
- Password: a1111111
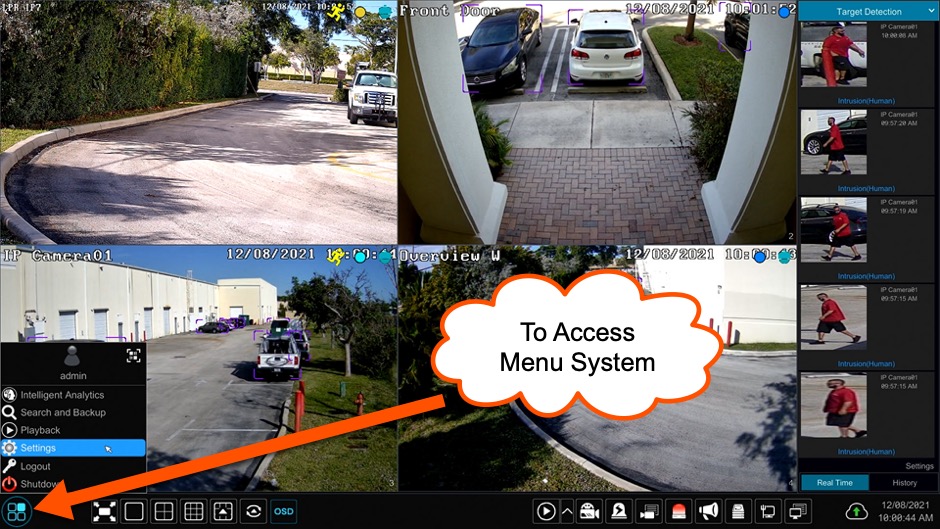
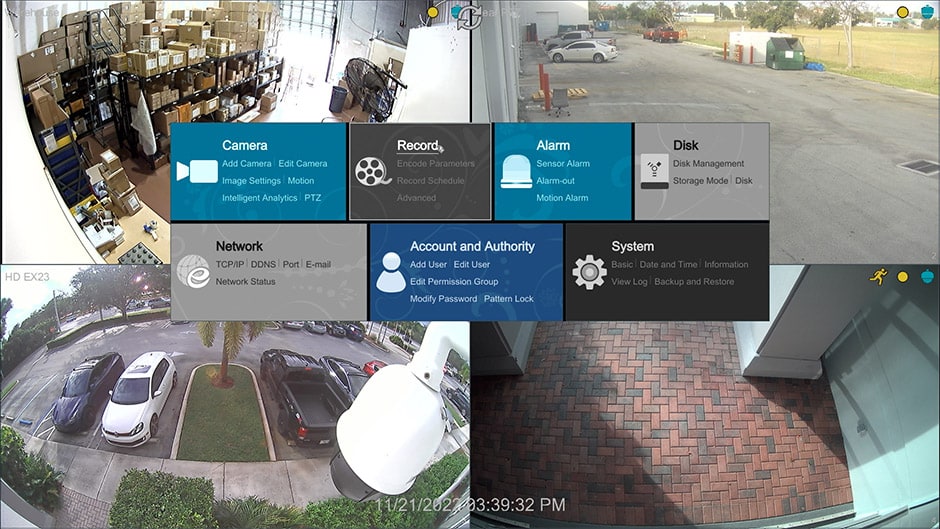
To access the main menu of the Viewtron DVR, use the mouse to press the menu button in the lower left of the screen, then select settings.
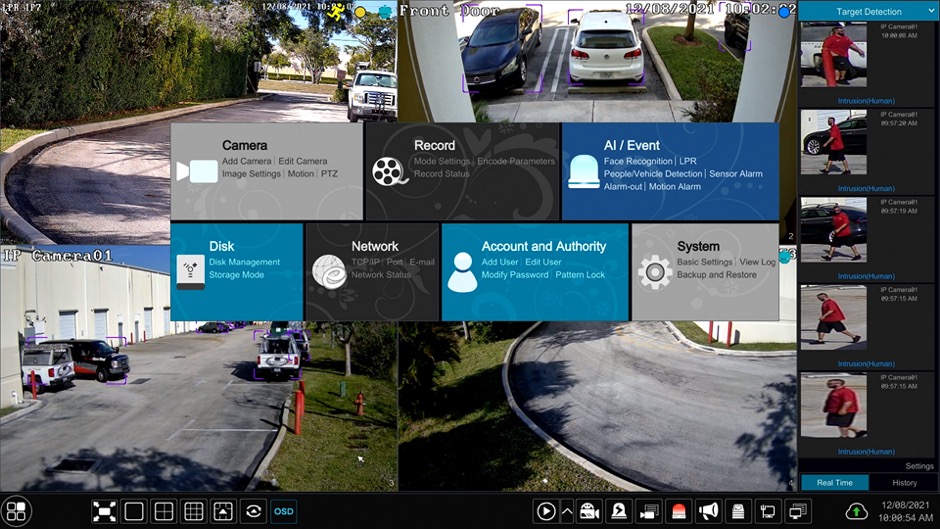
The main settings menu will appear in the middle of the screen as you can see above. From here, you can access all of the DVR's settings.
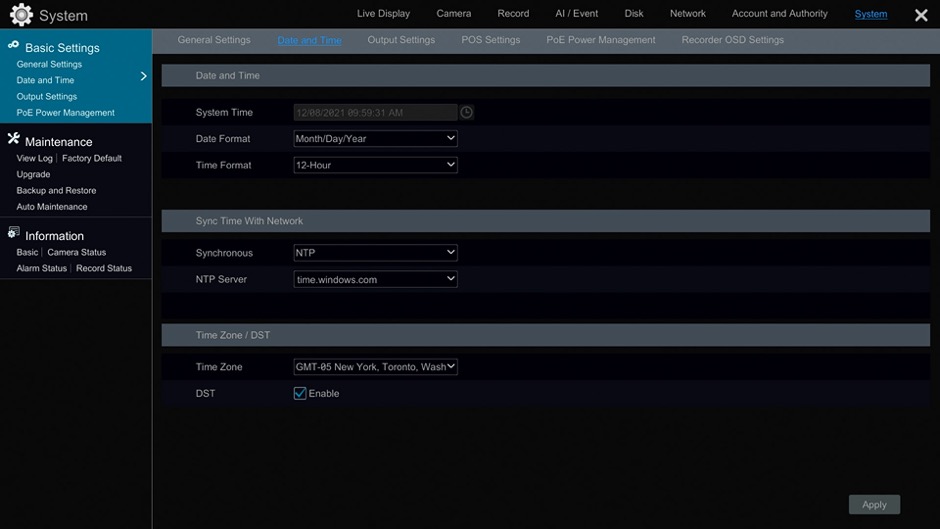
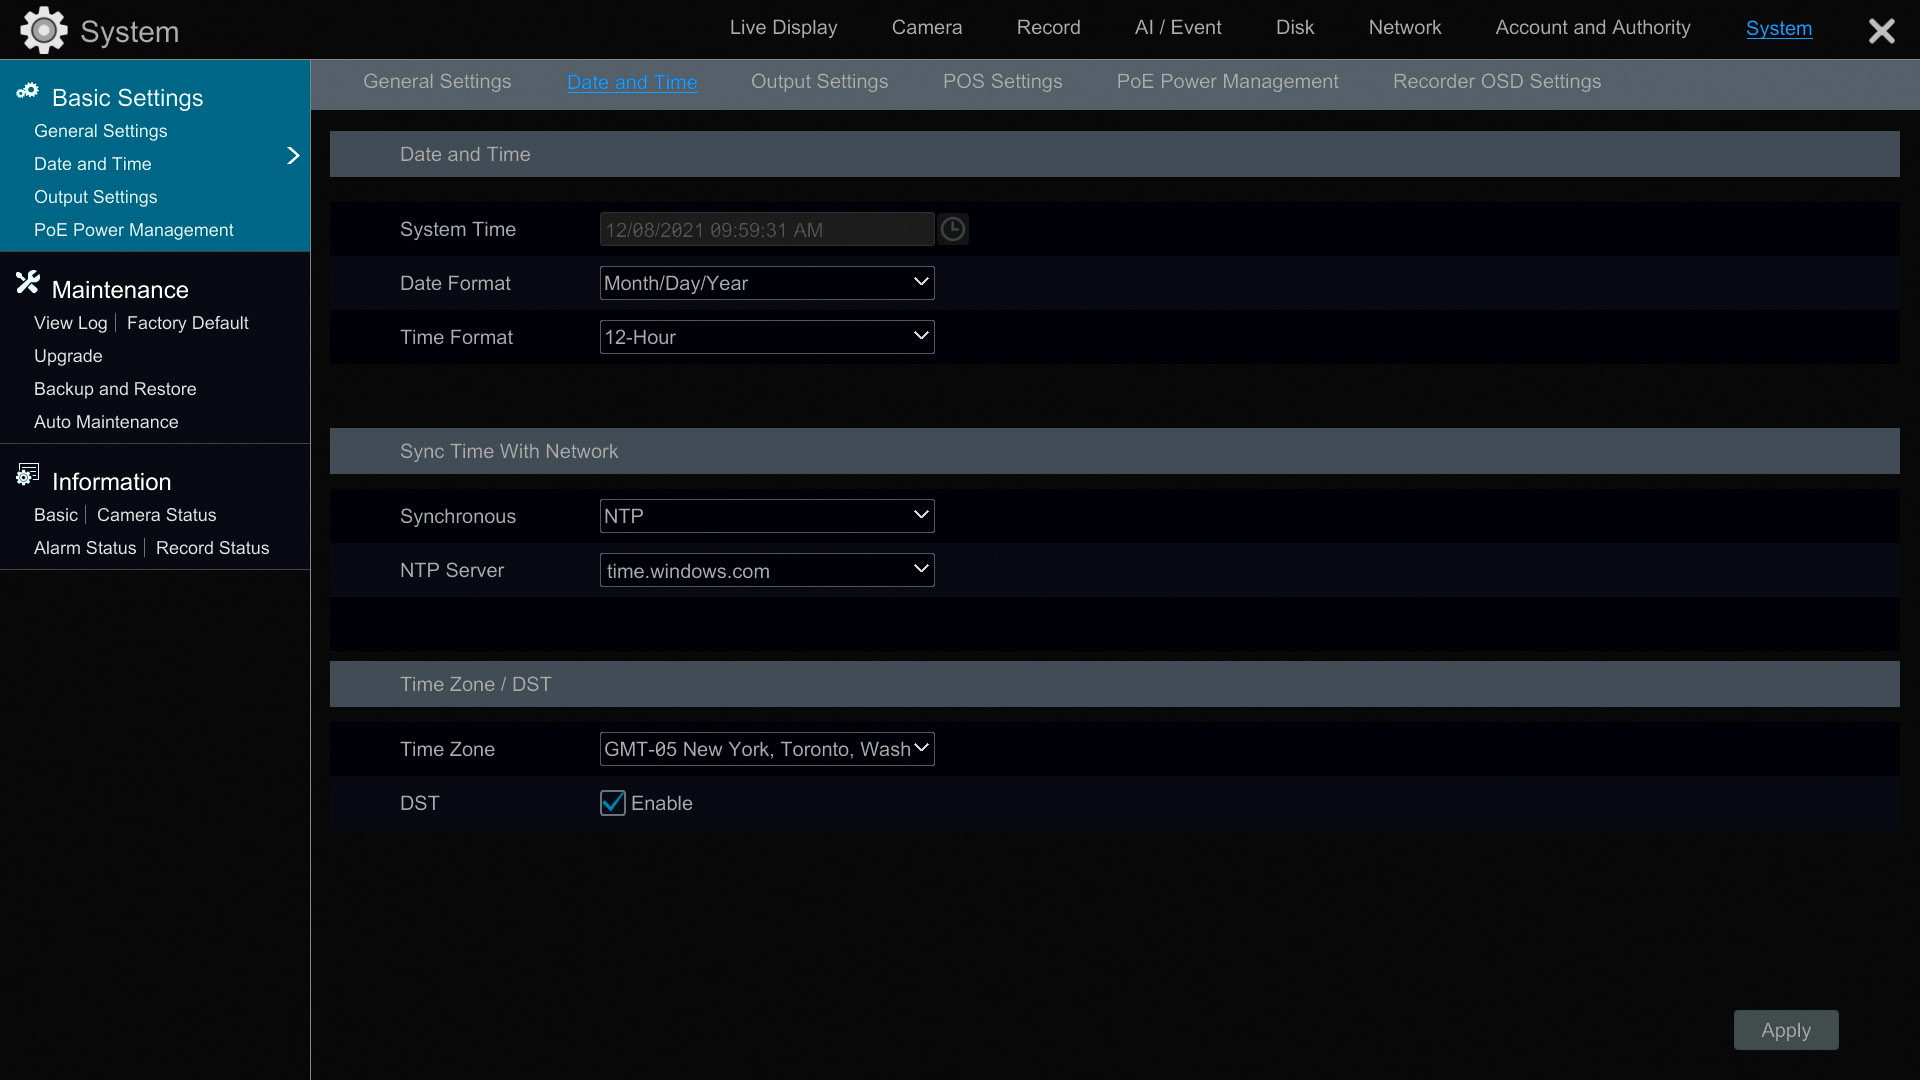
Before you setup video recording on your DVR, be sure to setup the time, date, and time zone. If you plan on connecting your DVR to your network (for local or remote network access), now is a good time to connect the Ethernet port on your DVR to your network. This will allow you to use a time server to keep your DVR's time in sync with your time zone and daylight savings time if applicable. To access the Date and Time settings page, select System from the main settings screen, then Date and Time.
If you are using any new cameras with your DVR, we highly recommend bench testing them before you mount them. What does bench testing mean? It simply means that you connect each camera before you mount them. This can be accomplished by connecting each camera to your DVR and viewing them on the monitor that you connected to your DVR.
Testing your cameras before installation has the following benefits.
Confirm all cameras are working properly before mounting them.
Opportunity to also test all of your cables if you are using premade CCTV cables.
If any of your cameras use an OSD or vari-focal lens, it gives you the opportunity to get familiar with these operations, which is much easier to do on the ground rather than up on a ladder.
Using Pre-made Cables to Wire Your System

If you are using pre-made cables to install your system, we have a complete premade Siamese cable wiring guide that you can find here. Please reference it to see many examples of how pre-made cables can be used to wire analog CCTV and HD BNC cameras. It is a great reference - especially if this is your first installation.
Using RG59 Cable Spools to Wire Your System

If you are using spools of RG59 Siamese cable to install your system, we have a complete RG59 Siamese cable wiring guide that you can find here. Please reference it to see how-to use RG59 coax cable to wire an Viewtron system with analog CCTV and HD security cameras - with individual power supplies or a power supply box. It is a great reference - especially if this is your first installation.
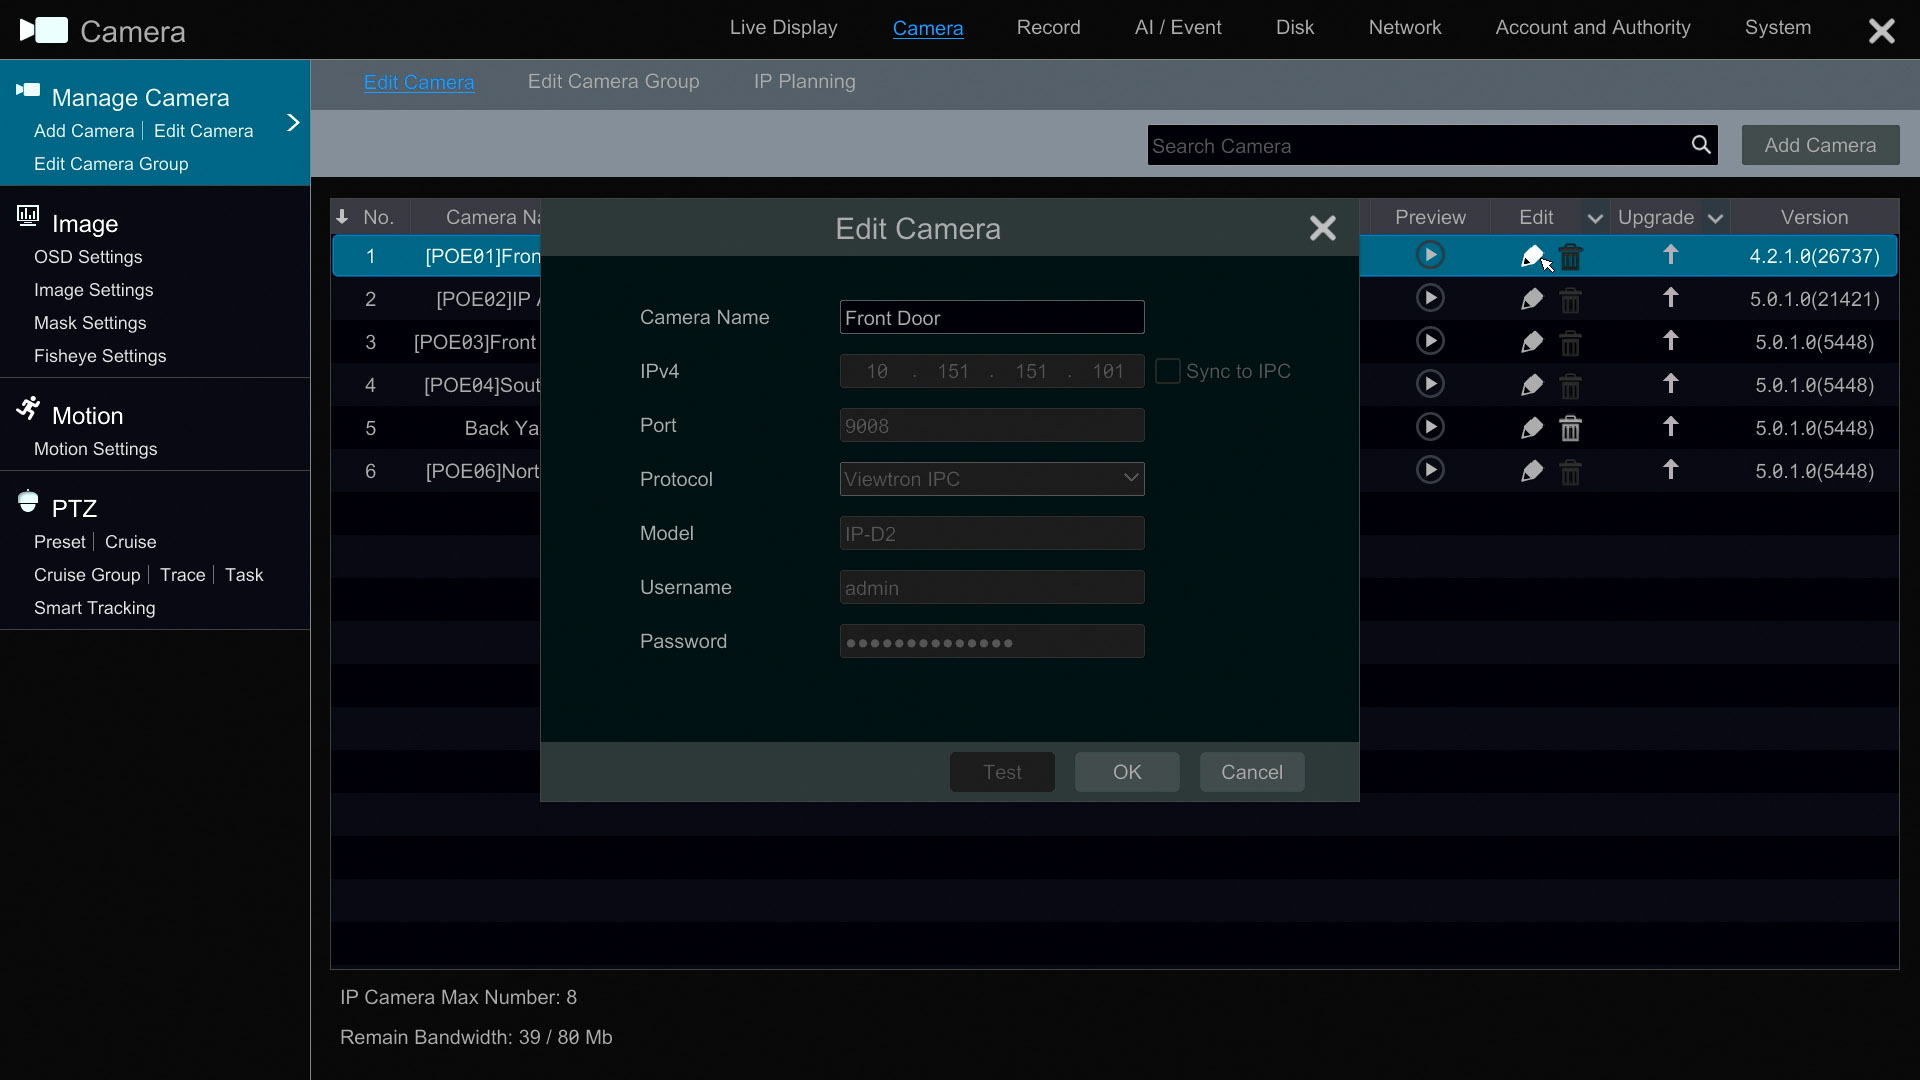
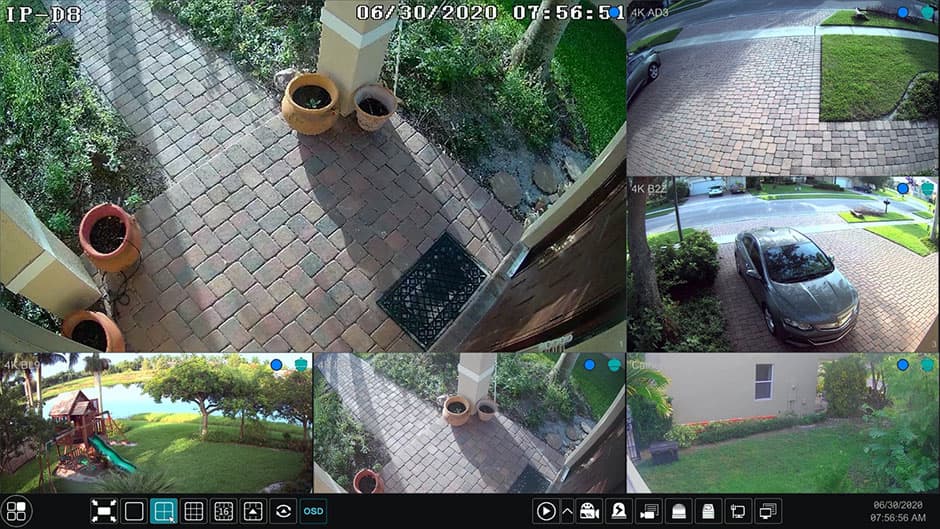
Most likely, you want to name your cameras something useful like "Front Door". This is the name that is displayed in the upper left hard corner of the video window on the live video display and recorded video playback screens for each of your cameras.
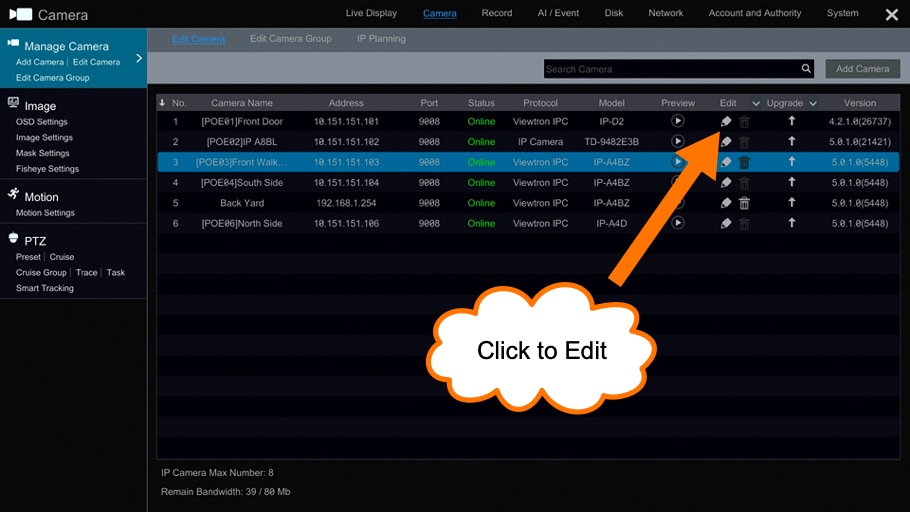
To name / rename your cameras, select Settings from the main menu. Then Camera > Edit Camera.
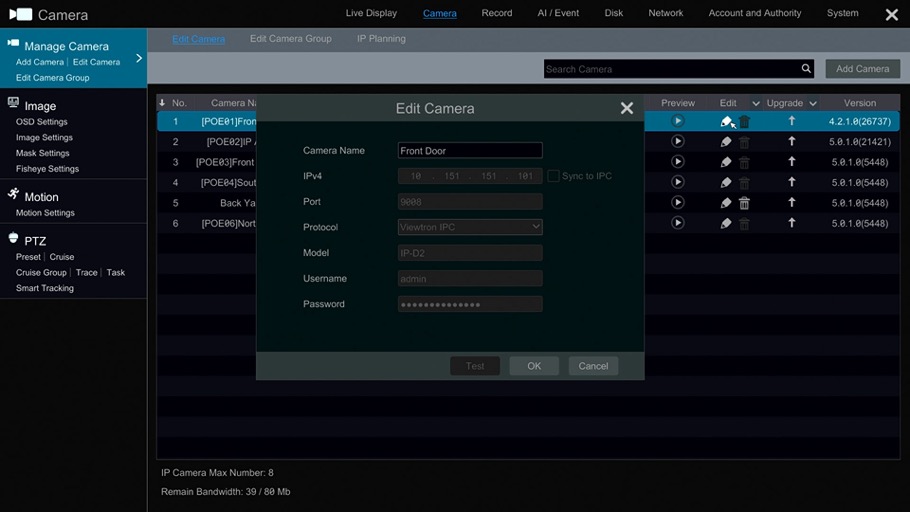
On the Edit Camera screen, click on the edit pencil icon for the camera that you want to name. Enter the name that you want, then click OK.
If you are using third party BNC cameras that use HD-CVI video format, you may experience a problem where they are always displayed in black and white. If this happens, please refer to the below screenshot and instructions.
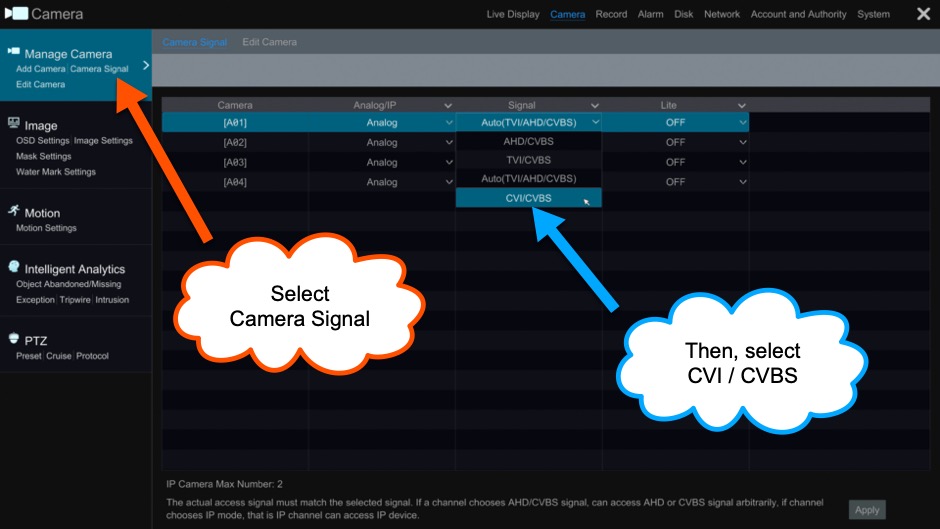
By default, the video signal on all BNC inputs is set to Auto-Detect. This works well for all supported video formats except for HD-CVI. If you are using HD-CVI format cameras, follow these steps. On the DVR user interface navigate to START > SETTINGS > CAMERA > MANAGE CAMERA > CAMERA SIGNAL. On the Camera Signal settings screen change the channel(s) where you are installed an HD-CVI camera to "CVI / CVBS". Then press apply in the lower right. Close the settings screen to go back to the live view of your security camera and confirm that it no properly displays in color.
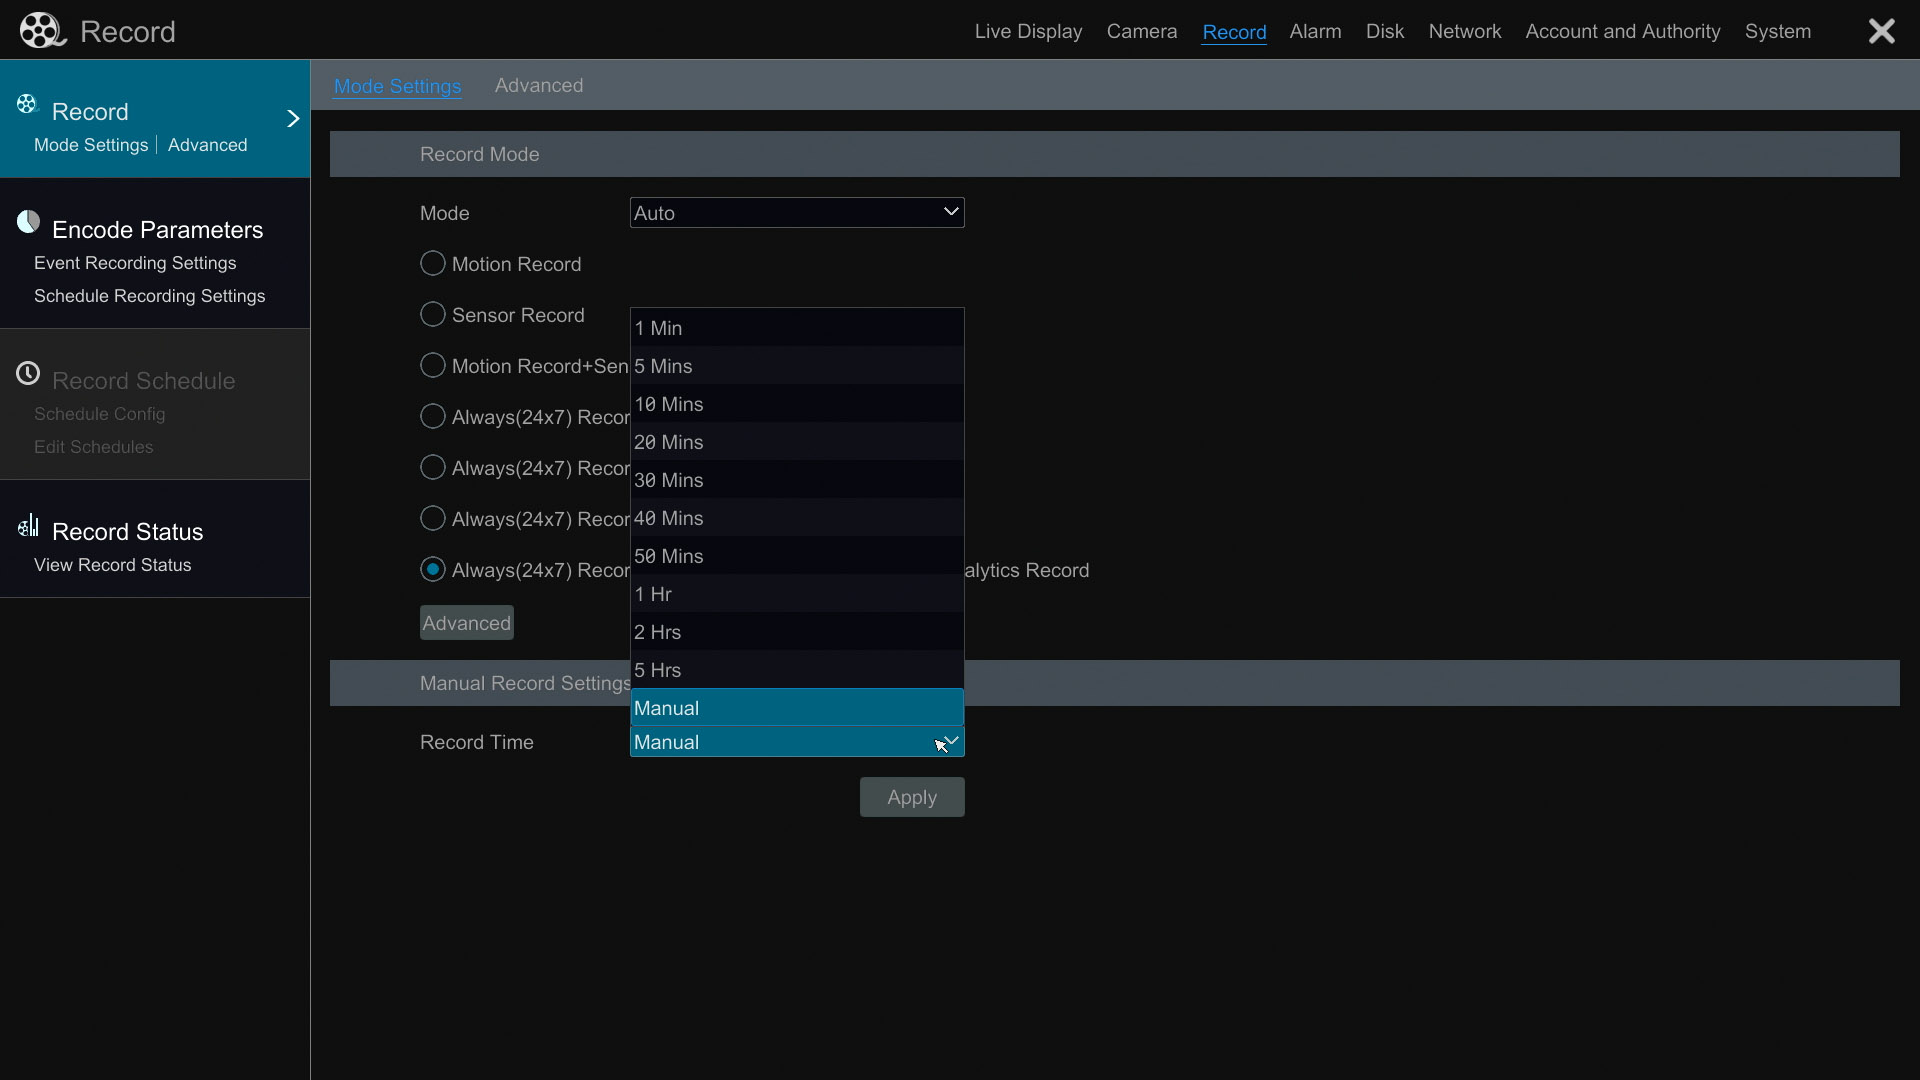
To setup video recording, select the Record link from the main menu.
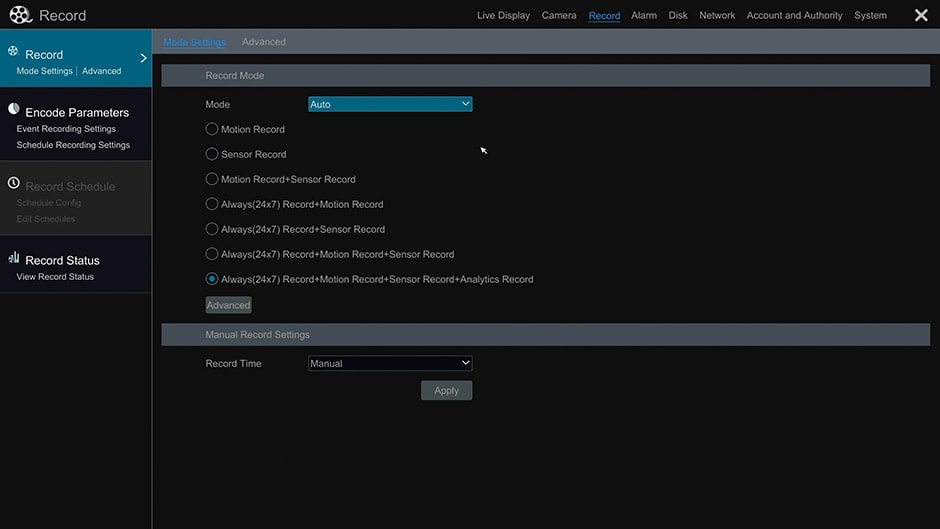
By default, the recording mode is set to Auto. This means for any of the recording types that you select, it will record that using that method 24/7 (around the clock). For example, if you select "Always(24 x 7) + Motion Record" the DVR will record this way on a 24 hour continuous schedule.

The Record Time setting under the Manual Record Setting controls how long the DVR will record for if you click on the manual record button. The Manual setting means until you click the record button again to end recording.

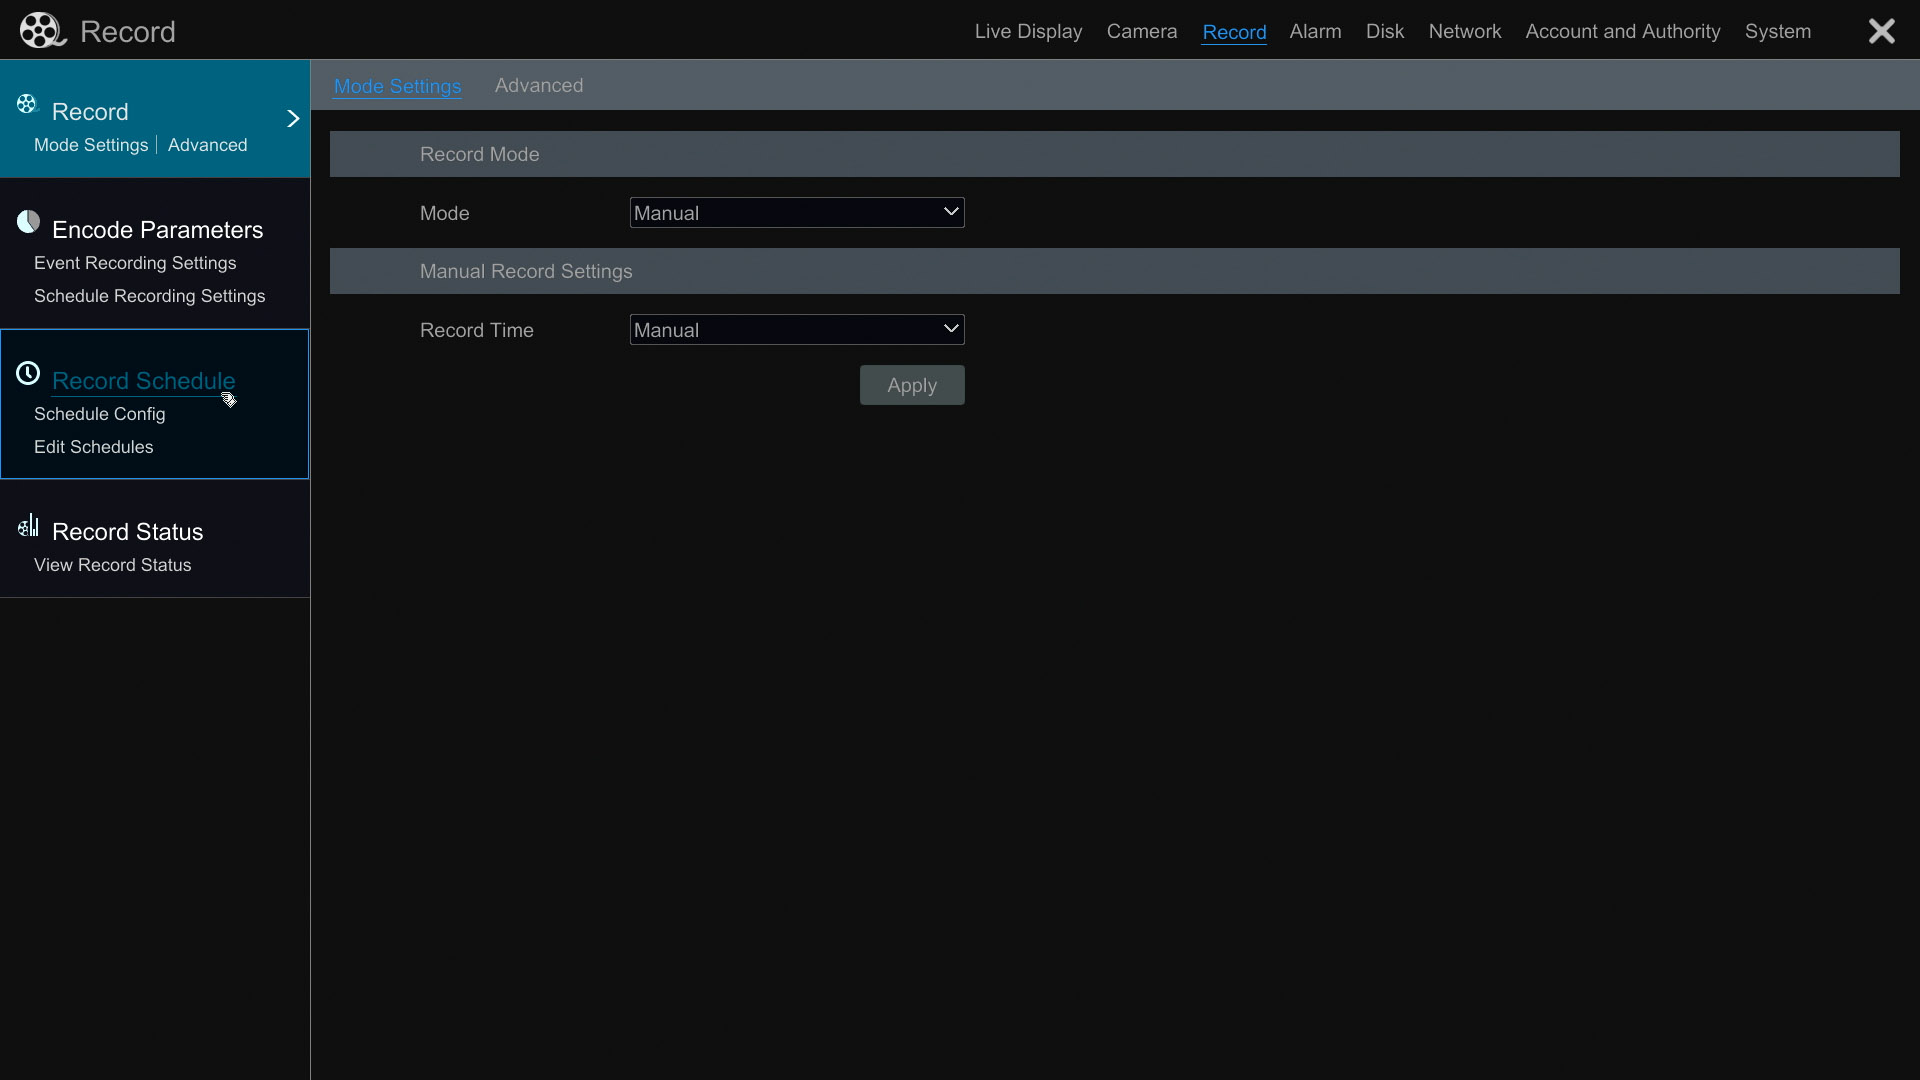
If you want to setup specific time schedules for one or more of the supported recording types, change the record mode to Manual, then press apply.

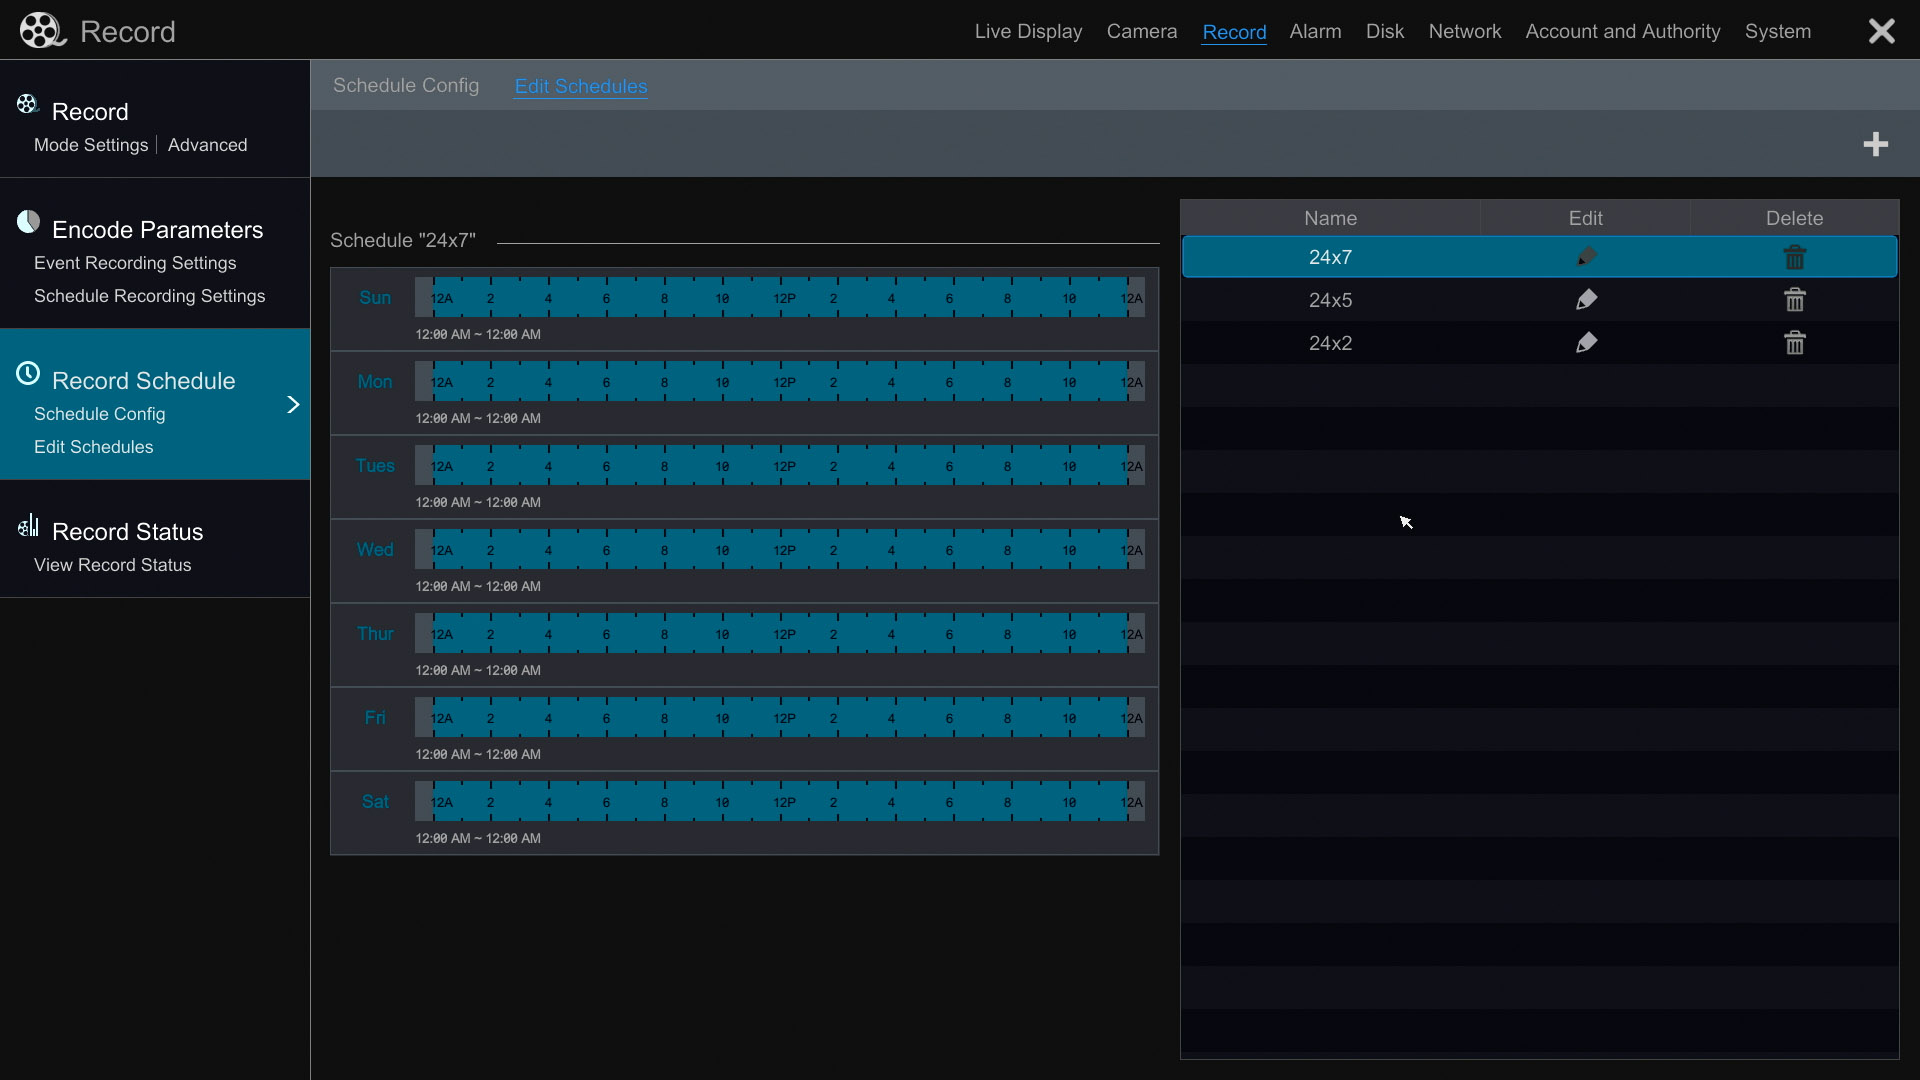
Next click on the "Record Schedule" link on the right menu. On this screen you can select a schedule for each recording type on a per camera basis. For example, you can setup camera 1 to record on motion 24x7 and camera 2 to record only on weekends from midnight to 5 am.

You can click on the Edit schedules link on the left to edit the existing schedules. Or you can click on the + button in the upper right to create one or more custom schedules that you can apply.
Watch this video to see an overview of the user interface of Viewtron DVRs.
Mobile App Setup
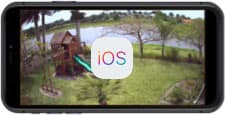
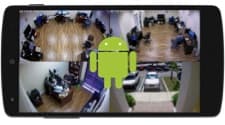
If you want to setup the mobile app for iPhone or Android to remotely access your security camera system, you can find the
mobile app setup page here.
NVMS Software Setup (Windows & Mac Software)
If you want to setup the NVMS software (network video management software) for Mac and Windows to remotely access your security camera system, you can find the
NVMS setup page here.
Additional Setup
This article is our recommended starting point to set up a new Viewtron DVR. There are many additional configuration options that Viewtron is capable of. Please refer to these pages for more support and setup information.
Learn more about Viewtron Security Camera DVRs
Learn more about the latest Viewtron
hybrid security camera DVRs here.
Works with Analog CCTV, Network IP, and HD BNC Security Cameras
Users can mix and match different camera technologies. This is perfect for customers that have existing CCTV cameras and want to upgrade to high definition over time. Hybrid iDVR-PROs work with the following security camera types and resolutions.
4K security cameras
- AHD Cameras (720p, 1080p / 2mp, 3mp, 4mp, 5mp, 4K / 8mp / 4K)
- HD-TVI Cameras (720p, 1080p / 2mp, 3mp, 4mp, 5mp, 4K / 8mp / 4K)
- HD-CVI Cameras (720p, 1080p / 2mp, 3mp, 4mp, 5mp, 4K / 8mp / 4K)
- Network IP Cameras - ONVIF compatible IP cameras up to 4K resolution supported
- Analog CCTV Cameras (all analog resolution supported including CIF, D1, 960H)
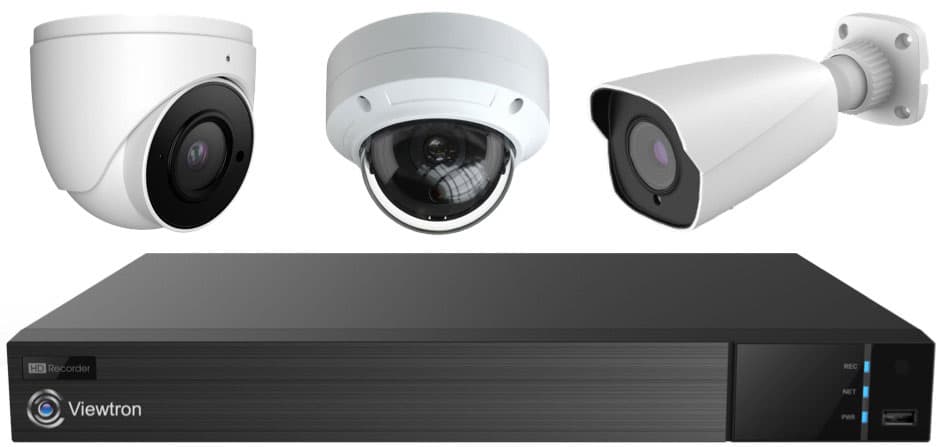
Complete BNC Camera Systems
CCTV Camera Pros has these pre-configured
HD security camera systems available.
CCTV Camera Pros can also provide a custom surveillance system quote that includes any Viewtron DVR or NVR model. We can include security cameras, cables, connectors, power supplies, and monitors. We can even mix and match IP cameras and HD BNC security cameras because Viewtron DVRs are hybrid. This means that they work with just about any type of security camera. As you have probably already seen on our website, we have 2, 4, 8, 16, and 32 camera surveillance systems in pre-made packages. However, it is not possible for us to package up every combination and quantity of all the different camera models that we carry. So, we can also provide you with a custom quote with as many cameras as you need and a mix of any combination of camera model(s) based on your project requirements. Please
request a quote when you are ready.

|