|
 Geovision IP Camera Network Setup Geovision IP Camera Network Setup
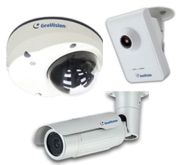
This article explains how to forward the correct ports in your router to enable remote access to your Geovision IP Cameras. The Geovision IP Cameras can be remotely accessed from a number of devices including iPhone, iPad, Windows, BlackBerry and Android mobile devices. In addition to mobile devices, the Geovision cameras can be accessed through PC web browsers and central management software.
Geovision IP Camera Network Setup
1. First ensure that the PC and Geovision IP Camera are connected to a router. Then obtain the IP Address of your Geovision IP Camera. This can be done by installing and using the GV IP Device Utility included in disc form with your Geovision camera (1.1). (Please write down the IP Address, you will be using it in the steps to come). (Shown Below)

2. Now select your routers brand below for specific Port Forwarding instructions.
2Wire
Comcast SMC
DLINK
Linksys
Netgear
Zyxel
3. Now you have to make sure the ports forwarded are open. You can do this by going to http://dvrport.net
Enter the remote IP address of your Geovision camera under Enter IP or Hostname. Change the Enter Port To Scan field to read 80 and press scan. (Do this for ports 5552 and 10000 as well).
NOTE: If the port is open you will use the remote IP Address you get from the http://idvrport.net . However you will need to type it in as follows via web browser - http://ipaddress:port number, eg. if your IP Address is 192.168.0.10 then it should look like this when you type it into your web browser - http://192.168.1.10:80
NOTE 2: If the ports are showing closed and you have a DSL provider, you will need to call your provider and have them bridge the modem to your third party router. This is a standard procedure.
|


