Surveillance Video Recording Setup for iDVR-E CCTV DVRs
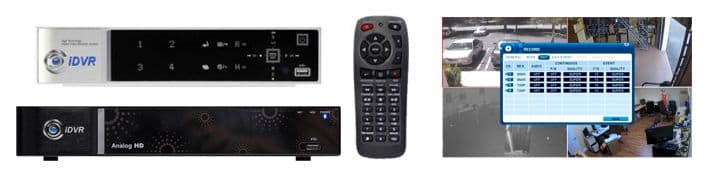
Follow these instructions to setup surveillance video recording for iDVR-E CCTV DVRs (original analog models and SD / HD hybrid models). The iDVR-E from CCTV Camera Pros supports continuous, schedule based, alarm, and motion detection recording modes. These modes can also be combined. For example, you may want to record continuously but also bookmark motion detection events. You can find the iDVR-E CCTV DVRs these instructions are applicable to here.
Important Note: these instructions were documented by using the infrared remote control included with the DVR. Users can also use the USB mouse that is included to navigate the menu system of the DVR.
Recording Modes
iDVR-E CCTV DVRs support the following video recording modes.
Setup Instructions
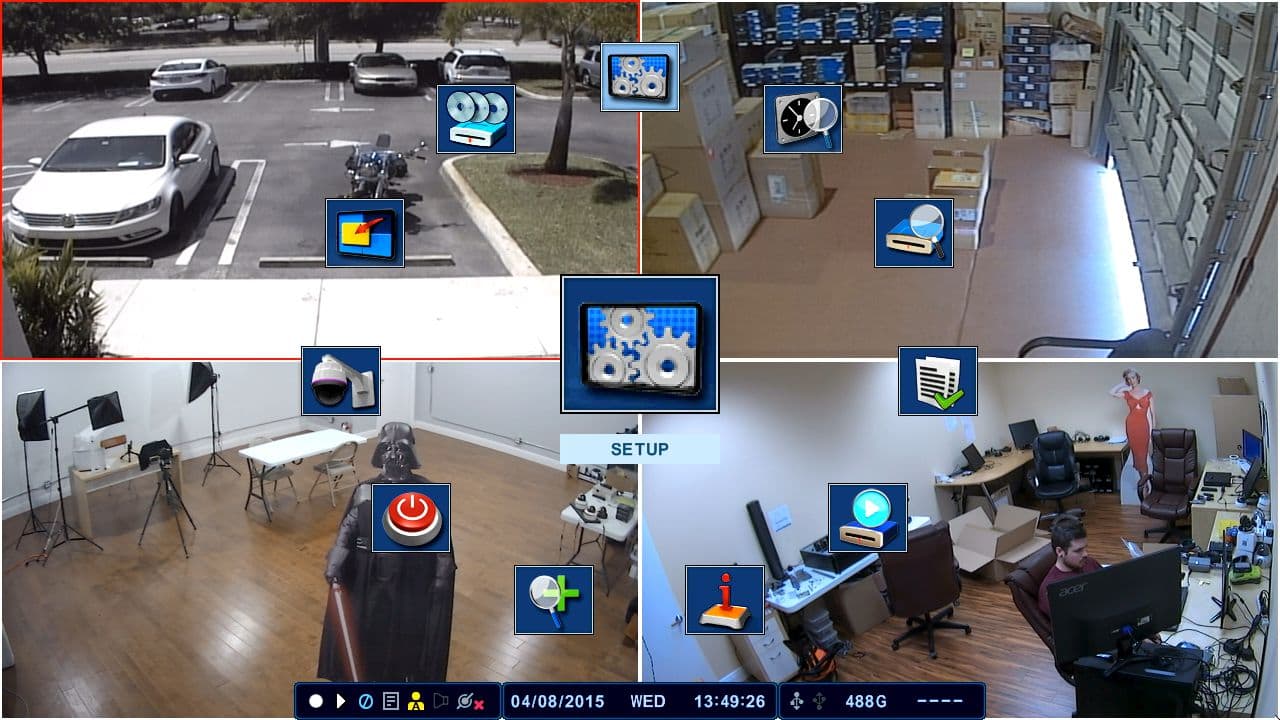
First press the
Menu button on the included IR remote control (Shown Below).
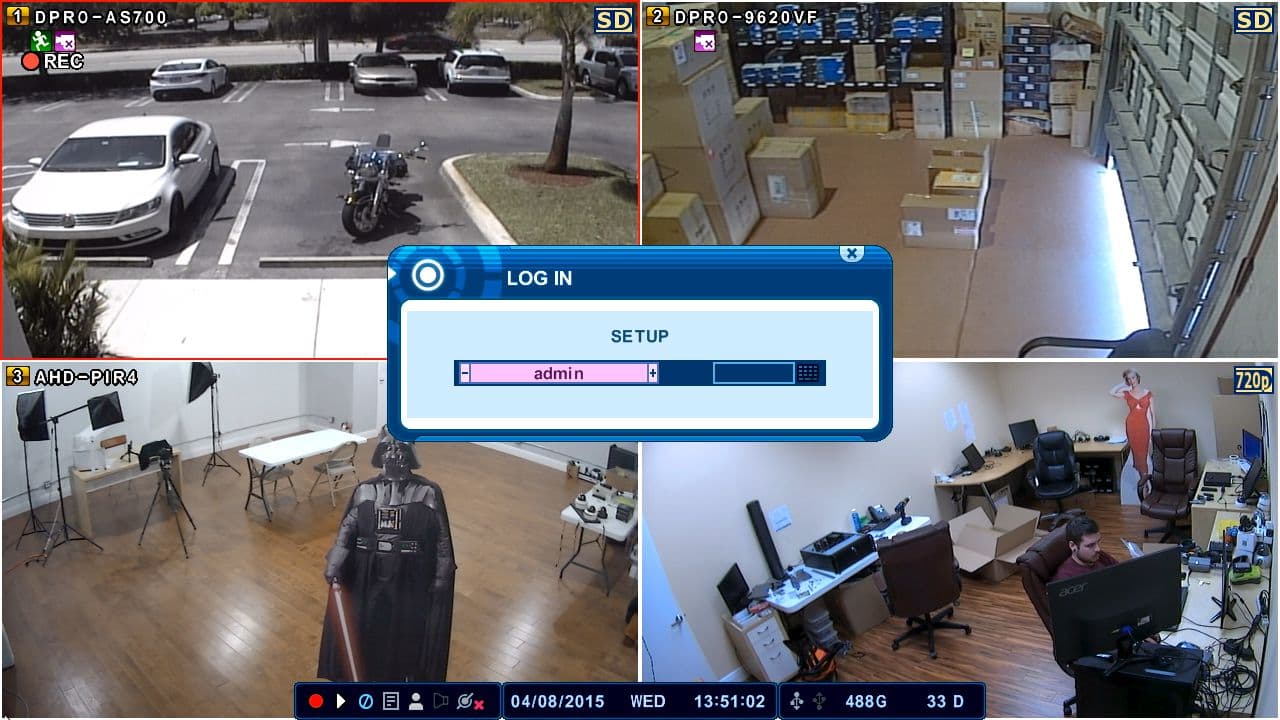
You will then be prompted to enter the password of the DVR to continue, "
000000" (six zeros) by default. (Shown Below)
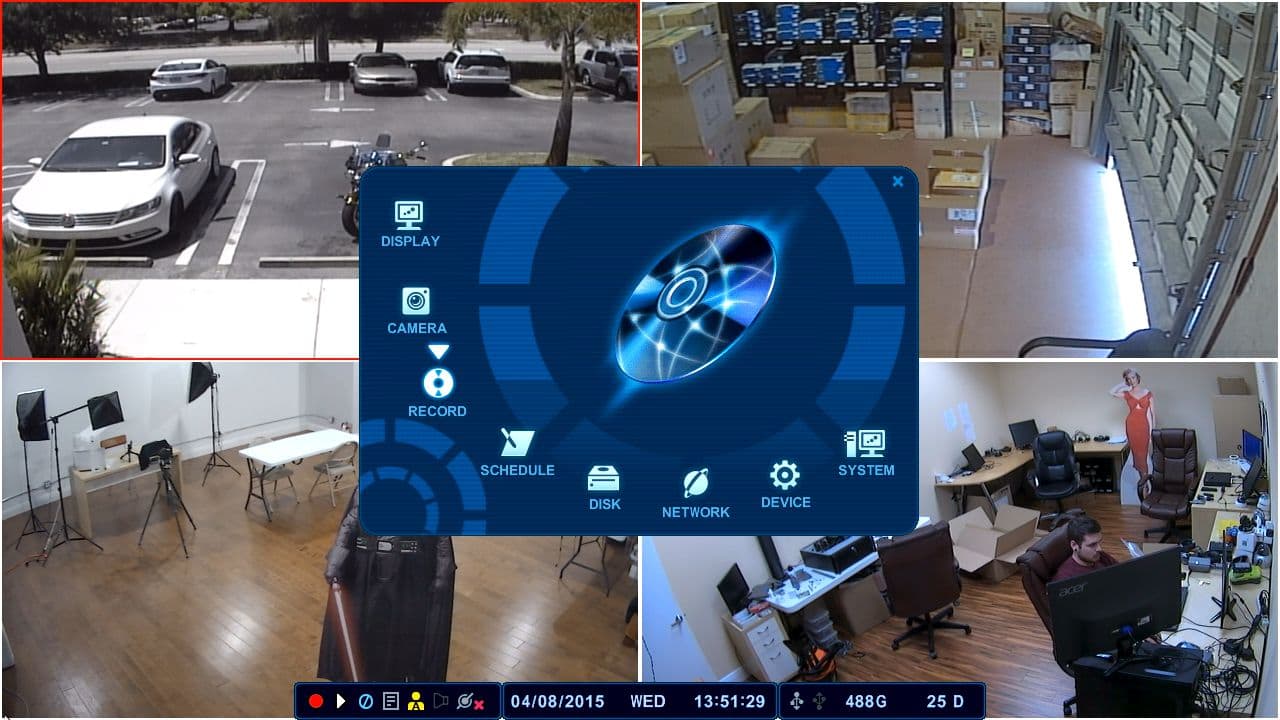
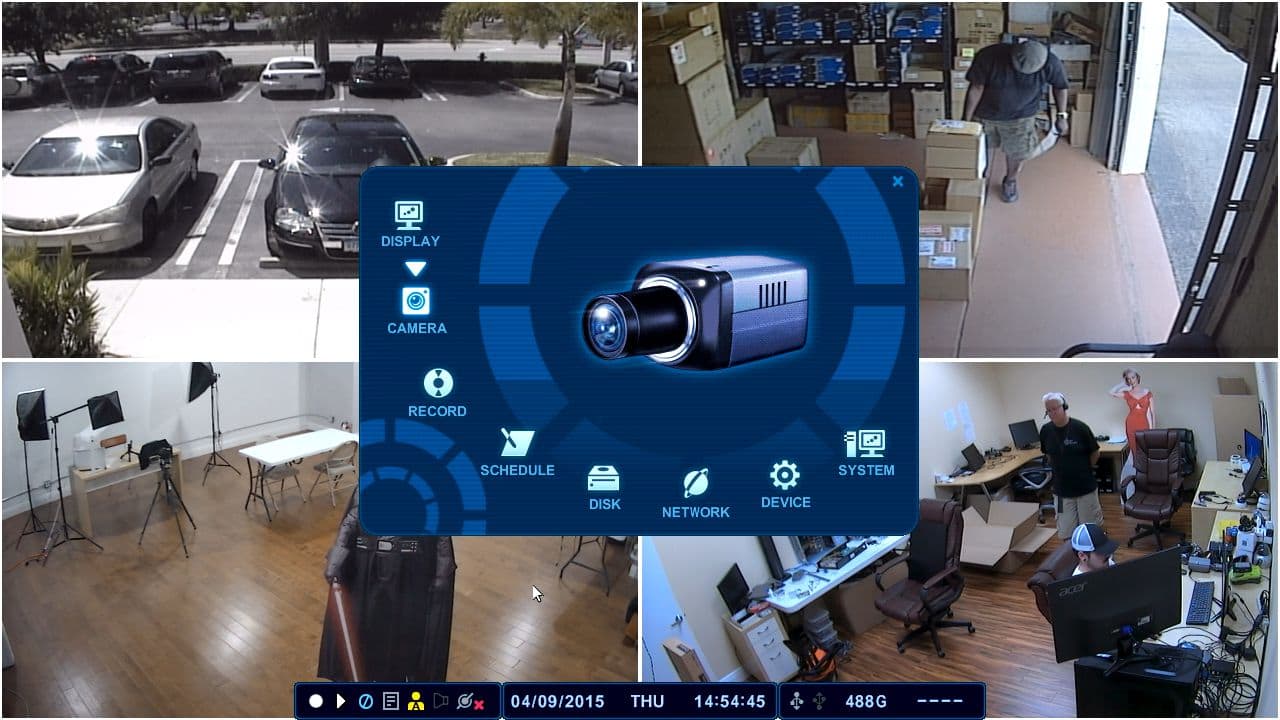
Now, locate the
Record icon and press Enter. (Shown Below)
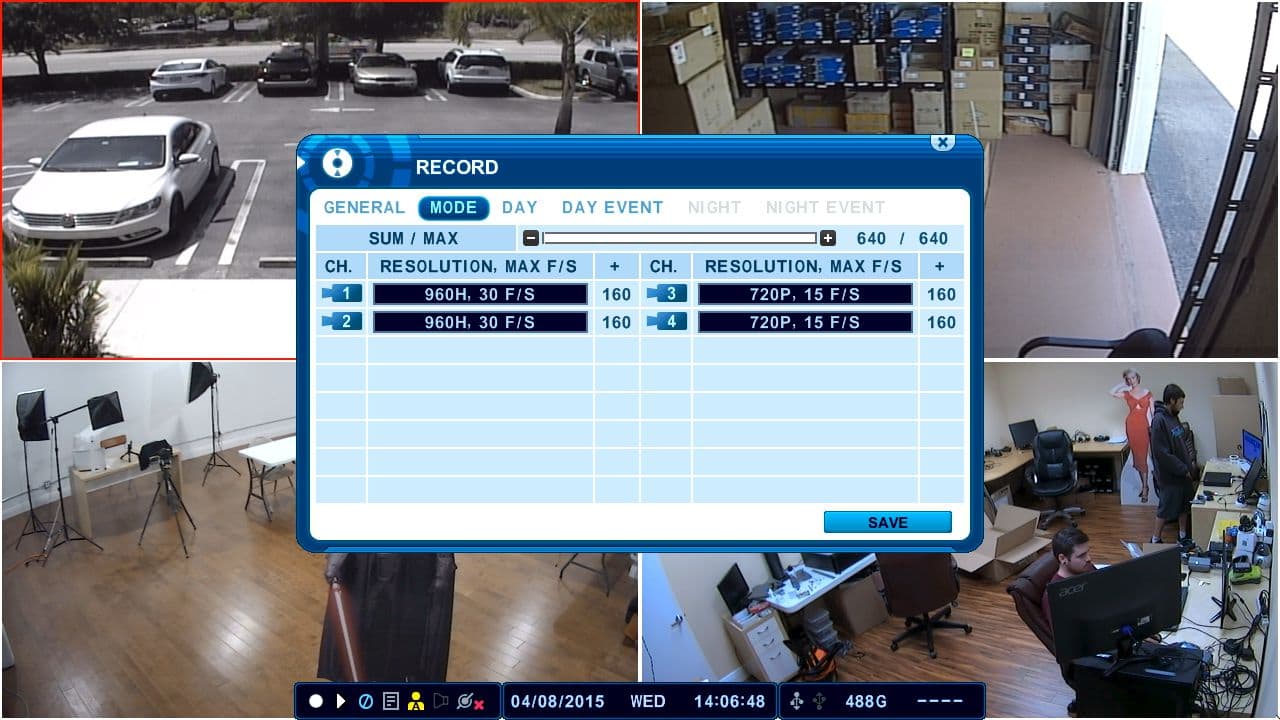
Then under the
Mode tab on the Record menu, select the Resolution and Max F/S (frames per second) you would like to allocate for each channel using the "+" and "-" buttons on the IR remote. Now press the Save button in the lower right and continue to one of the recording modes listed above. (Shown Below)
Continuous Recording
On the main menu of the DVR, locate the
Record icon and press Enter. (Shown Below)
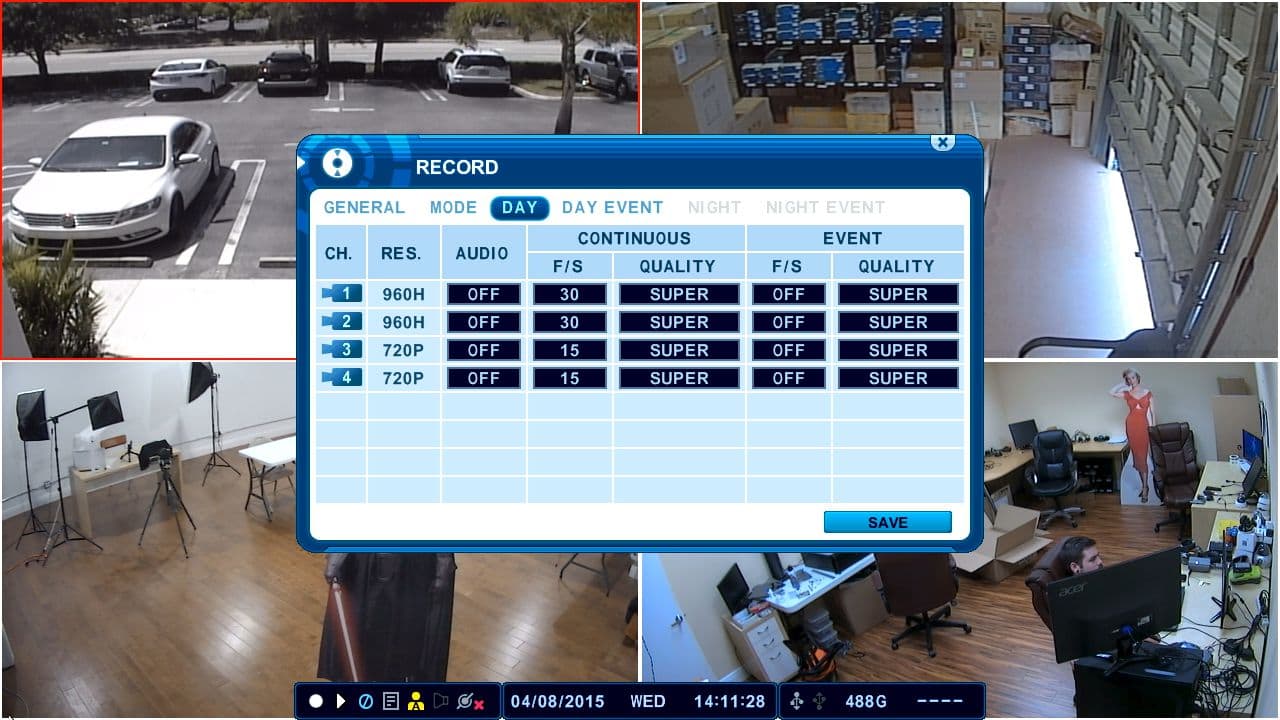
Under the
Day tab located on the Record menu, set the F/S (frames per second) and recording Quality under the Continuous list for each camera using the "+" and "-" buttons on the IR remote control (Make sure that the F/S under Event is set to Off). Then press Enter on the Save button in the lower right corner to continue. Your DVR is now set to record continuously, press the Record button to initiate. (Shown Below)
Continuous Recording Setup Video
Watch this video to learn how to setup continuous surveillance video recording on iDVR-E CCTV DVRs.
Motion Detection Recording / Alarm Trigger Recording
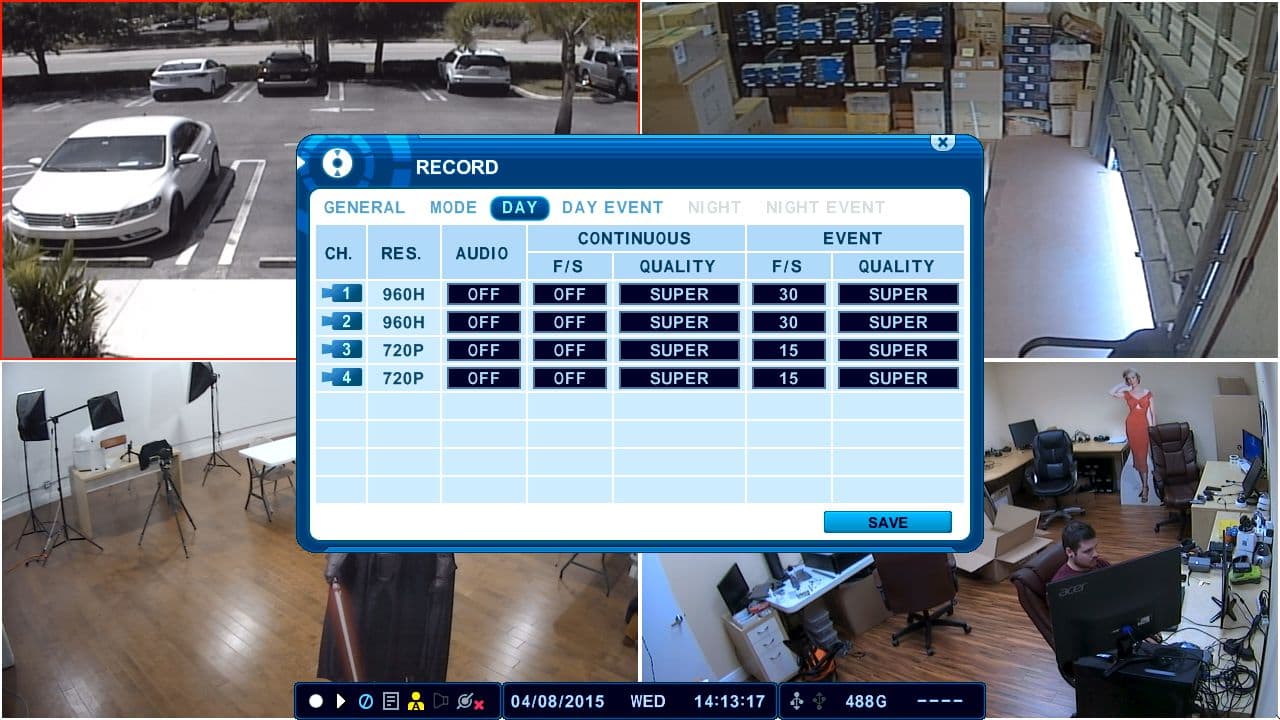
Under the
Day tab of the Record menu, set the F/S (frames per second) and recording Quality under the Event list for each camera using the "+" and "-" buttons on the IR remote control (Make sure that the F/S under Continuous is set to Off). Select the Save button to continue. (Shown Below)
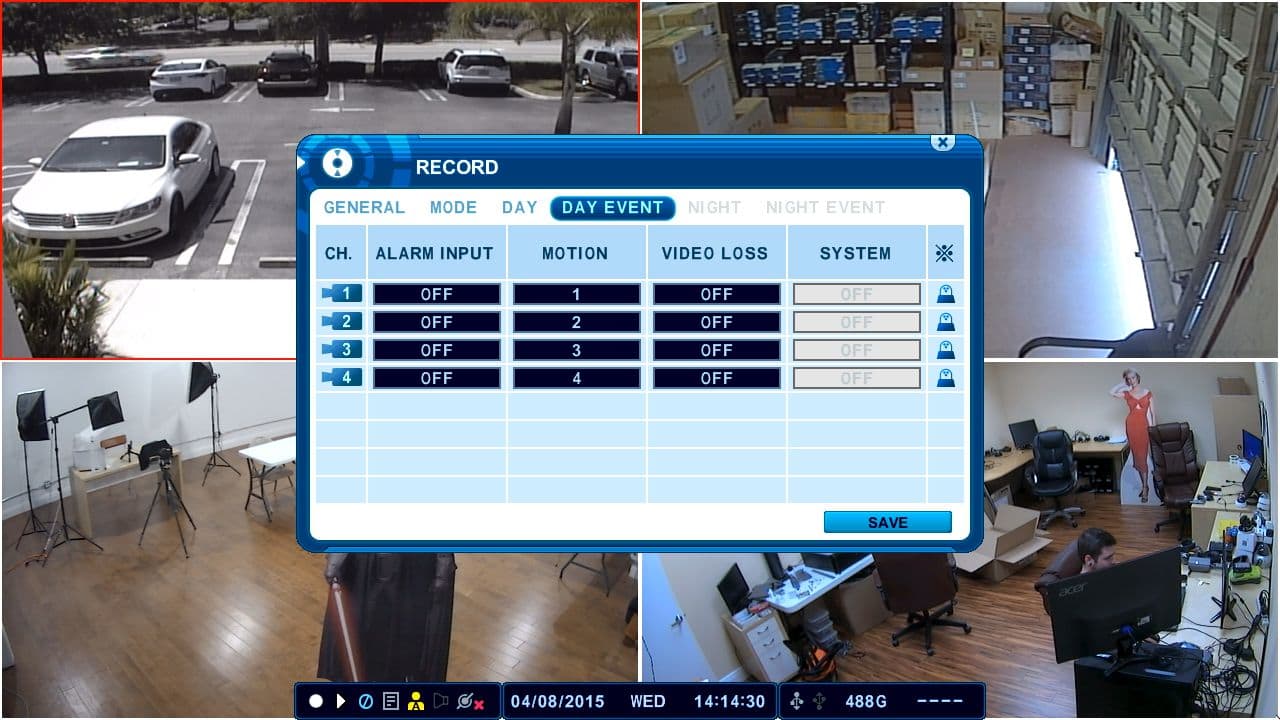
Now move to the
Day Event tab, one tab to the right. In this section you will be able to set Motion and / or Alarm Input triggers to each camera using the "+" and "-" buttons on the IR remote control (In order to use the alarm option you will have to have a trigger device, such as a door sensor, connected to the DVR). As you can see in the illustration below, we have each channel set to motion and alarm triggers set to off. Press the Save button in the lower right to continue. Now press the Record button to initiate the recording. (Shown Below)
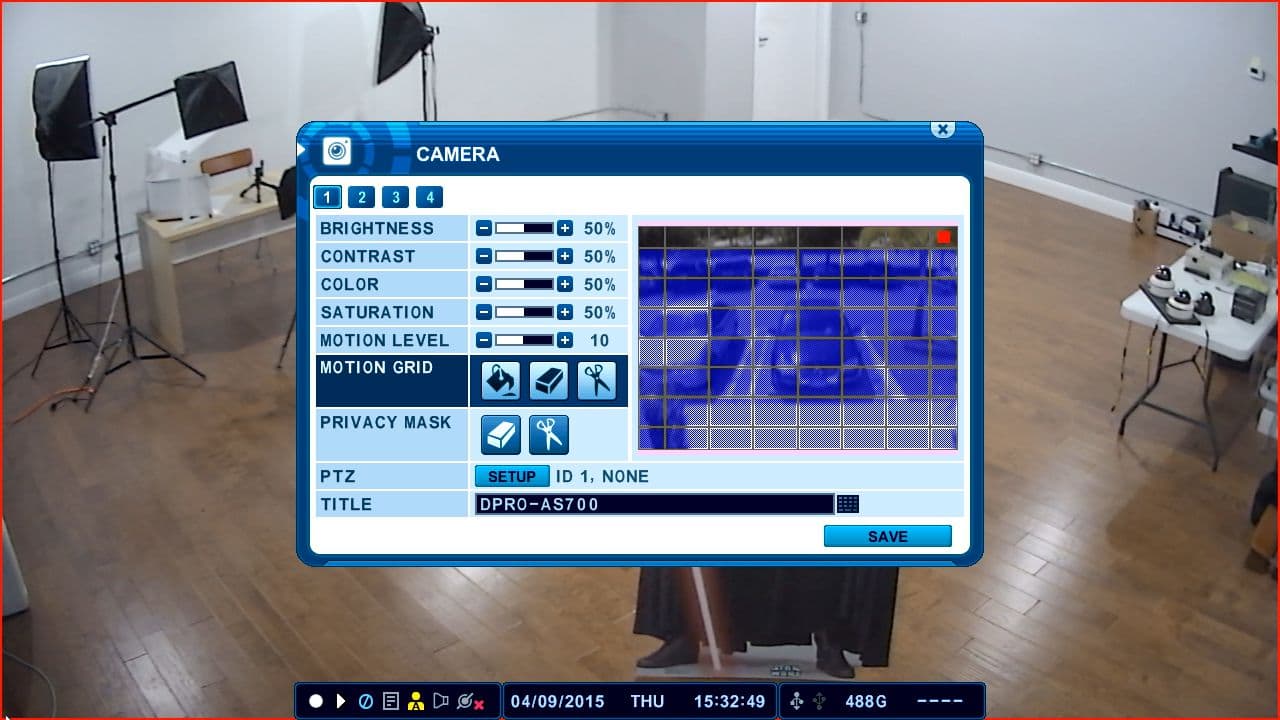
Now the next step is to setup the
Motion Mask and the Motion Sensitivity. First on the main menu, locate and select the Camera icon. (Shown Below)
Then scroll down to the
Motion Grid section, by default the whole grid is set to trigger motion (blue tiles). If you wish to completely mask the section (no motion detection at all), select the Eraser icon and press enter. All of the tiles will now be clear (To reverse it, simply select the Paint Bucket icon). If you wish to only mask part of the camera view, select the Scissors and using the arrows on the remote to navigate over each square that you wish to mask. Then press the Enter button. You will see that the entire top row of our grid is masked (grey tiles) and motion will not be triggered in that area. To setup the Motion Sensitivity, scroll to the Motion Level section and adjust it using the "+" and "-" buttons. The higher the number the more sensitive it will be. (Shown Below)
Motion Detection Recording Setup Video
Watch this video to learn how to setup motion detection surveillance video recording on iDVR-E CCTV DVRs.
Scheduled Recording
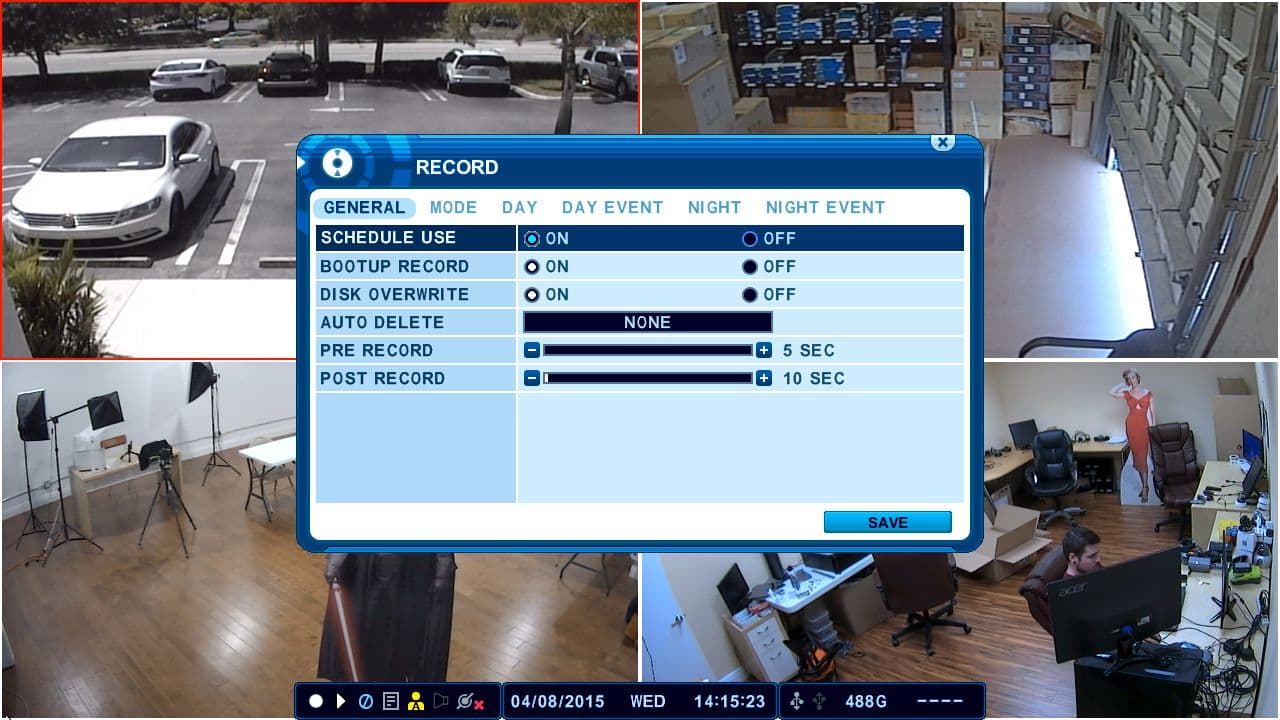
First, still on the
Record menu, move over to the General tab. Now ensure that Schedule Use is set to ON and press the Save button in the lower right corner. (Shown Below)
Then return to the main menu by pressing the
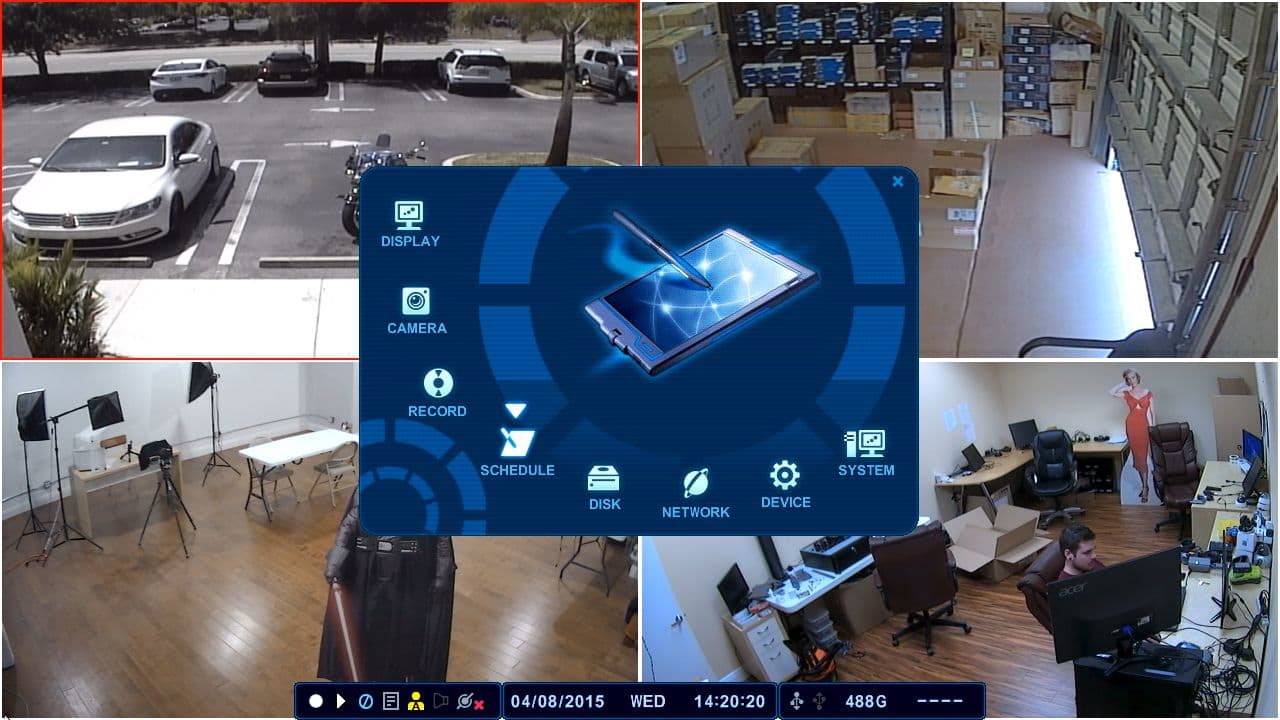
Menu button on the remote control. Select the
Schedule icon and press Enter. (Shown Below)
Then on the
Schedule menu under the Chart tab, select the day you wish to setup (select Custom to setup one setting for all days) and press Enter. (Shown Below)
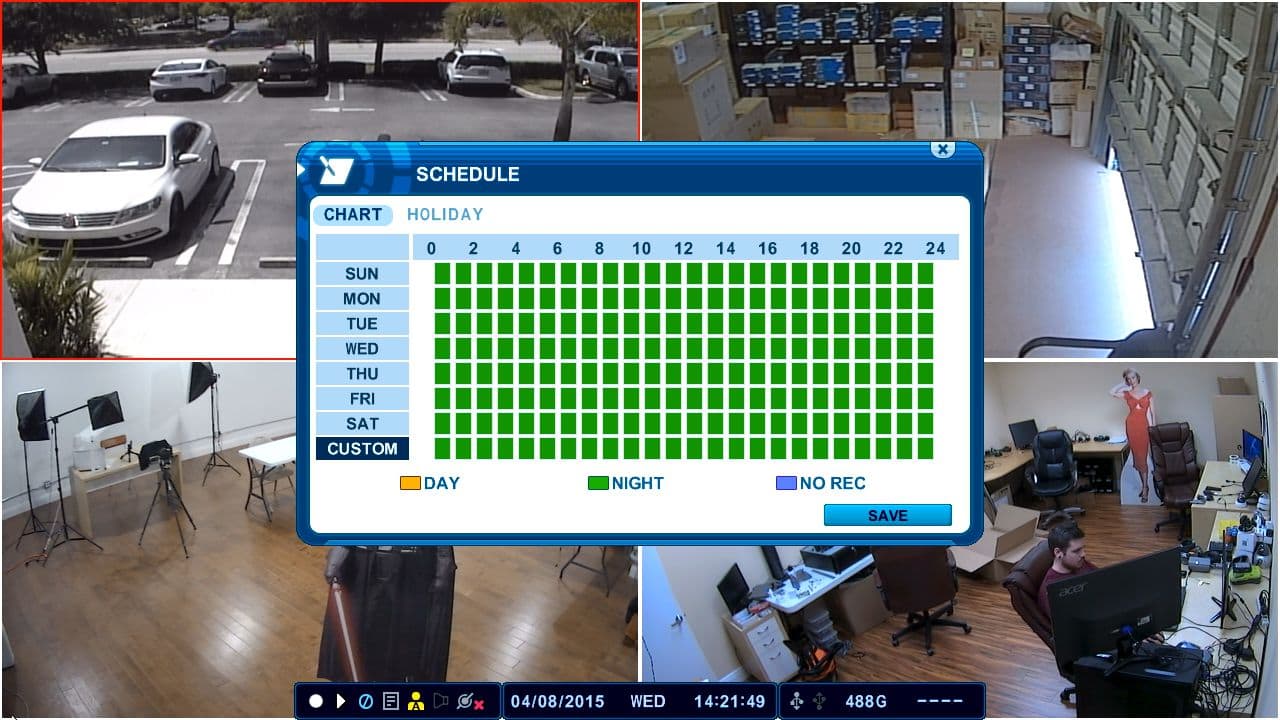
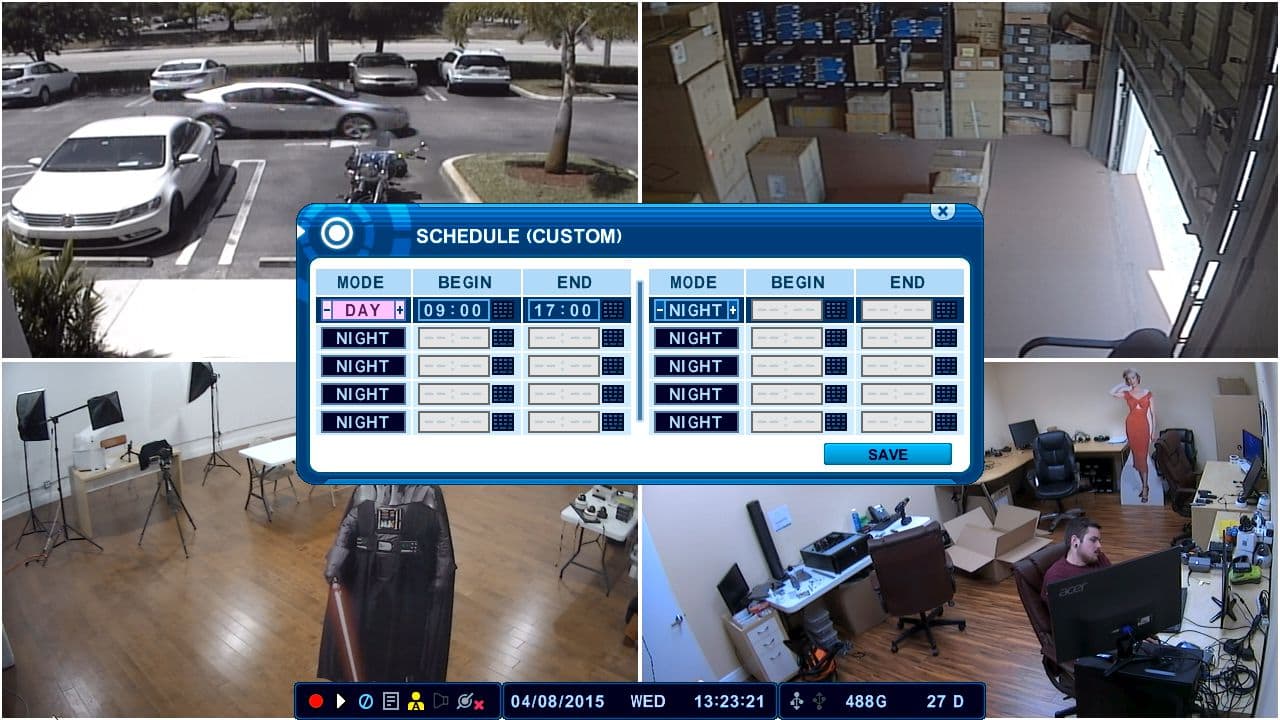
Now using the "
+" and "-" buttons on the IR remote control, select either Day or Night mode (Day and Night refers to the settings set on the Record menu previously). Then select the Begin and End time that you wish to record for the specified day. Select the Save button in the lower right corner to continue. Press the Record button to initiate recording. (Shown Below)
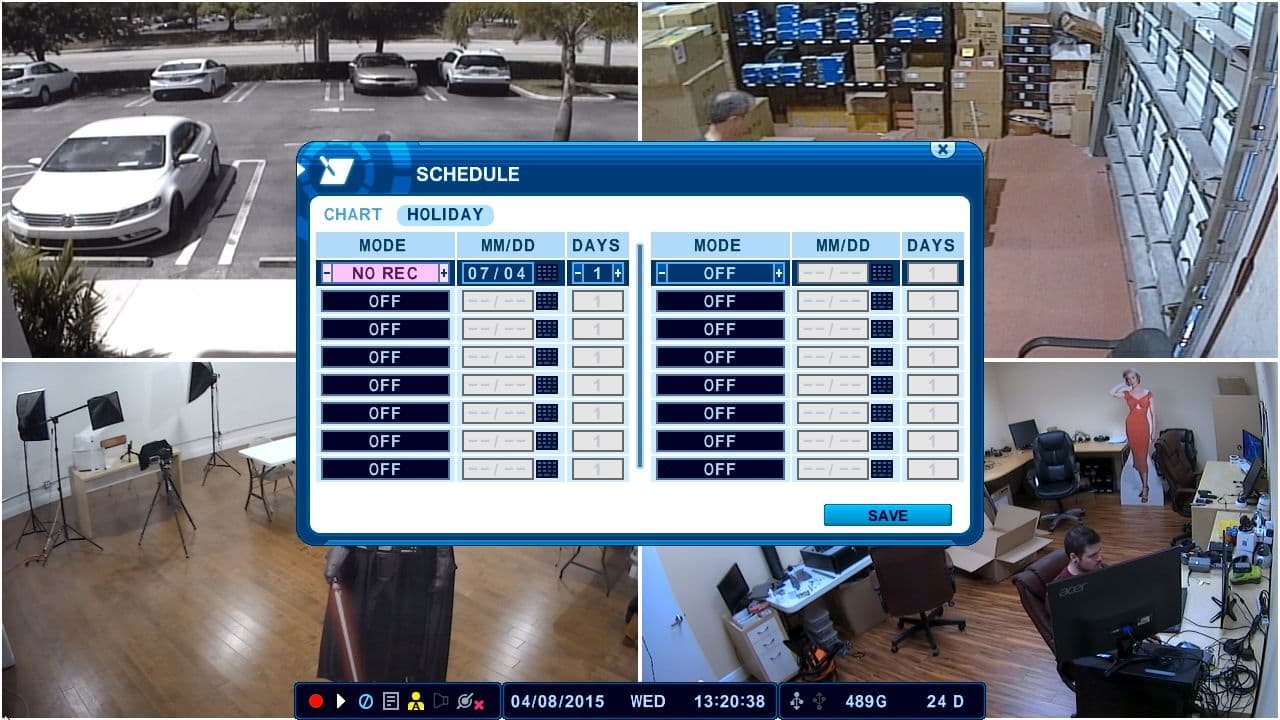
If you wish to setup a specific recording for holidays or special dates, select the
Holiday tab to the right of the Chart tab as shown in the previous steps. Here you will be able to select a specific date and to use either Day, Night or No Record modes. (Shown Below)
Learn more about iDVR
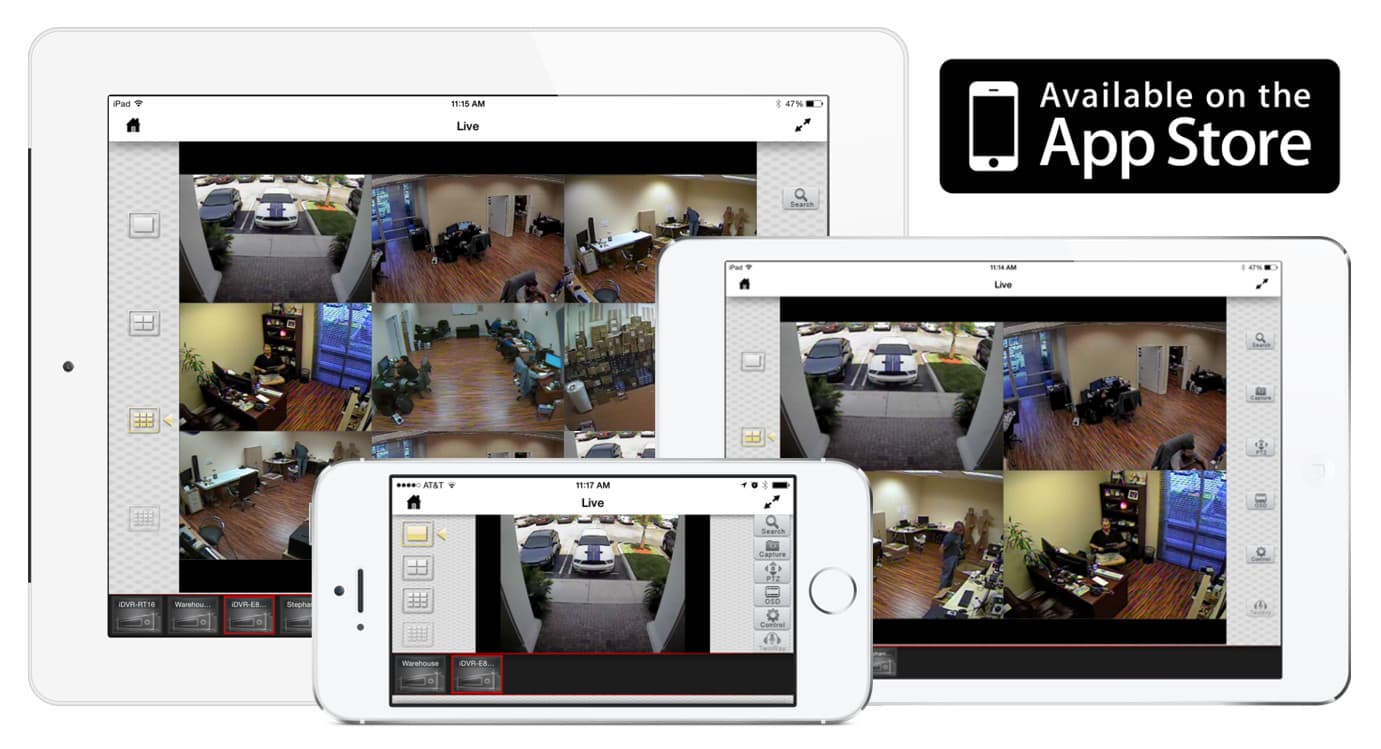
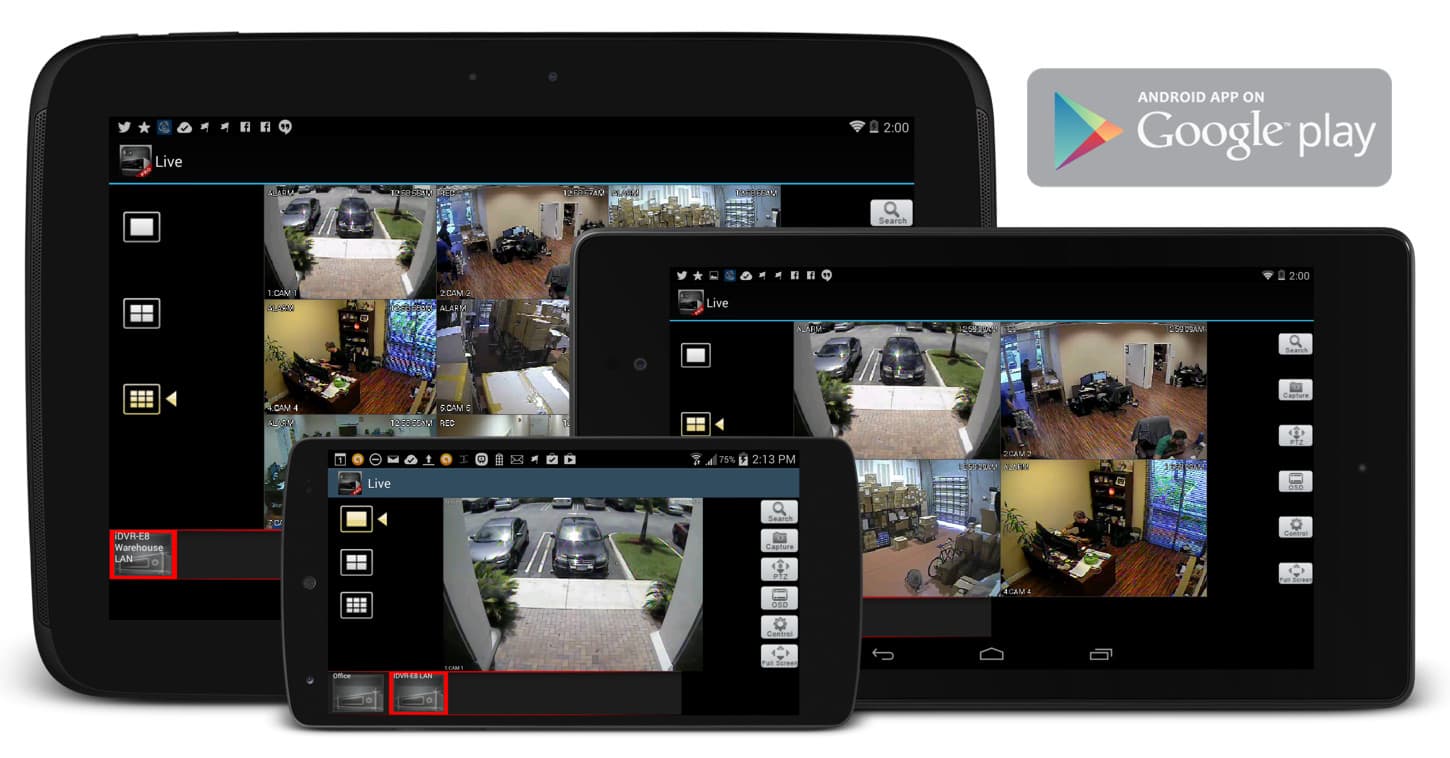
iPhone / iPad Compatible
|
Android Compatible
|
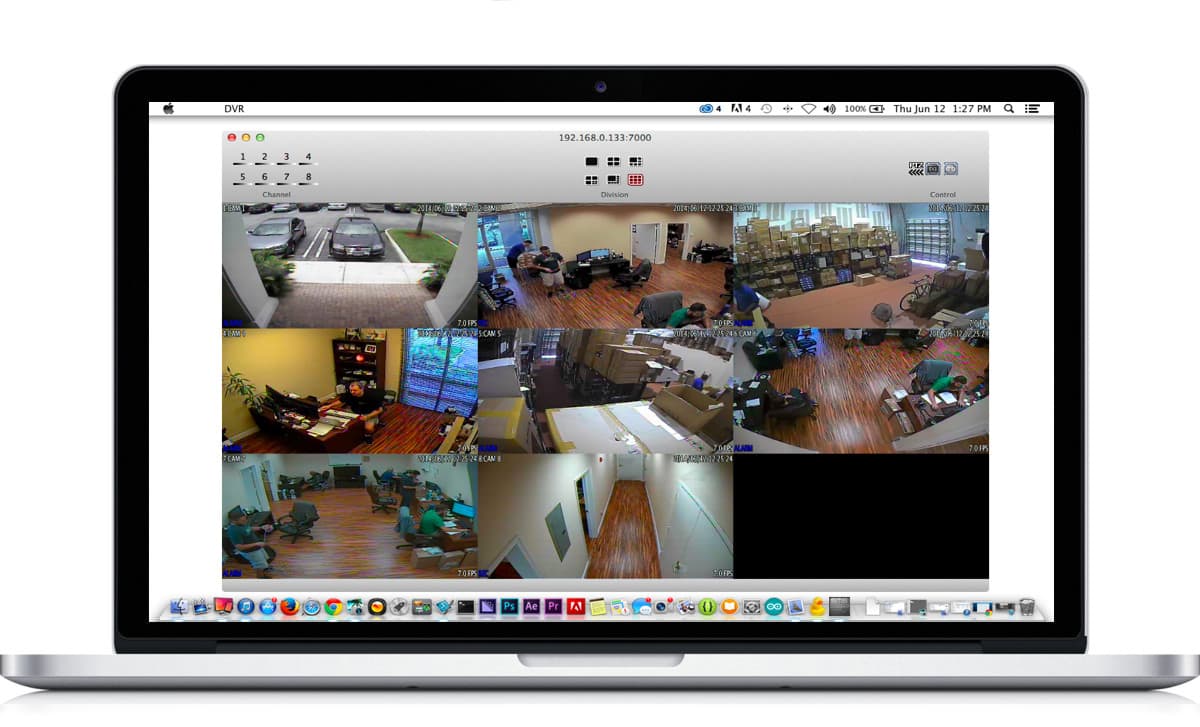
Mac Compatible
|

Click here to
learn more about the latest HD CCTV Hybrid DVRs.
Request a Demo
If you do not currently have an iDVR-PRO and would like to log in to the demo unit at our office, please request a demo login below. You will be able to login from iPhone, iPad, and Android mobile devices. You can also login from Macintosh and Windows computers. Please
click here to request a demo login.
Complete CCTV Systems
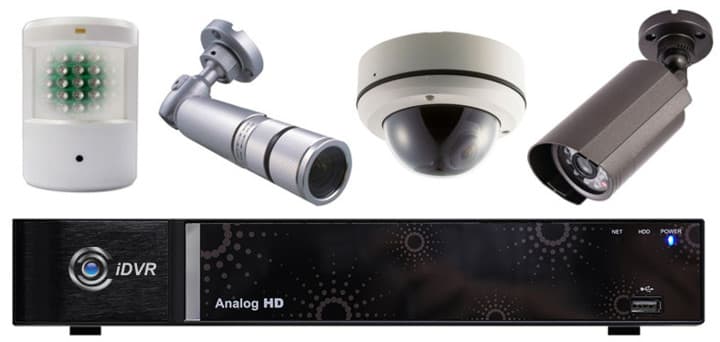
Did you know? CCTV Camera Pros can provide a complete surveillance system quote that includes a hybrid iDVR-E surveillance DVR, any number of cameras SD and
HD CCTV cameras you need plus cables, connectors, power supplies, and monitors? As you have probably already seen on our website, we have 2, 4, 8, and 16 camera surveillance systems in pre-made packages. However, it is not possible for us to package up every combination and quantity of all the different camera models that we carry. So, we can also provide you with a custom quote with as many cameras as you need and a mix of any combination of camera model(s) based on your project requirements.

|


