DVR Alarm Output Setup for Viewtron CCTV DVR / NVR
Viewtron CCTV DVRs and IP camera NVRs have alarm output ports that support the ability to connect external devices such as sirens and strobe lights. The alarm outputs on the DVR can be configured to be triggered by an event, such as camera motion detection, human object detection, or a
magnetic door sensor via an alarm input. Each alarm output of the DVR is a simple relay circuit that switches from one position to the other (from normally closed to normally opened). Watch the above video to learn how this is setup. You can also watch this video on how-to wire a magnetic door sensor to alarm input on security DVR.
Viewtron
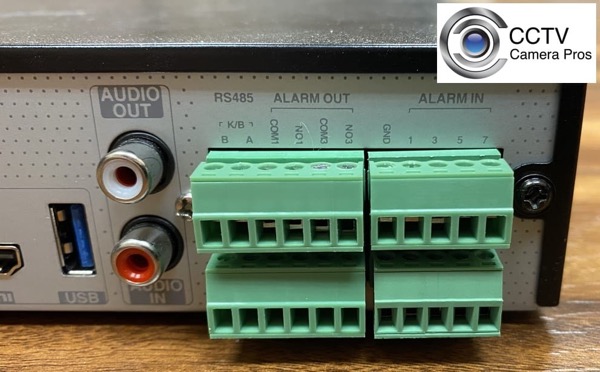
CCTV DVRs and IP camera NVRs have multiple alarm outputs on a terminal block on the back of the DVR case. Please check the specification for the model that you are interested or contact a sales engineer at CCTV Camera Pros to confirm how many alarm output ports your DVR has. The setup guide below will walk users through how to setup alarm outputs on a Viewtron DVR.
DVR Alarm Output Overview
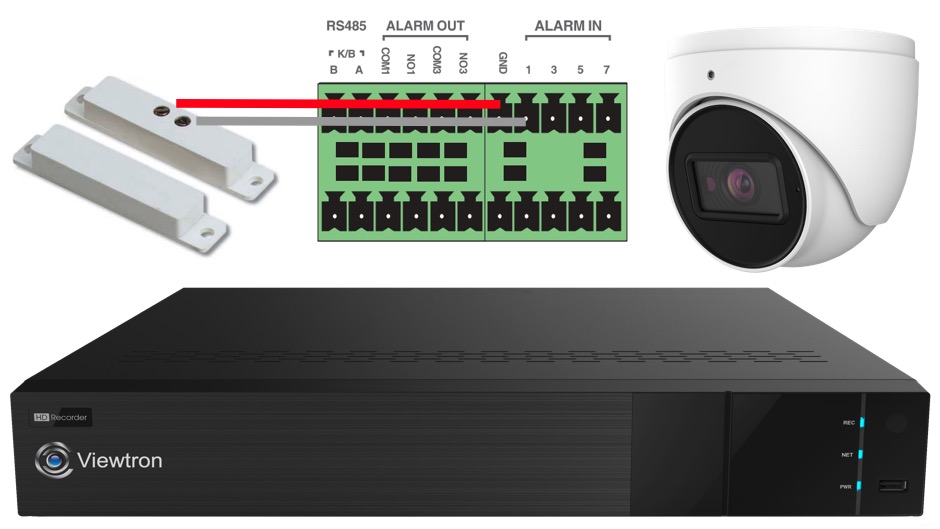
The alarm output ports on the back of Viewtron DVRs / NVRs are each labeled with NO, and COM. The NO stands for normally opened and COM is a common contact. When the alarm is in the non-triggered state, it is normally closed which means that the circuit is allowing current to flow from COM to NO. When the alarm is triggered, the relay is enabled and switched from the normally closed (NC) to normally opened (NO) position.
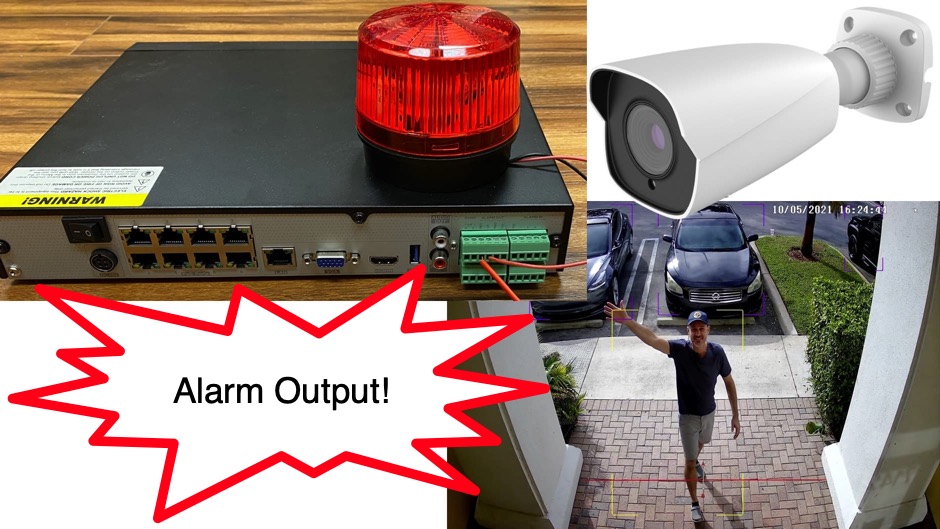
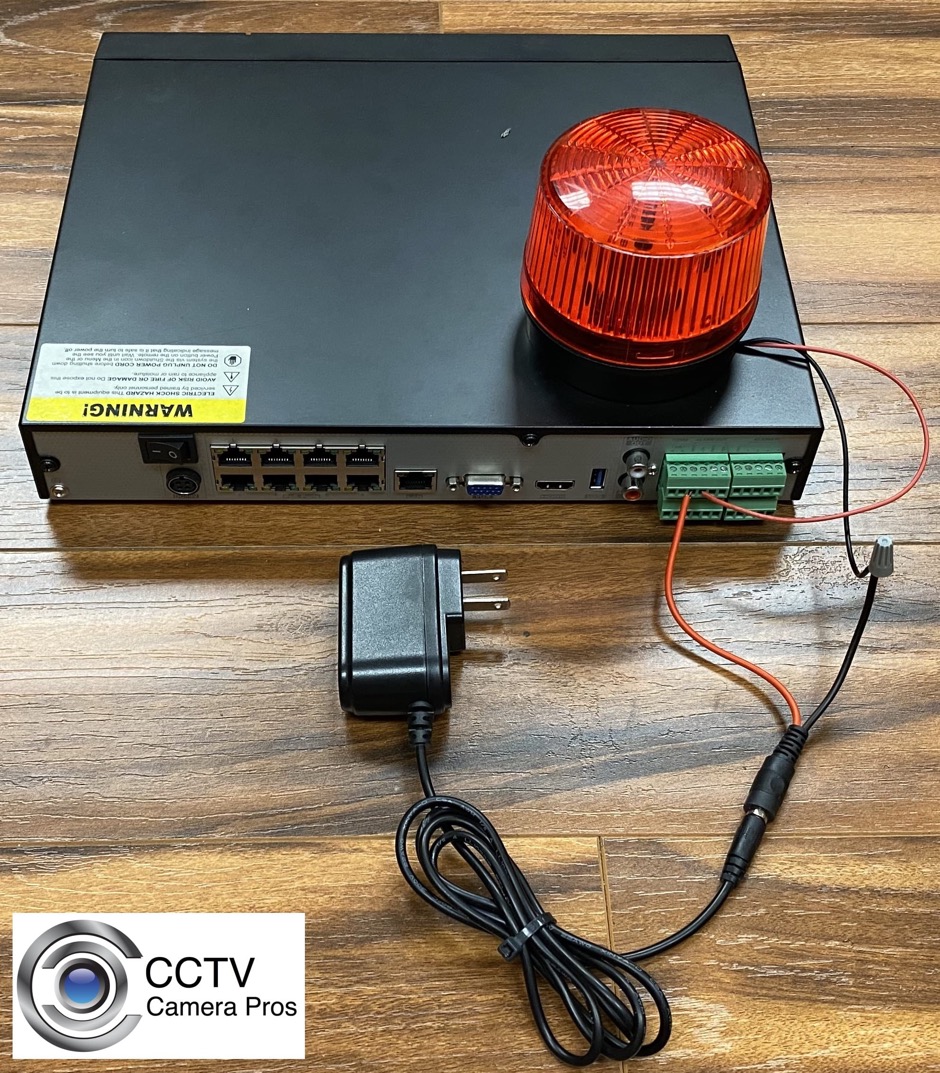
The security application used in these instructions uses a 12v DC powered strobe light. The goal is to turn the strobe light on when an alarm is triggered.
Please note that the DC transformer used to power the strobe light / siren is only used to power the siren and has nothing to do with the power supply of the DVR. The concept is that the strobe light sits dormant / un-powered (relay in the open position) until the alarm goes off. When the alarm goes off, the relay is enabled and allows power to flow to the strobe light (via switching the power of the circuit to the closed position), which turns it on.
IMPORTANT! Alarm Relay Max Electrical Power Rating
Important WARNING! Please be aware of the electrical power rating of the alarm relays in Viewtron security camera DVRs and NVRs. These relays have a maximum current rating of 1A for DC power and 0.5A for AC power, with voltage ratings of 30VDC or 125VAC. So, the maximum power rating is 30 watts for DC powered alarm devices and 62.5 watts for AC powered alarm devices.
If you are using these setup instructions to guide you on integrating alarm devices on other types of surveillance DVRs (not Viewtron), it is
strongly recommended that you consult the manual of your DVR to understand the maximum power that your DVR alarm outputs can use. Using an alarm device that draws more power than the relays of your DVR are rated at will cause damage to the relay terminals and / or can ruin the entire DVR / NVR.
DVR Alarm Output Wiring
- Connect the positive wire from the power supply to the COM1 terminal of the alarm-out port.
- Connect the negative wire from the power supply to the negative cable of your output device (in this case a strobe light).
- Connect the positive wire from the strobe light to the NO1 terminal of the alarm-out port.
DVR Alarm Output Configuration
Please follow these steps to configure the software on the DVR. Please note that in this example, we used a Viewtron AI security camera and IP camera NVR. The setup on Viewtron CCTV DVRs is the same except that AI cameras are not yet supported.
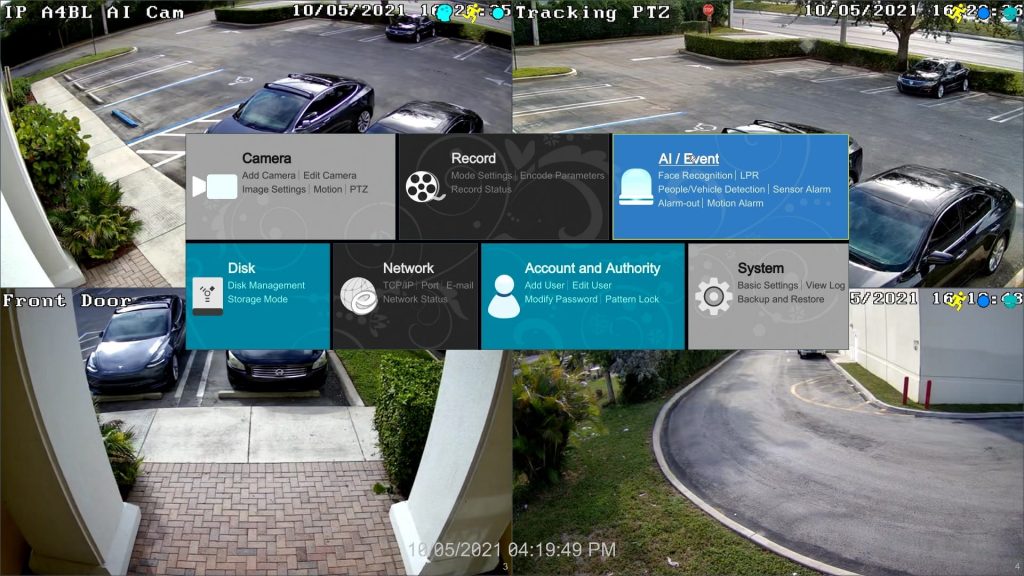
From the DVR/ NVR main menu, select AI / Event.
On the AI / Event screen, do the following.
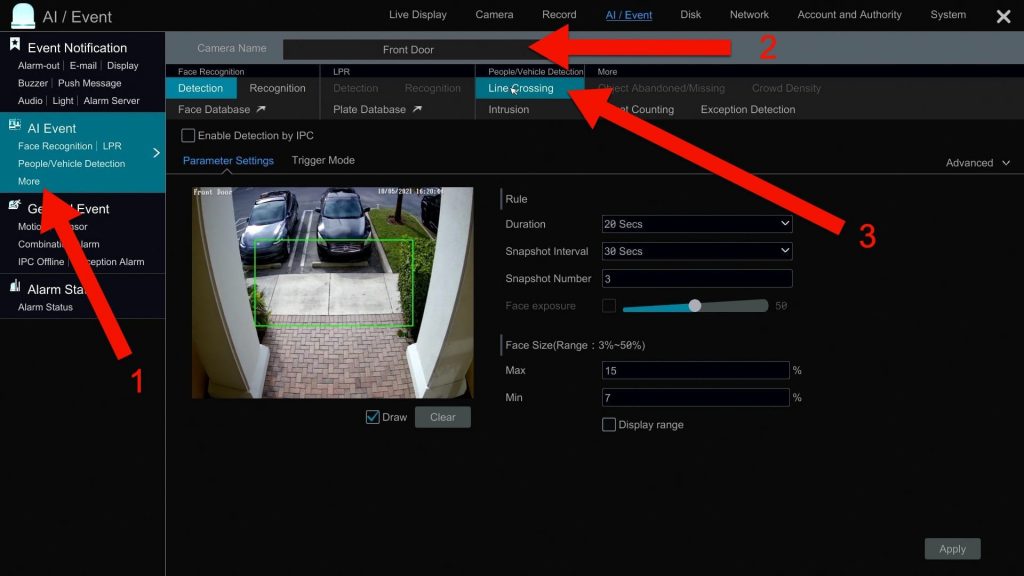
- Select More from the AI Event menu.
- Select the camera that you are applying the AI rule to from the camera dropdown.
- Select Line Crossing as the event type.
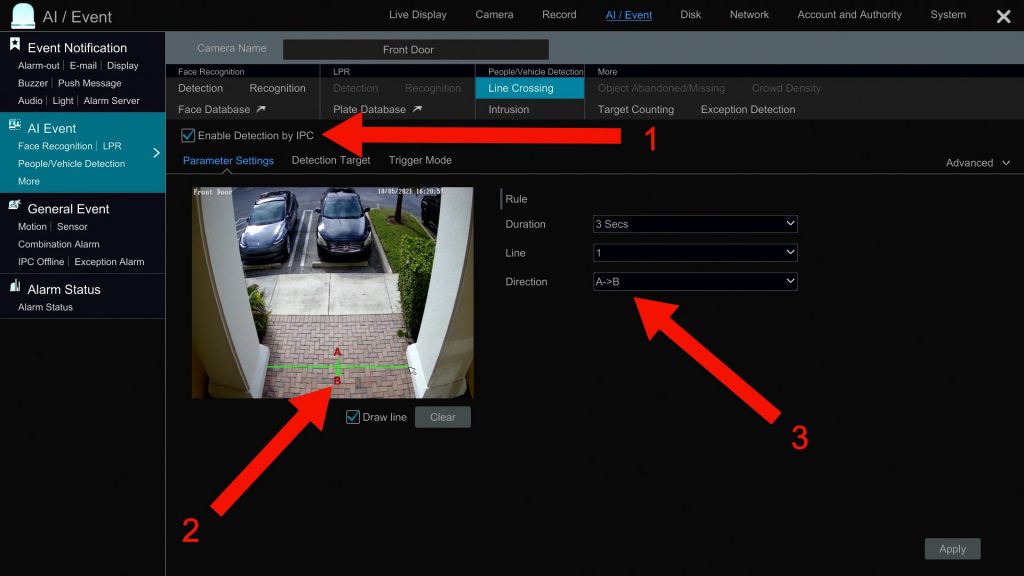
Next, do the following.
- Check the Enable Detection by IPC (IP Camera) checkbox.
- Check the Draw Line checkbox and draw your tripwire on the screen.
- Choose the direction of the traffic flow used to trigger the alarm. You can choose a single direction or both directions.
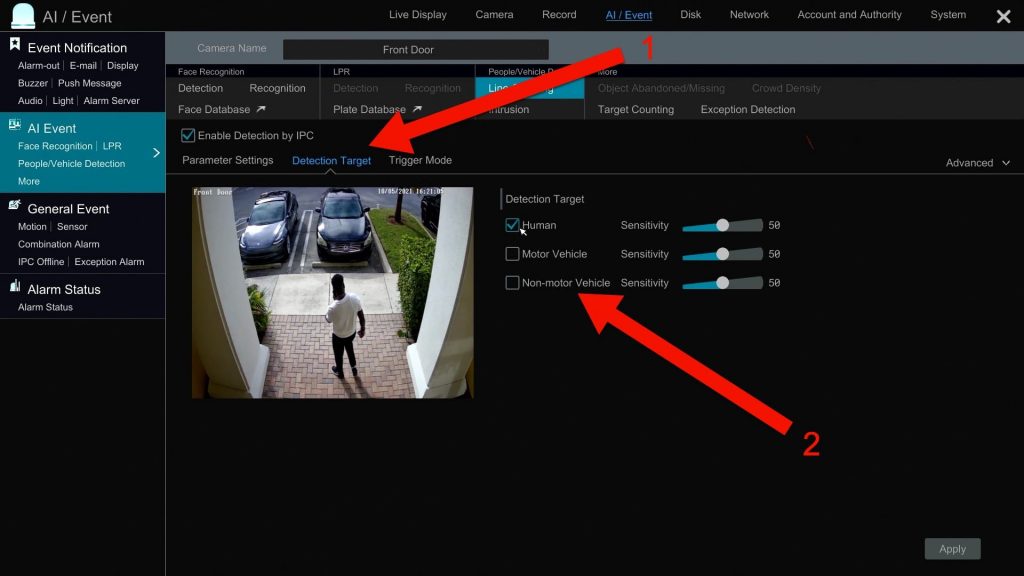
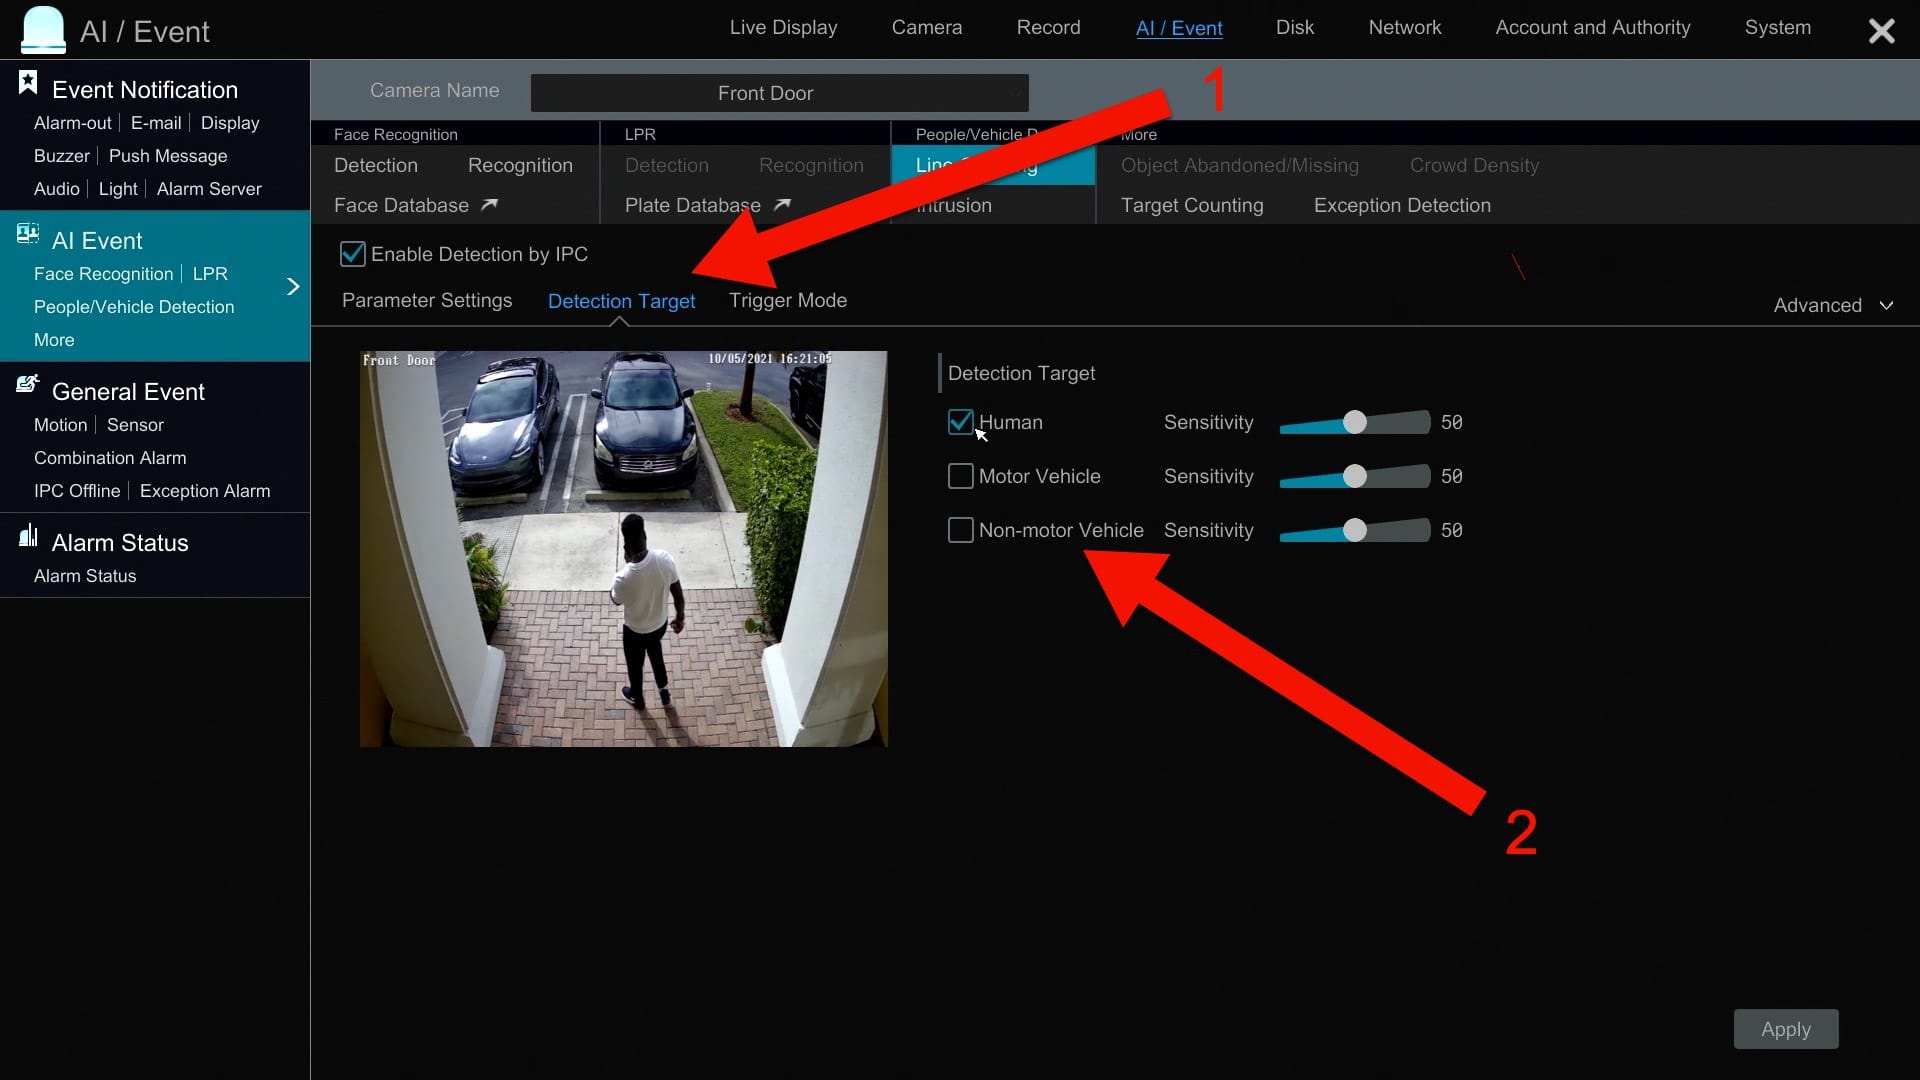
- Click on the Detection Target tab.
- Check Human for the detection target type. Uncheck Motor Vehicle and Non-motor Vehicle as they are not applicable in this case.
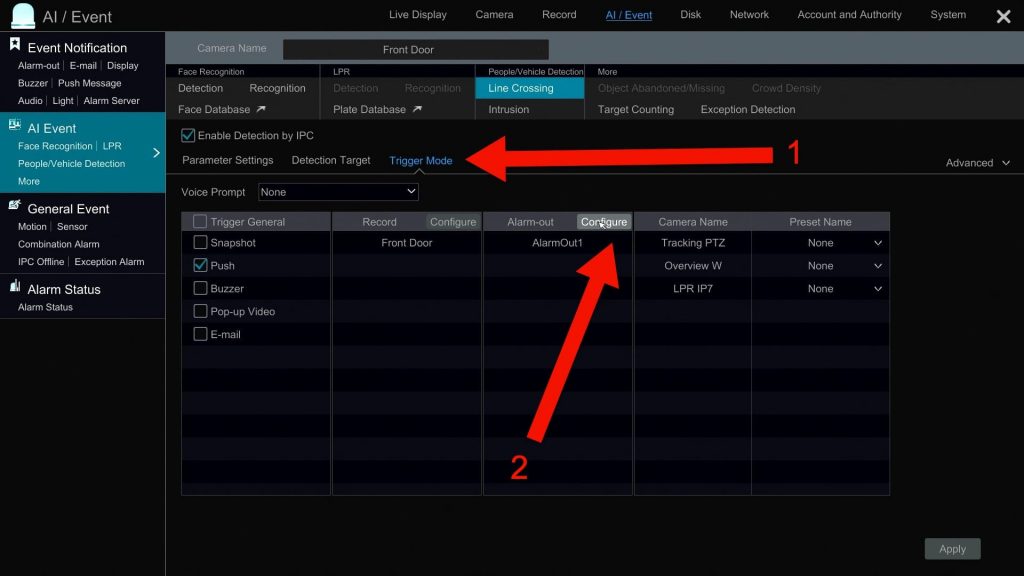
- Click on the Trigger Mode tab.
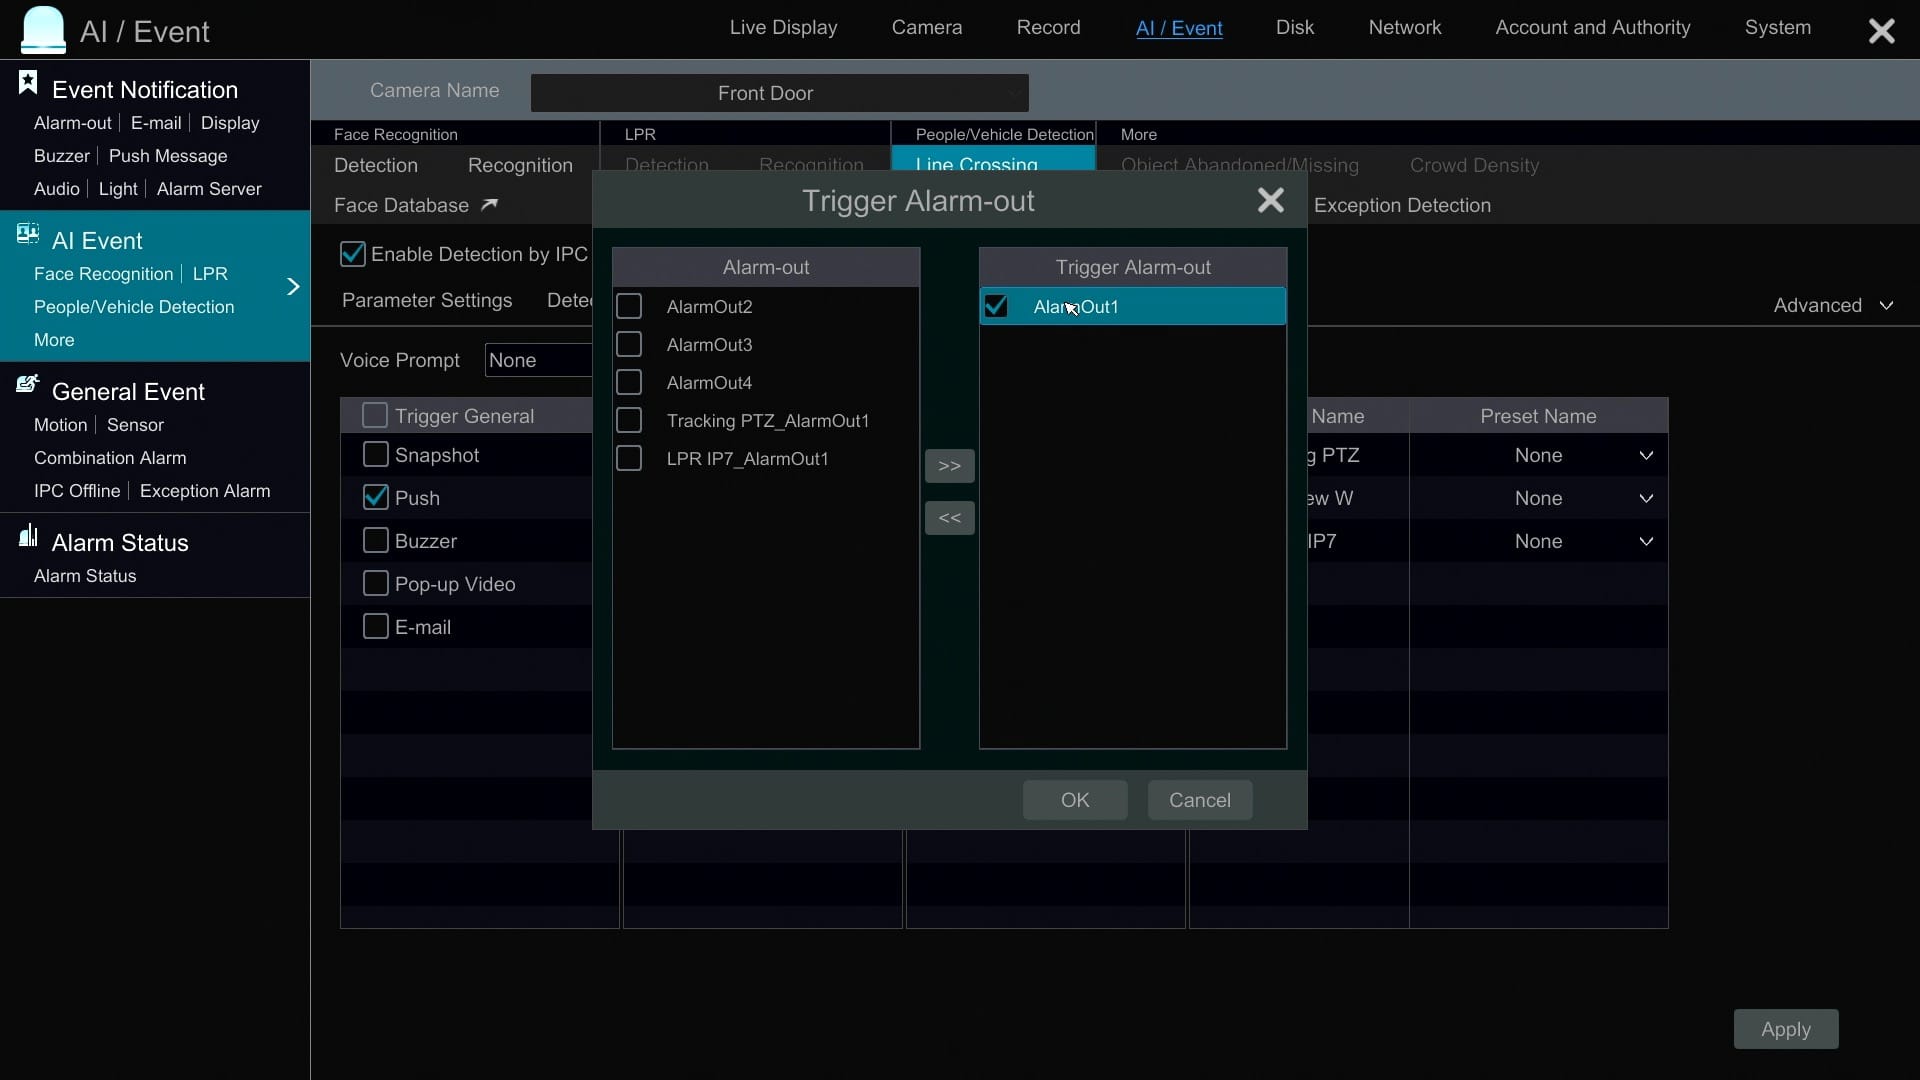
- Click on the Alarm Out Configure button. Please note that you may setup additional alarm triggers on this screen such as image snapshot, mobile app push notification, alarm buzzer, pop-up video, and email alerts.
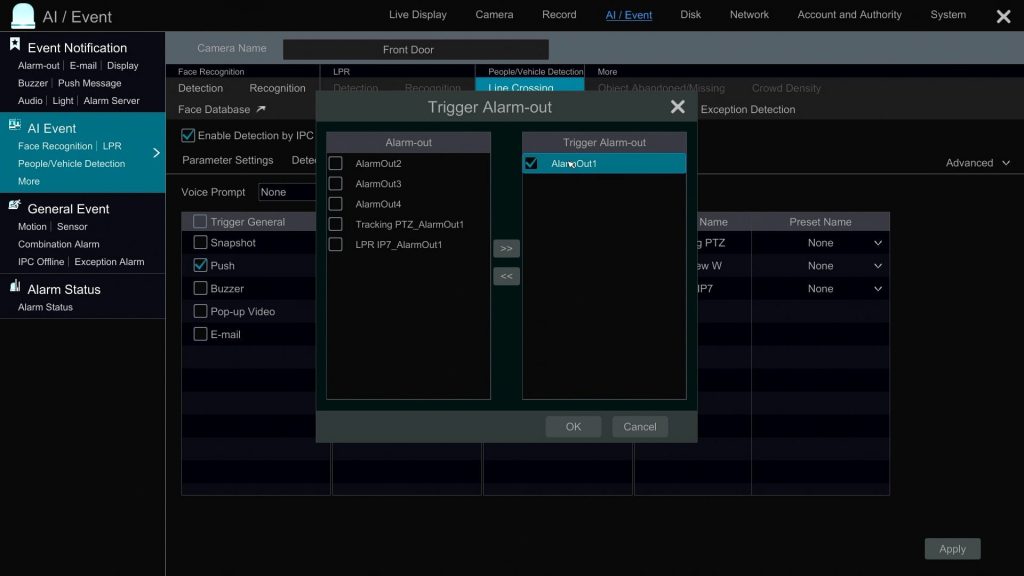
On the DVR alarm output screen, select the alarm output that your light (or other device) is connected to from the window on the left and click on the arrows (>>) to put the alarm output on the right window. Then, check the checkbox next to it.
Click OK. Then, click Apply in the lower right.
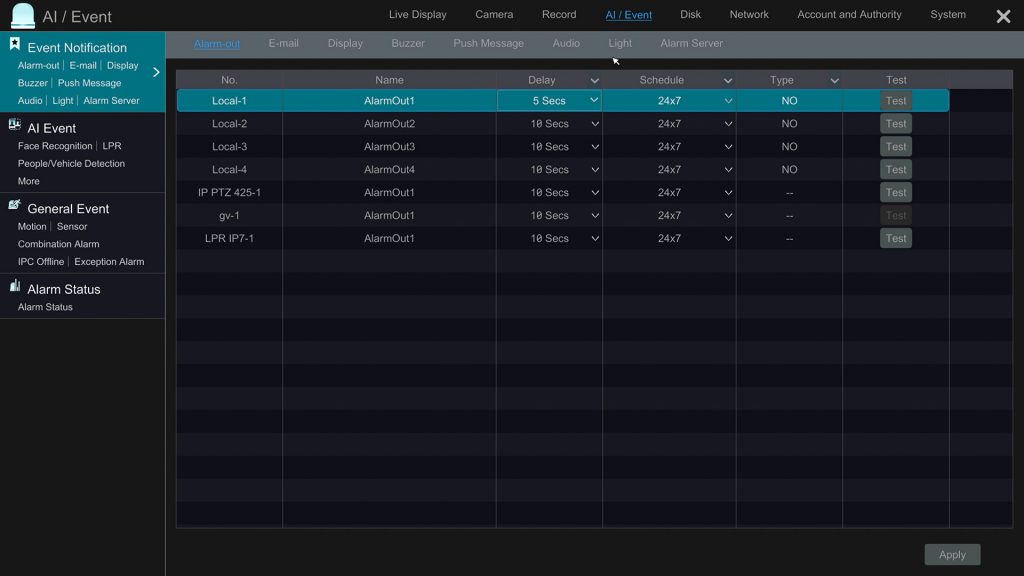
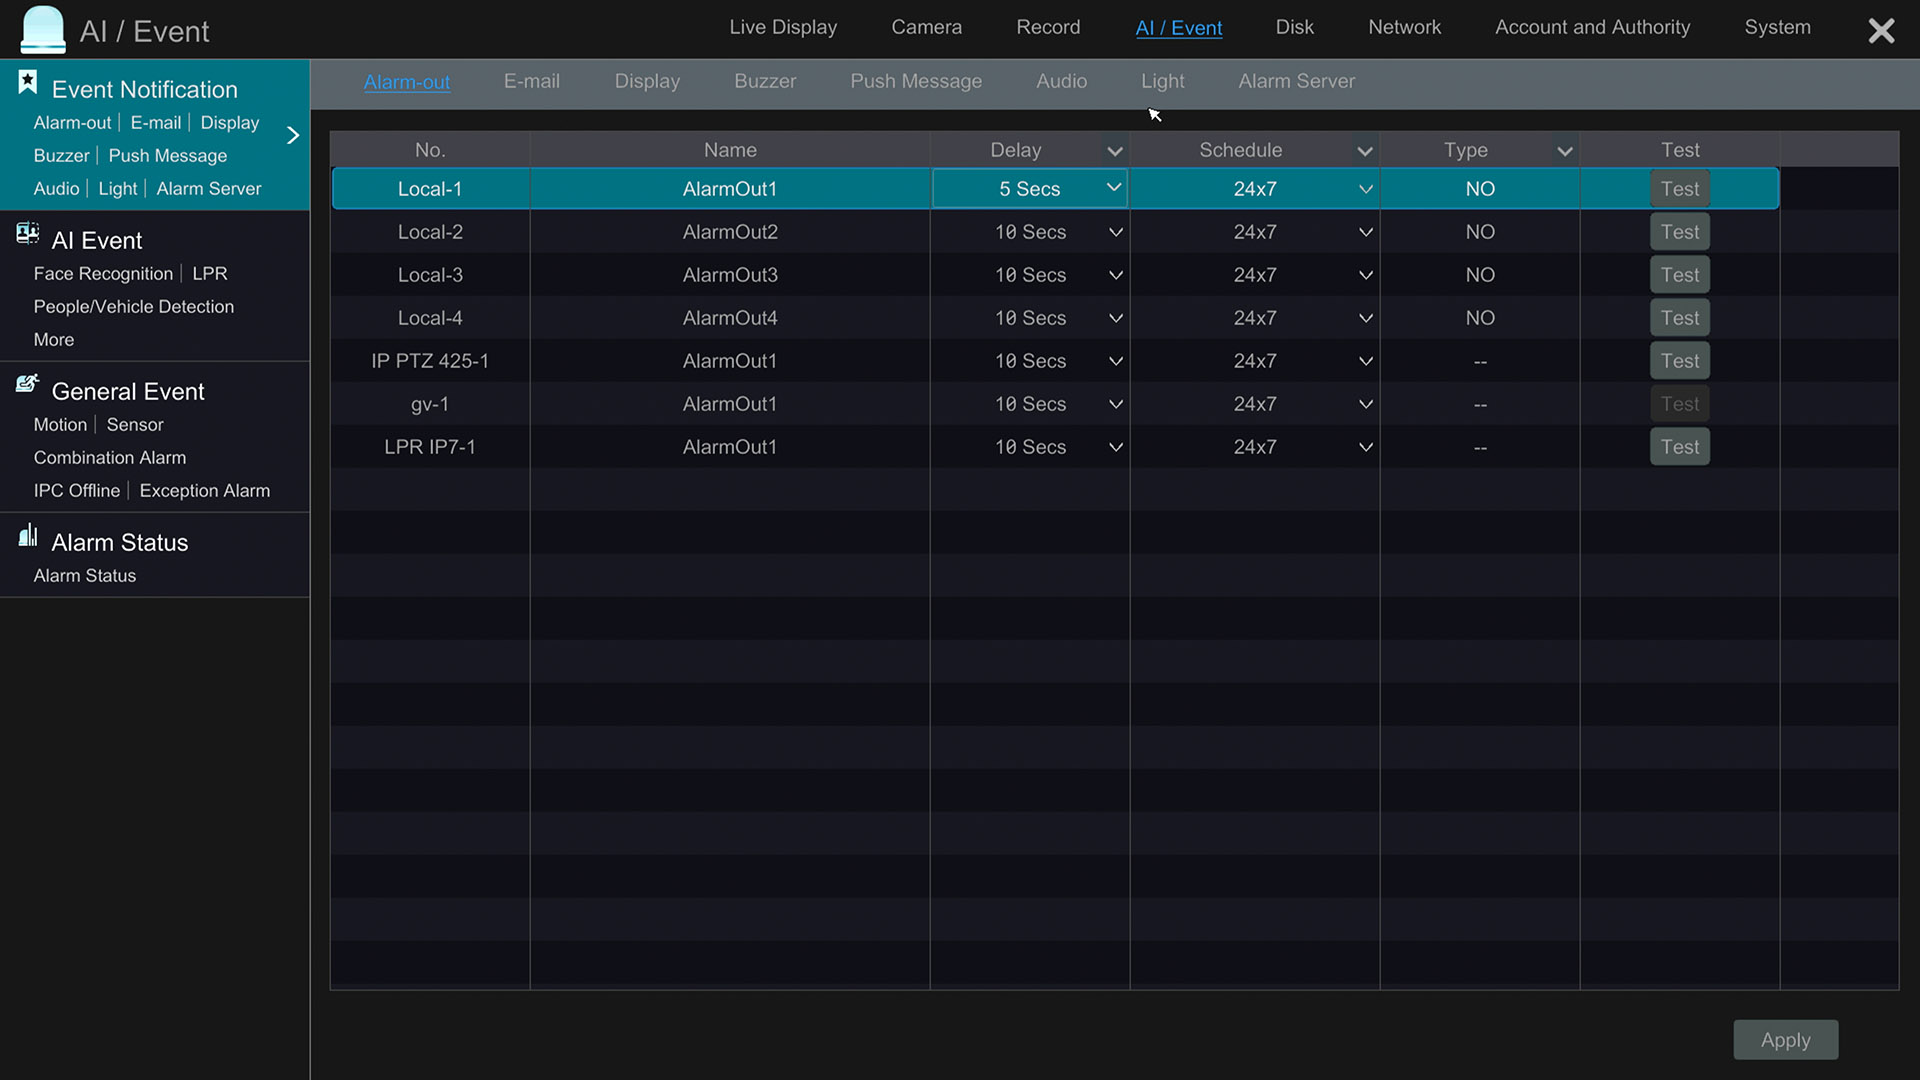
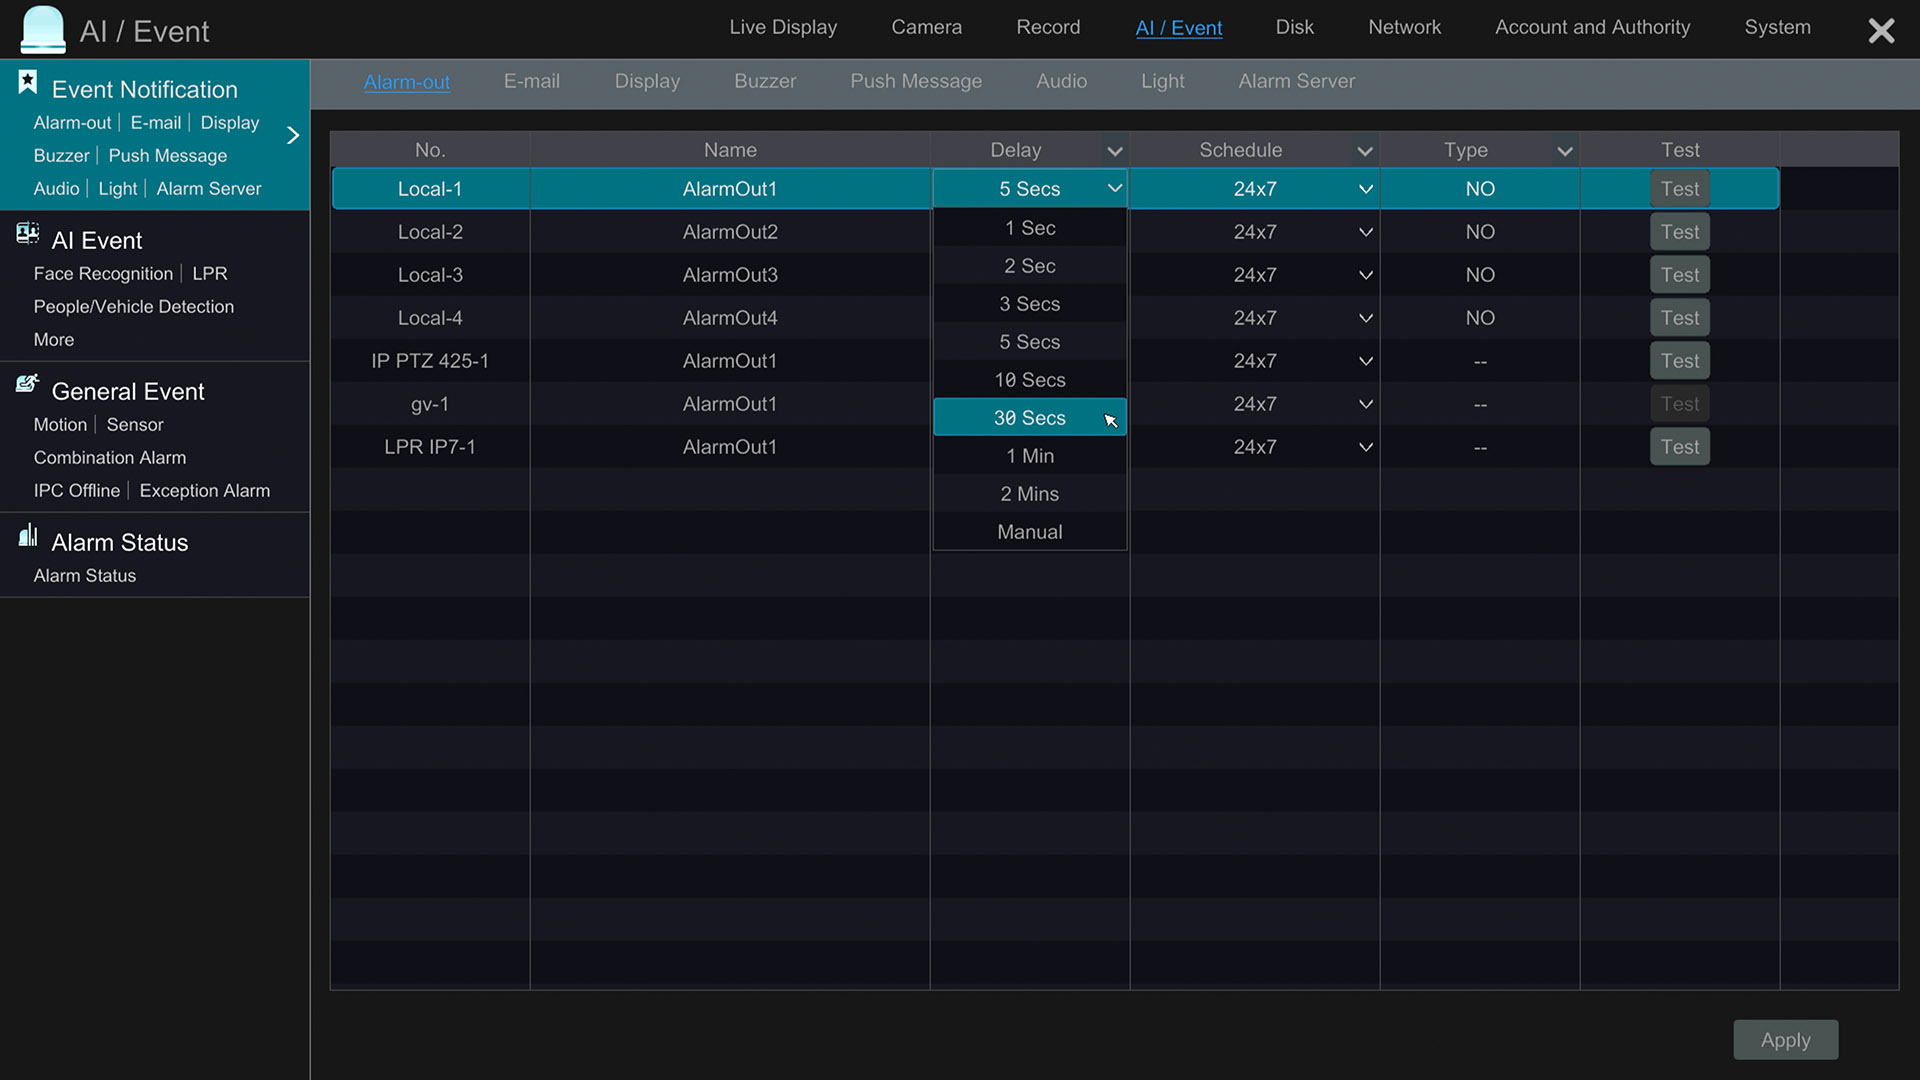
Next, click on the Alarm-out link under Event Notification. On this screen, you may configure the duration that the alarm output will be triggered. This is labeled as Delay. You can also configure the alarm Schedule, the Type (normally open or normally closed), and click the Test button to manually trigger the alarm output.
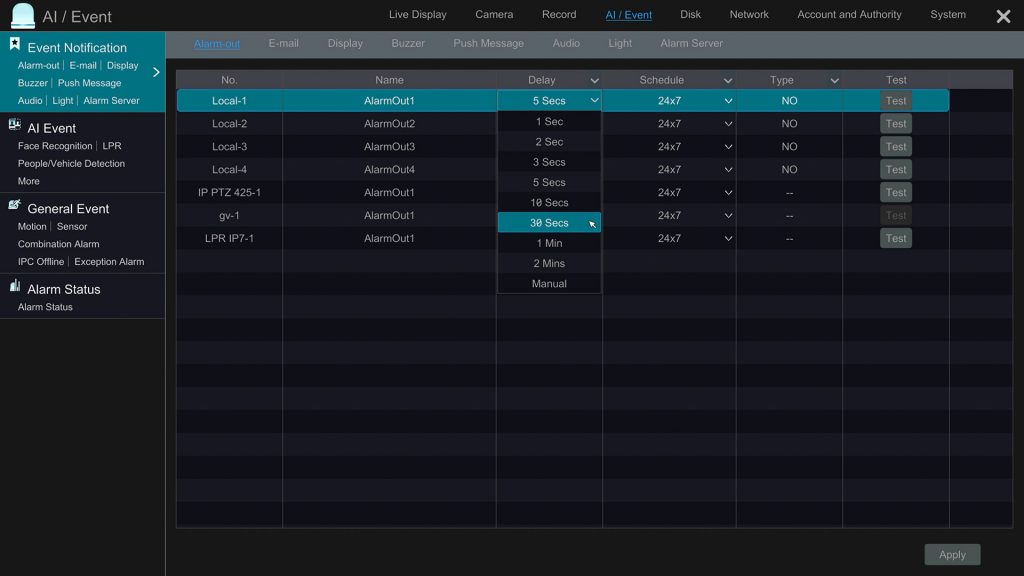
The alarm output duration (Delay) can be set to various time increments between 1 second and 2 minutes. You may also set it to manual which means that the alarm will be triggered until a admin manually turns it off. You can turn the alarm off vie the mobile app or on the recorder.
Click Apply.
You may then close all of the DVR / NVR configurations screens and return to the live view of your security cameras.
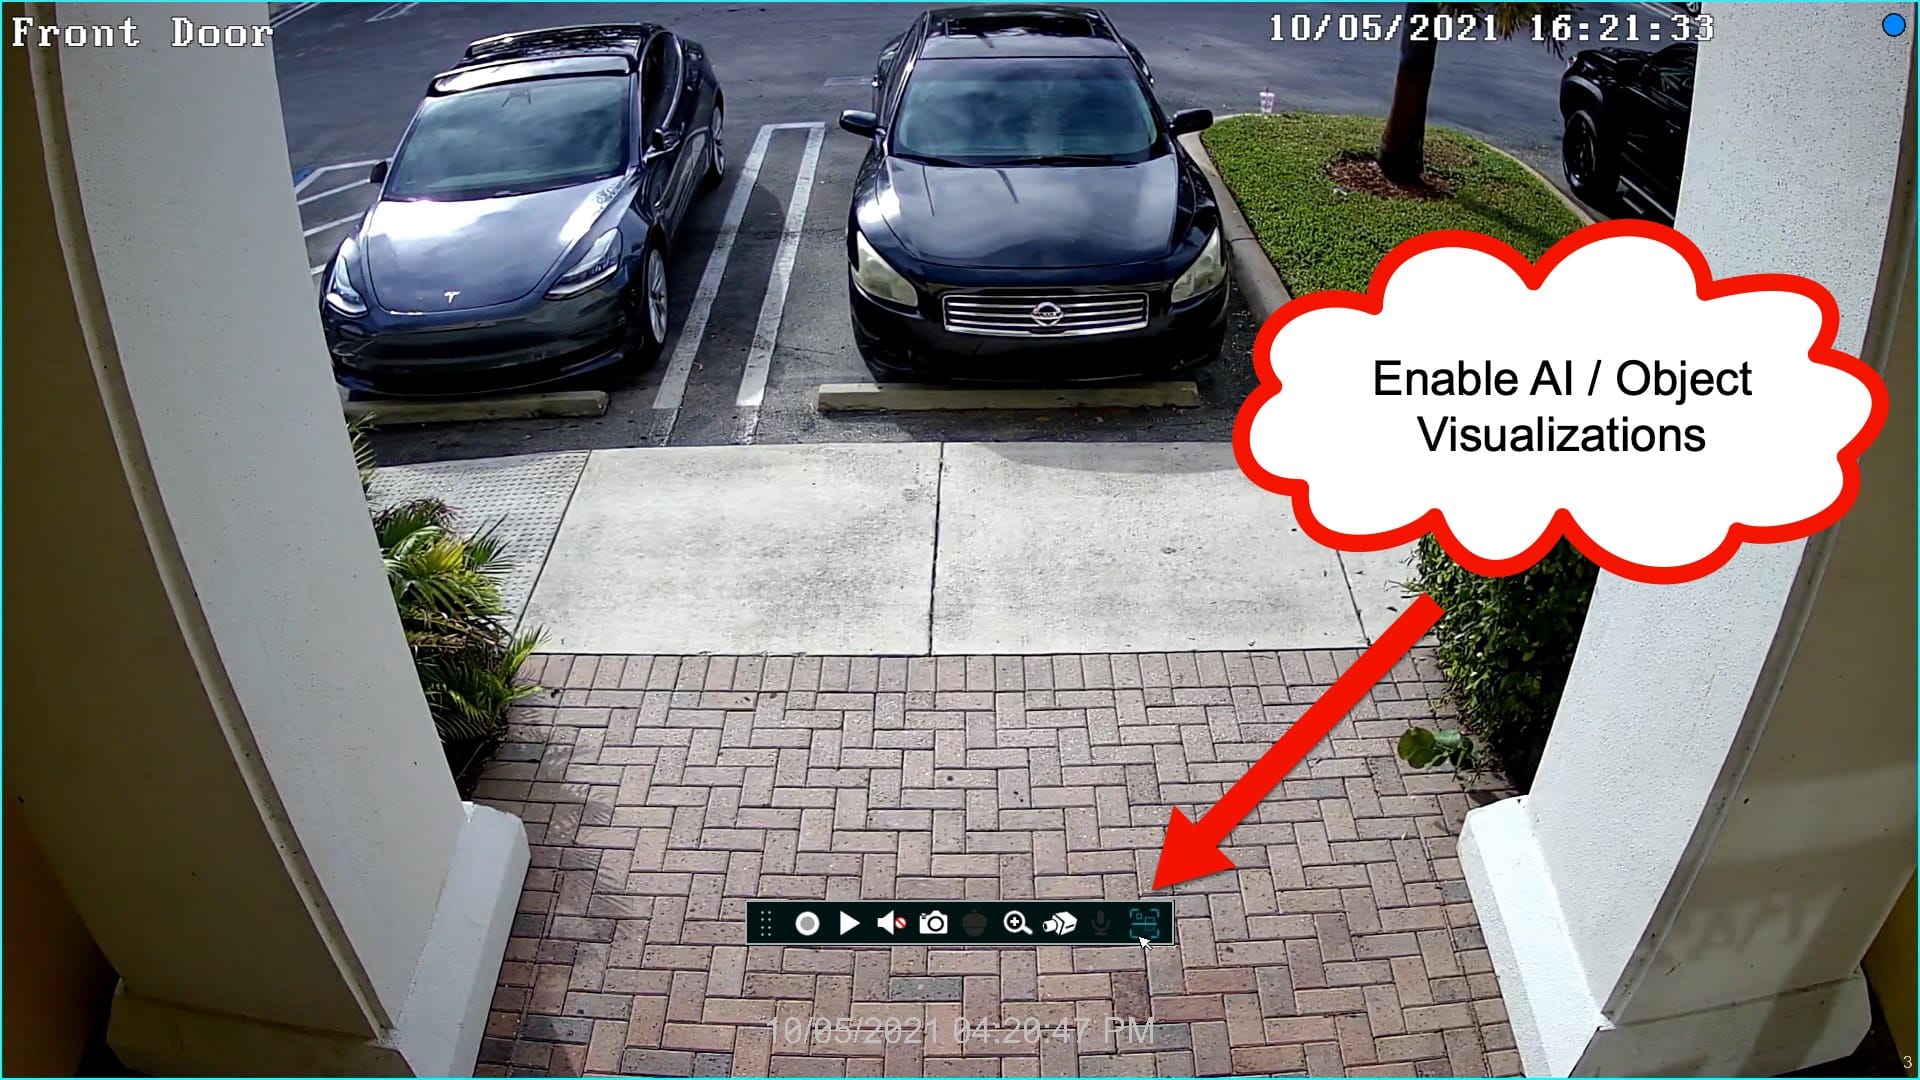
AI Software / Object Detection Visualization

On the live security camera view of your recorder, double click on the camera that you are using for this alarm project to show that camera's live view full screen. You can enable the AI / Object Visualizations by clicking on the above icon.
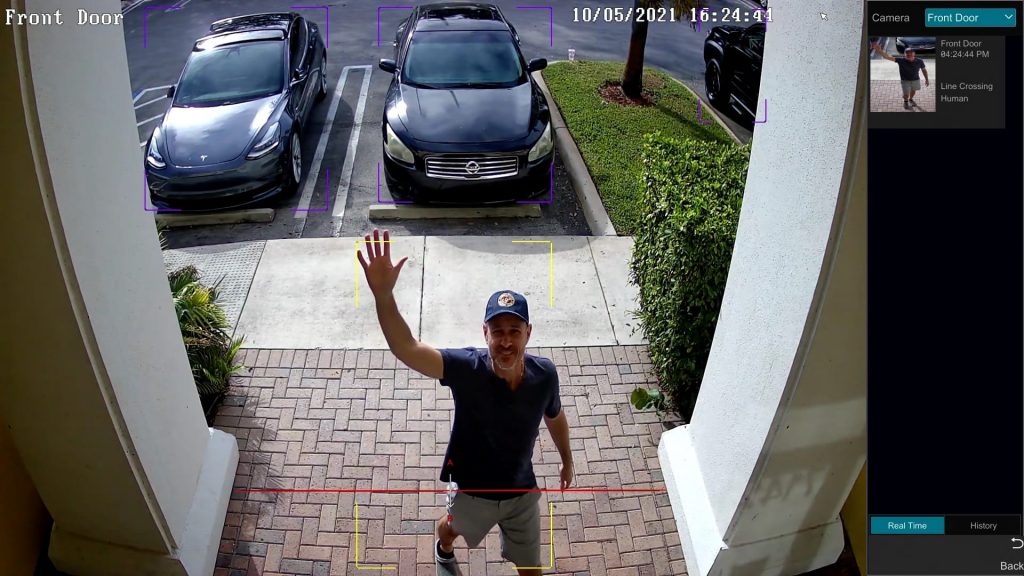
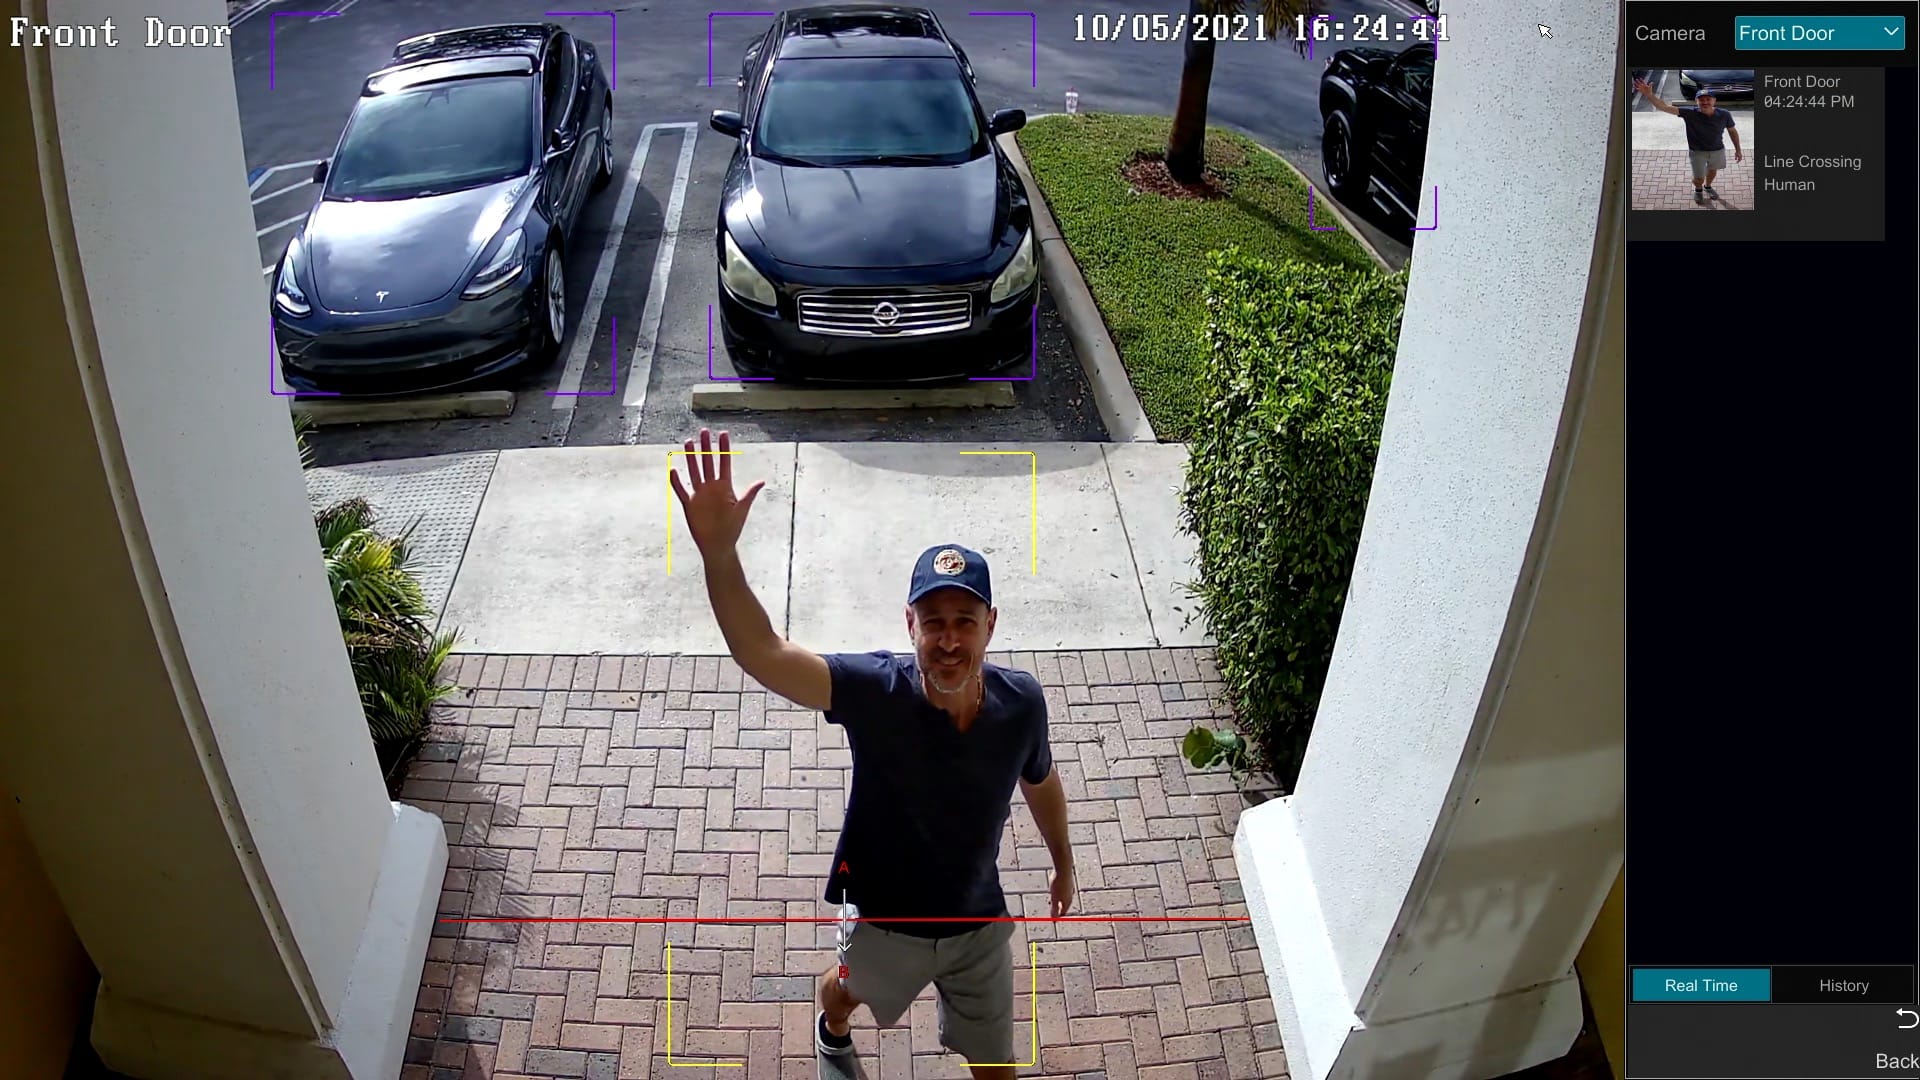
When you enable the AI software visualizations on the live camera view, a few things happen.
- The alarm event window opens on the right. When your security camera detects the event that you configured, a snapshot image will appear in that screen to document the event.
- All objects that the system is able to detect will be outlined. Please note above that I am outlined with that yellow box because the AI software is detecting me as a human. The cars in the background are outlined in purple. Even though we are only using people detection for our alarm, the NVR software still outlines the other object types that it recognizes.
- The line crossing / virtual trip wire is shows in red. And the A->B traffic flow that I setup it also shown
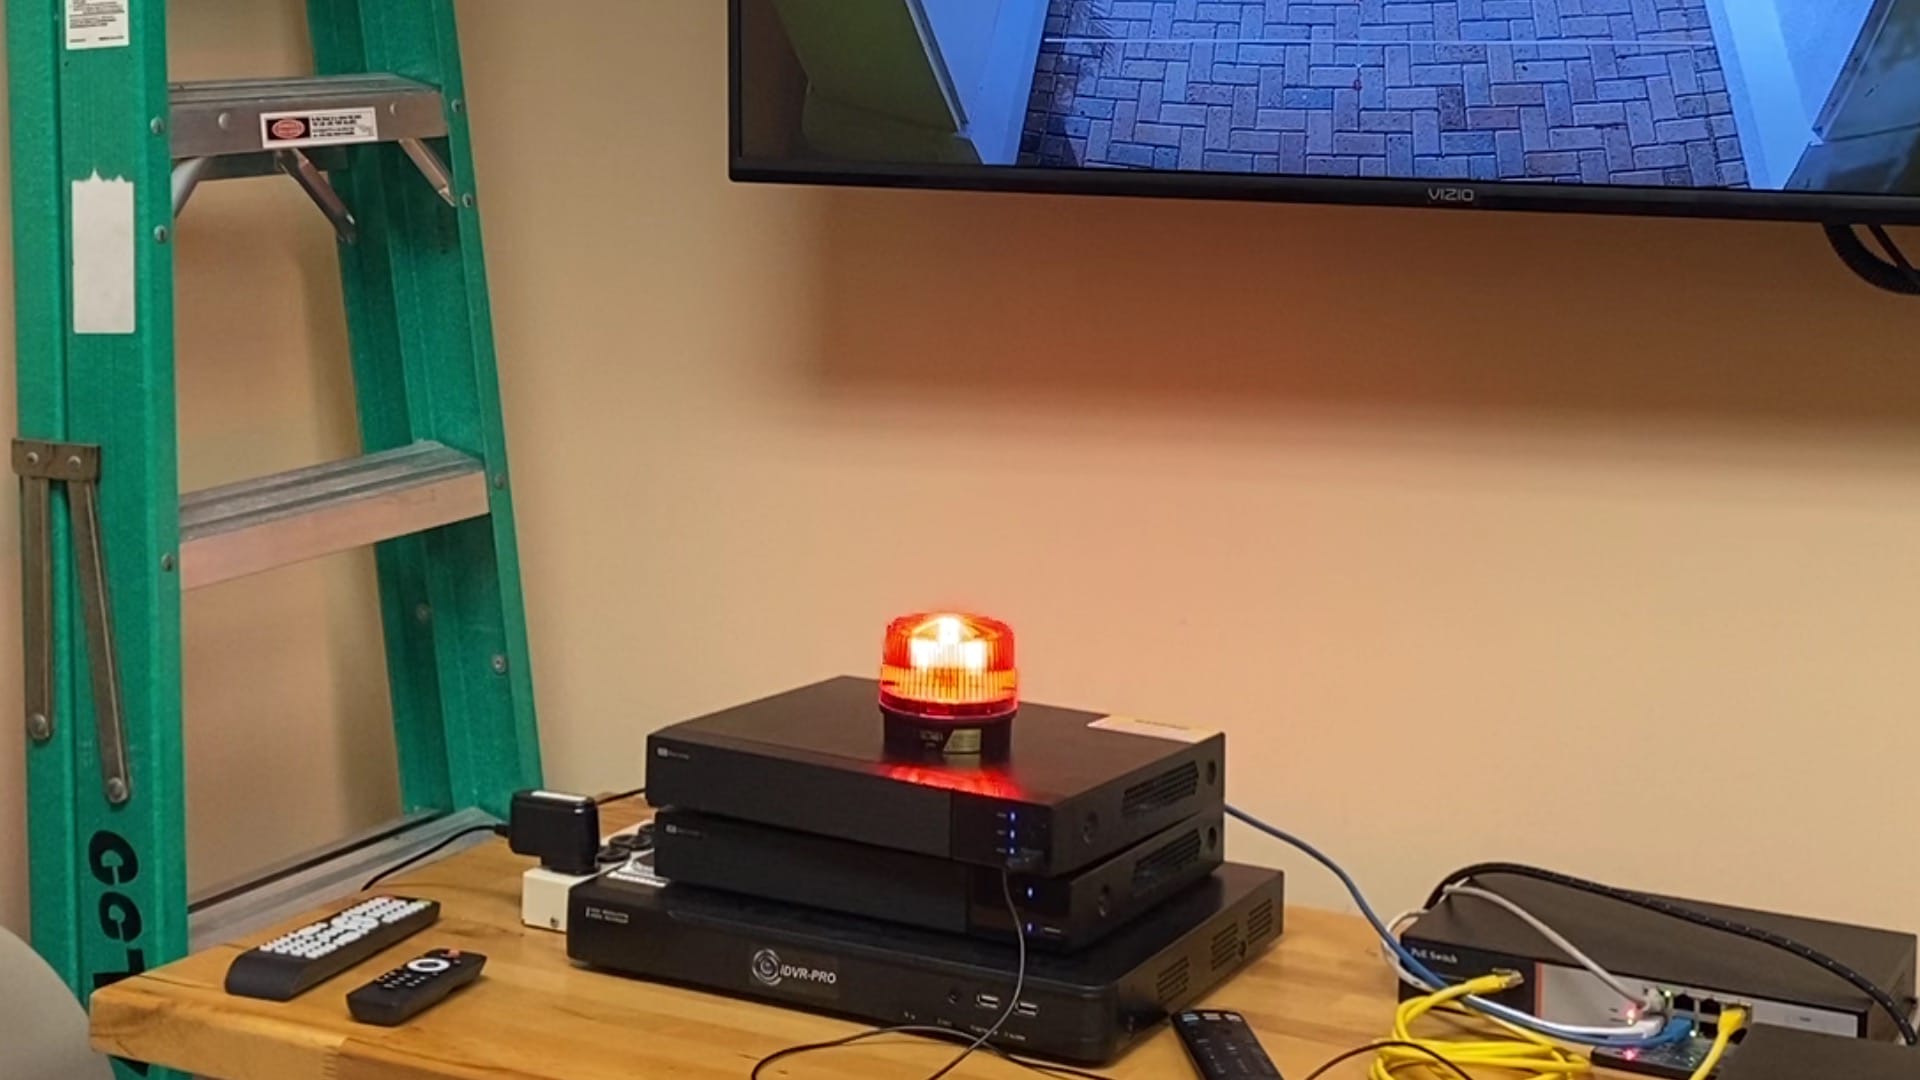
NVR / DVR Alarm Output Turns Light On
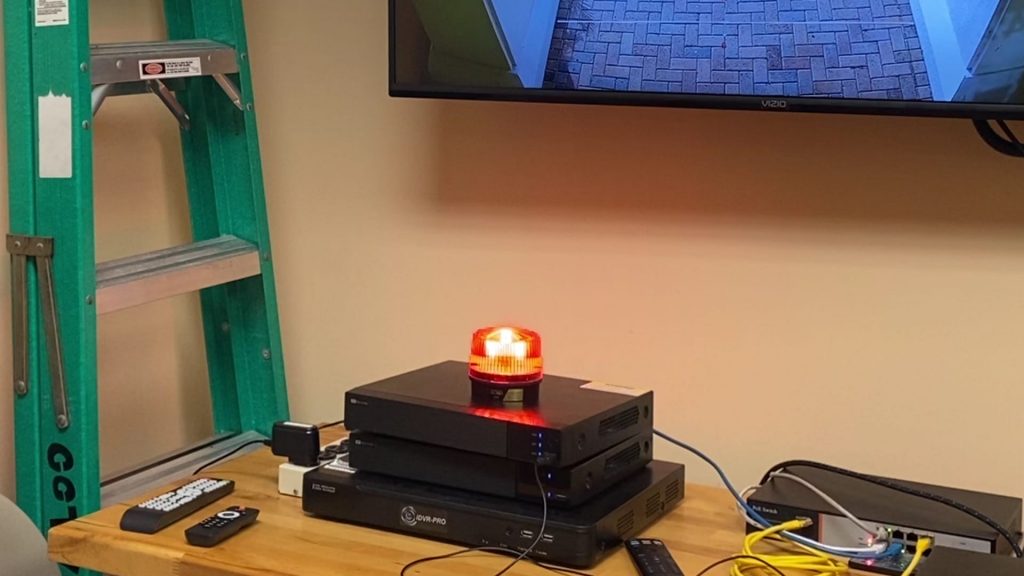
Last, here is a screenshot of the strobe light turned on as a result of the human detection / line crossing event.
Watch this video to learn how to connect a magnetic door sensor to the alarm input of a Viewtron
security camera DVR or IP camera NVR. The video also shows viewers how to configure the DVR to start video recording, take a snapshot image, and pop-up live video of a security camera when the door sensor is opened. You can also setup the DVR / NVR to send a push notification to the mobile app when the magnetic door sensor is opened. You can find complete setup instructions on how-to connect a magnetic door sensor to a DVR here.
Author
These setup instructions were written by
Mike Haldas, co-founder and managing partner of CCTV Camera Pros. Please send questions to mike@cctvcamerapros.net.
|