You are here: Home > Support & Knowledge Base > iDVR-E CCTV DVR Support (Legacy Model) > iDVR Touch Panel Controls
1. Front Panel

< 4Channel >
iDVR-E4

< 8Channel>
iDVR-E8

< 16Channel>
iDVR-E16


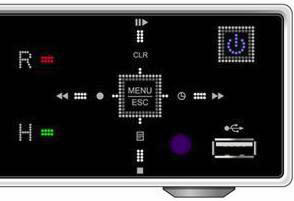
1. Mode indicator : 3 LEDs display the status of the Digital Video Recorder.
iDVR Mode / Controls

Power (Blue), Recording (Red) and HDD (Green)

2. Playback / Record control: These functions are used in Live Mode or
Playback mode.

1) Direction buttons: In Menu setup mode, used to move the cursor.

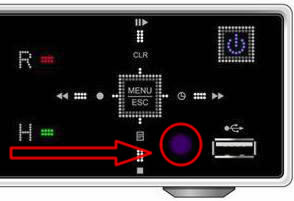
2)  [LOG / Playback Stop]
① Log : Press this button to access to log list.
② Stop : This button stops playback

3)  [R step or FR / REC ]
① Reverse Step : This button is used to move reverse field by field during STILL mode
② Fast Rewind : This button is used to fast rewind during PLAYBACK mode.
③ REC : Press this button to start recording. Press the button again to stop.

4)  [Clear / Still or Playback] :
① Clear : This button is used to hide the On-Screen-Display information such as the
time, date and channel icons. This button removes alert icons on the corner of the
screen (AL, VL and PL). This button is also used to turn off the alarm buzzer.
② Still or Playback: This button is used to still or 1 x playback during playback mode.

5)  [Schedule / F step or FF] :
① Schedule : Press this button to make scheduled recording standby. Press the button
again to stop.
② Forward step : This button is used to move forward field by field (picture by picture)
during STILL mode
③ F.F. : This button is used to Fast Forwarding during PLAYBACK mode.

3. Menu / ESC Button :
① Menu : Press this button to display the MAIN MENU screen.
② ESC : Press this button to exit menu without saving.

4. . Enter :
: Press this button to save menu settings

5. . QUAD :
: Press this button to display the cameras in multi-screen view.

6. . Channel / Numeric Buttons :

Press the buttons to enter data or make selections. Press “–” or “+” to enter
appropriate numbers when prompted for a password, or appropriate dates in schedule
option mode.
[-, +] : To Decrease settings, To Increase settings

7. Remote control signal receiver :
Do not block the receiver port on the unit. Doing so may cause the remote controller
to function improperly.


8. POWER button:
Press this button to turn the power on; press again to turn the power off. The
POWER LED indicator is lit when the power is on.

9. USB Port: USB port allows light backups of video files to devices such as flash
memory.