|
Hard Drive Format Instructions for iDVR-E CCTV DVR

The instructions featured in this article explain how to format the hard drive on the iDVR-E surveillance DVR. When a new hard drive is installed into the iDVR-E, it must be formatted to accept the recording files of the DVR. Please follow the instructions below to see how the formatting process is done.
iDVR-E Hard Drive Format Instructions
Please follow the instructions below to format the hard drive of your iDVR-E.
- Make sure the hard drive is connected to the SATA port on the iDVR-E motherboard. Then proceed to step 2.
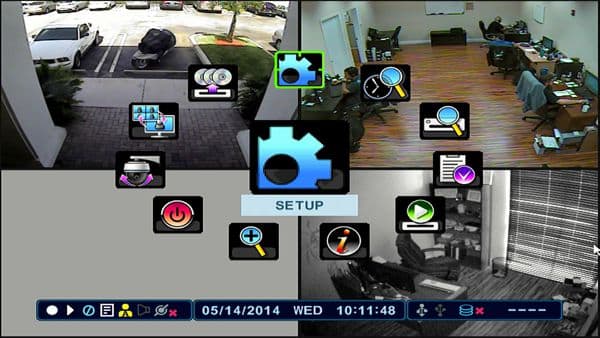
- Press the Menu button on either the front panel of the DVR or on the handheld remote. Then select Setup and press Enter. (Shown Below)
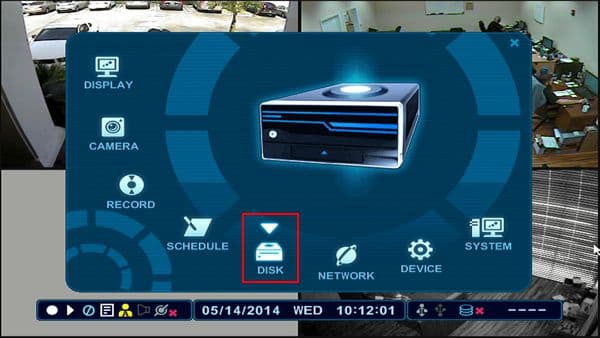
- Then scroll over and select the Disk icon. (Shown Below)
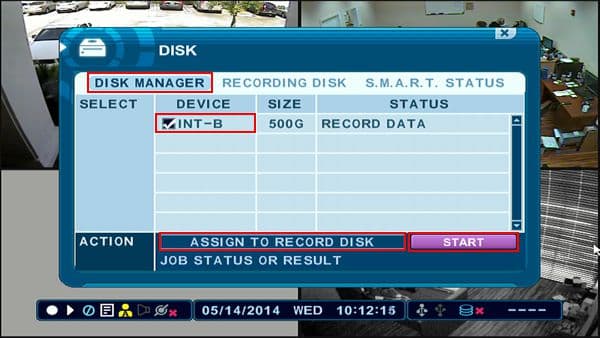
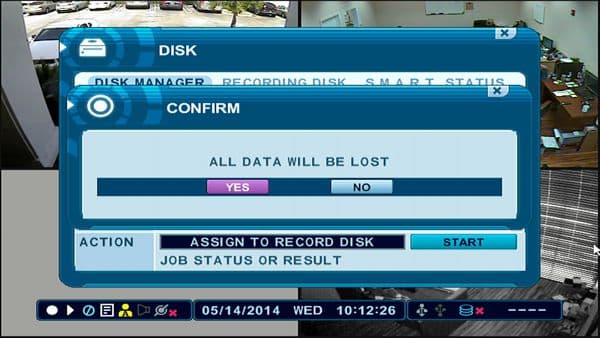
- Under the Disk Manager tab, check the hard drive you wish to format by using the '+' and '-' buttons. Then to the right of Action, select Assign to Record Disk and press Start. You will be prompted to continue, select Yes to continue. A format status bar will then appear. (Shown Below)
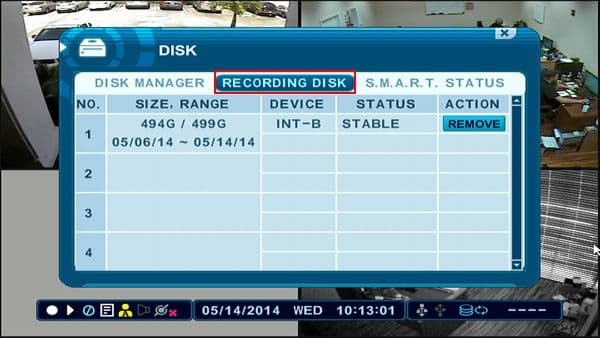
- Now that the disk is formatted, scroll over to the Recording Disk tab. Your hard drive will appear under this menu if the format was successful. (Shown Below)
iDVR CCTV DVRs
These instructions apply to the following model CCTV DVRs: iDVR-E4, iDVR-E8, iDVR-E16, and iDVR-RT16. Click here or on the image below to learn more about these video surveillance DVRs.

 About the Author About the Author
These setup instructions were written by Mike Haldas. Mike is the co-founder and managing partner of CCTV Camera Pros. Please send questions to mike@cctvcamerapros.net.
|
|


