JP DVR Surveillance Microphone Setup Audio surveillance can be setup using our JP Surveillance DVRs
and a surveillance microphone. These DVRs support the capability to
both record audio surveillance as well as listen to audio in real
time by connecting speakers to the DVR. These instructions are broken up into two parts. The first part will direct you to another page that contains instructions on how to setup your surveillance microphone wiring with your CCTV camera. The second part will walk you through the settings that you need to make on your DVR to enable audio recording and playback. Audio surveillance can be setup using our JP Surveillance DVRs
and a surveillance microphone. These DVRs support the capability to
both record audio surveillance as well as listen to audio in real
time by connecting speakers to the DVR. These instructions are broken up into two parts. The first part will direct you to another page that contains instructions on how to setup your surveillance microphone wiring with your CCTV camera. The second part will walk you through the settings that you need to make on your DVR to enable audio recording and playback.
Surveillance Microphone Wiring
Follow this link to setup the wiring of your surveillance microphone: Surveillance Microphone Setup. This link will open a new window so that you do not lose your place on this one. If you have already wired your camera and microphone, you can skill this step and proceed to the instructions below.
DVR SettingsTo enable surveillance audio recording and/or live listening on your DVR, please follow these steps.
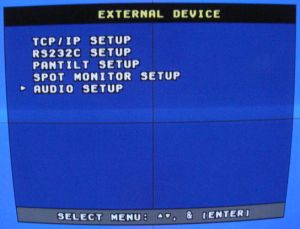
- From the System Menu on your DVR, select External Device.
- On the External Device menu, select Audio Setup as seen below.
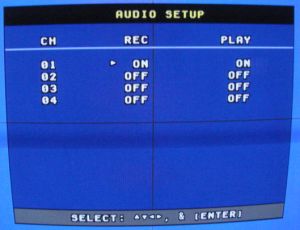
- On the Audio Setup screen, select the channel that you connected your microphone to and using the enter button, set the audio to on for recording, playing, or both.
- Press the menu button several times to exit.
To hear the audio from your microphone, connect your DVR to an audio device (such as a sterio) using the RCA audio output on the back of the DVR.
|
|


