Video Decoder / Receiver SetupThe following instructions will
demonstrate how to setup the Vivotek RX7101 video decoder with a
manually assigned IP address within your local area network (LAN). This device is used to convert digital (IP) network component signals to an analog signal.
1. Place the Vivotek CD in you CD ROM tray and install the Vivotek Installation Wizard 2
2. Connect the power adapter to the unit and connect the unit to your network switch / adapter via CAT5 cable
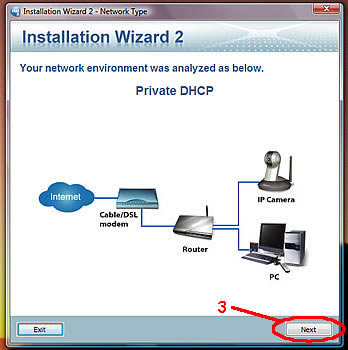
3. Run the Installation Wizard 2 to analyze your network environment and detect devices, then Click "Next"
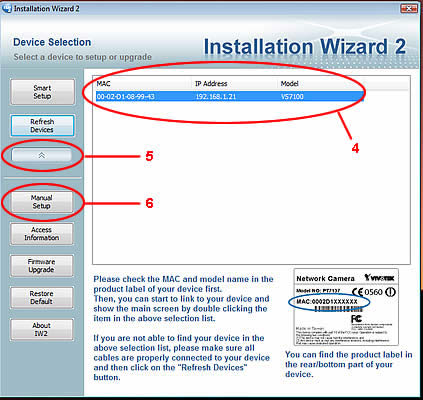
4. Select the device you wish to configure
5. Click the drop-down menu button
6. Click the "Manual Setup" button
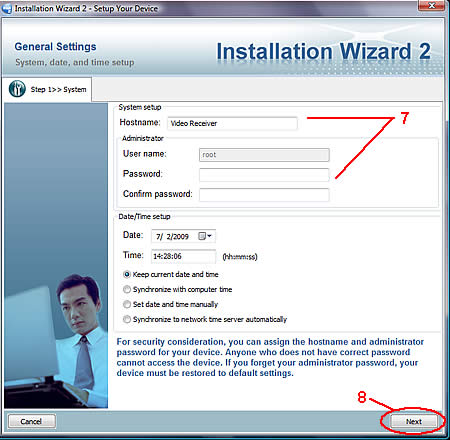
7. On the General Settings page, set Hostname
(you may leave the default "Video Server" or type a name of your choice)
Create and confirm a password of your choice, Set Date/Time settings if necessary
8. Click "Next"
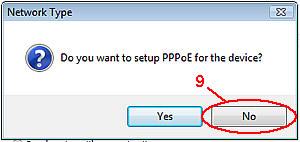
9. When prompted to setup PPPoE, Click "No"
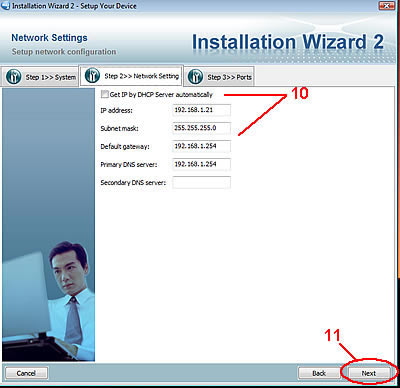
10. Un-check the "Get IP by DHCP Server automatically" and input IP address, Subnet mask, Default gateway,
Primary and Secondary DNS server of your choice following proper Internet Protocol naming conventions.
11. Click "Next"
You may Click the "Back" button to go back and make changes or
12. Click "Apply"
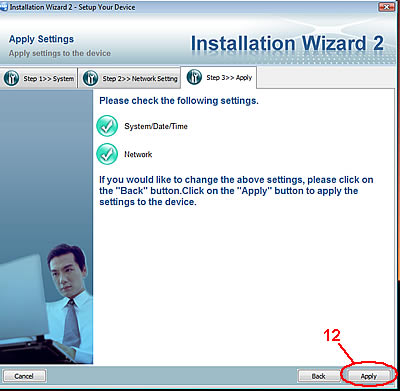
Your RX7101 Video Decoder / Receiver is now configured with the IP address and settings for your LAN.
You
may open your Internet Explorer browser, type in the IP address that
you assigned and will be able to connect to your Video Decoder via the
web page interface.
*Optional
You may now setup communication with your VS7100 Video Encoder via the following steps.
1. Make sure both the video encoder and decoder are connected to power adapters and network switch / router
2. Run the Installation Wizard 2 to analyze your network environment and detect devices, then Click "Next"
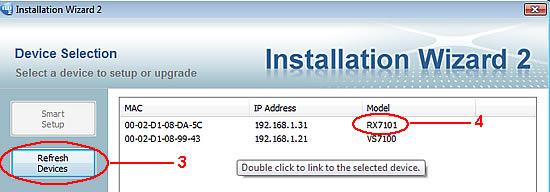
3. Click "Refresh Devices" button to confirm that both devices are detected
4. Double click the Decoder (RX7101) to open Web Browser Inferface
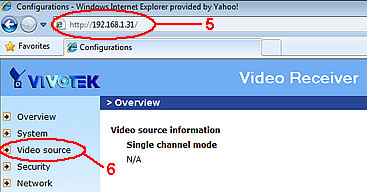
5. Once you double-click the device, Internet Explorer will open. The IP address of your device should show in
the address bar of the IE browser. (If Internet Explorere is not your default browser, then open IE manually
and type the IP address you assigned in the address bar.)
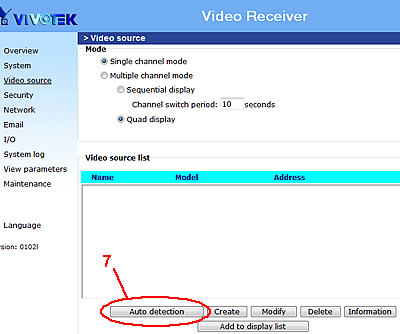
6. Click "Video source"
7. Click "Auto detection" button below the Video source list
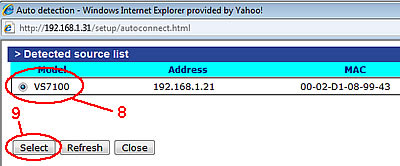
8. Select the radio button for the video encoder (VS7100)
9. Click the "Select" button
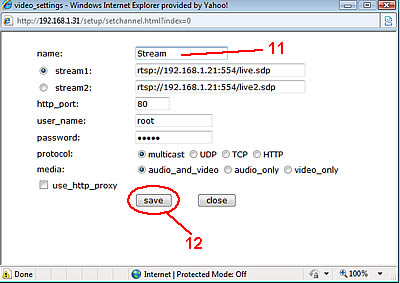
10. Enter Username (root) and password; click "save"
11. Name the data stream; leave other fields as is (default settings)
12. Click "save" button
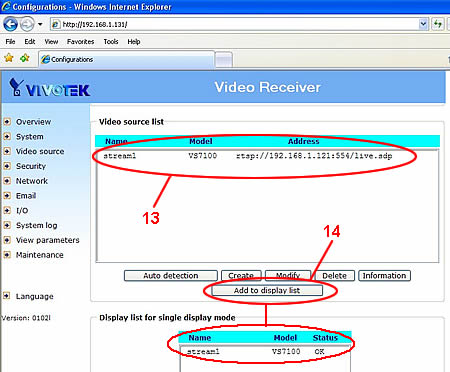
After you click save, you will be taken back to the Video Source page.
13. From the Video source list, Click on the data stream that you created in step 11
14. Click "Add to display list" button. The video stream will now show in the display list area. Click "Save".
The video decoder / receiver will now get the video stream sent from the video encoder / server.
See below for a typical system map converting from digital to analog over a LAN
|
|
|


