|
 Nuuo Main Console PTZ Camera Setup Nuuo Main Console PTZ Camera Setup
The instructions below explain how to set up a PTZ (Pan / Tilt / Zoom) camera on the Nuuo Main Console surveillance DVR / NVR system. The instructions will explain how to setup both Analog PTZ cameras and IP PTZ cameras. To use Analog PTZ cameras users must purchase a separate I/O box such as the Nuuo-SCB-C08 to connect the PTZ to the Nuuo Main Console.
1. First, ensure that you have at least one open IP license to connect the IP PTZ to. Then connect the IP PTZ to the same router the Nuuo Main Console PC is connected to.
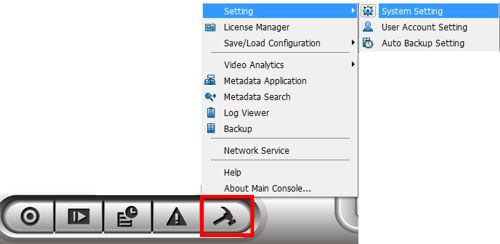
2. Now click the General Setting icon followed by Setting and finally System Setting. (Shown Below)
3. Then under the camera tab, click the Search button. Once your IP PTZ camera appears on the list double-click it. Then enter the Username and Password followed by OK. The click OK again to save the camera to the Nuuo Main Console. (Shown Below) 
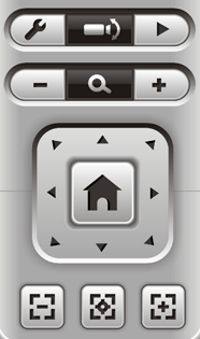
4. Now back on the live video screen, click on the IP PTZ Camera and use the controls on the right to control it. (Shown Below)
Analog PTZ Setup 1. First, ensure that the I/O box is connected to the USB port of the Nuuo Main Console PC. Then be sure to connect the RS-485 ports to the correct ports on the Analog PTZ camera (T+ & T- on the I/O Box to R+ & R- on the PTZ cameras). (Shown Below) 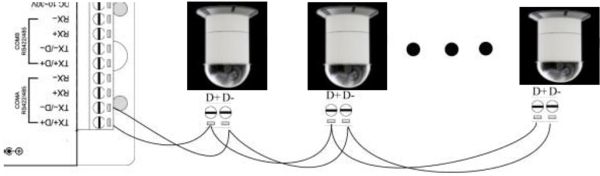
2. Now in the Nuuo Main Console go into the System Settings menu. (Shown Below) 
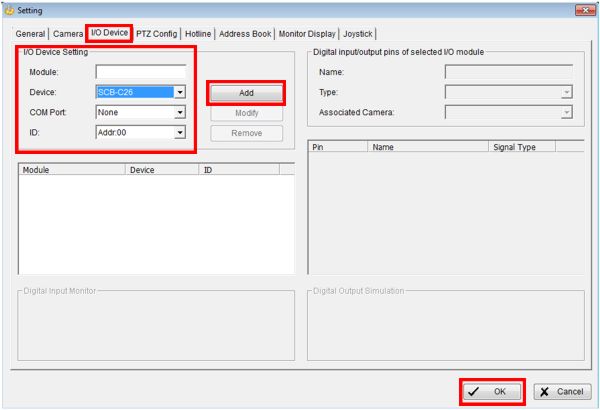
3. Then under the I/O Device tab enter the Module, Device, COM Port and ID for your I/O Box. Click the Add button followed by OK to save the settings. (Shown Below)
4. Go into the System Setting menu again and go to the PTZ Config tab. Enter the Camera Model, COM Port, Braud Rate and Address. Then set up the camera speeds under Advanced Setting. Click OK to save the settings. 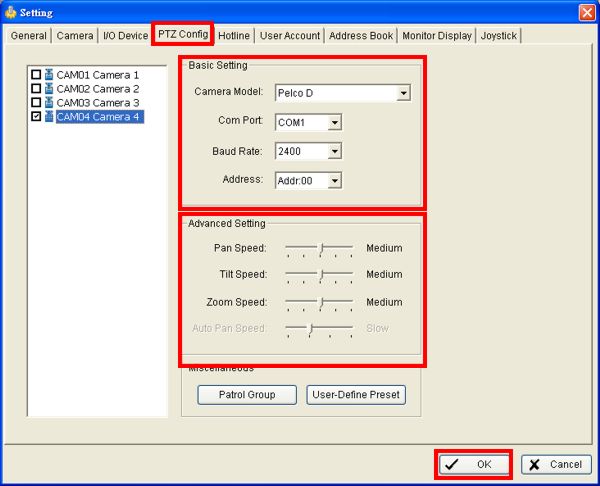
5. Then on the main video screen click on the Analog PTZ camera and use the controls to the right to control it. (Shown Below) 
|


