How-to Setup Zavio IP Camera for License Plate Capture
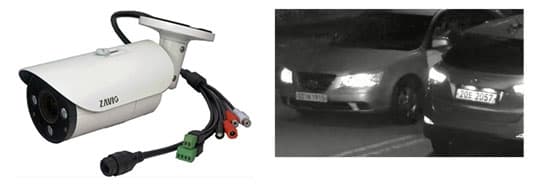
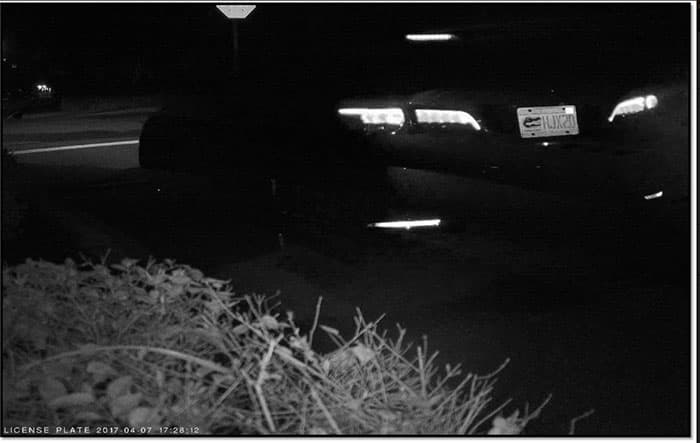
Some Zavio IP cameras have a built-in LPR (license plate recognition) mode which automatically adjusts the camera's settings to be optimized for capture license plate capture. The Zavio B6330 and Zavio B6530 DO NOT have an LPR mode but they can be set up manually for License Plate capture up to 30ft ( B6330) and 40ft ( B6530). This article will teach users how-to setup these two IP cameras for license plate capture. These are the settings that we have found to work best for both day and night capture. The below screenshots were captured using a B6530, however, the settings will be the same for the B6330 as well.
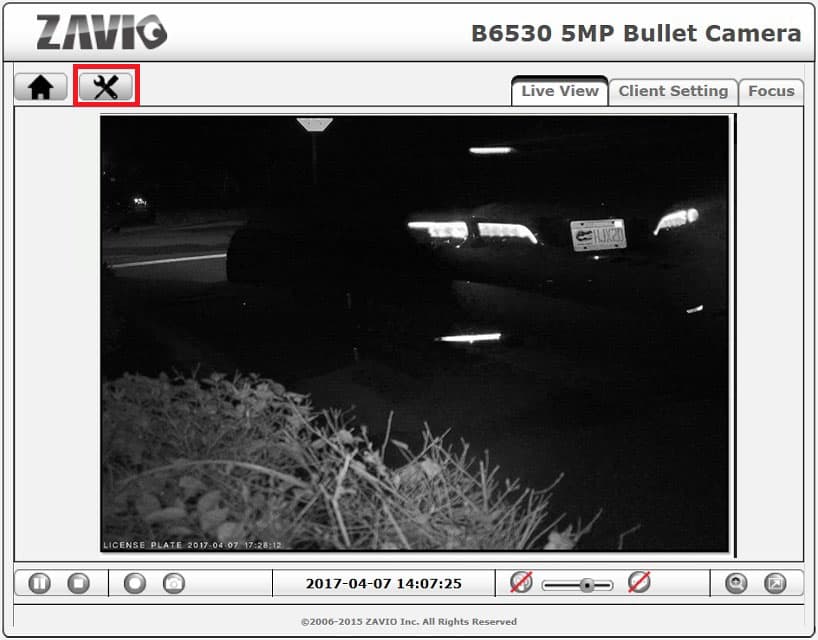
1. Log into the cameras web interface, then click the Settings button located top left of the camera interface. See reference image below.
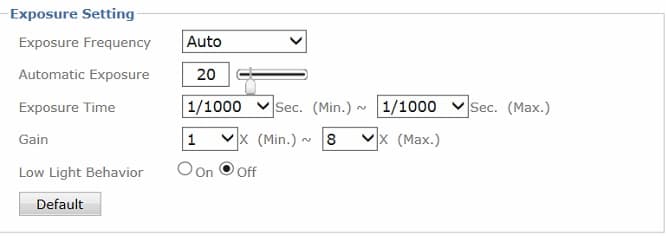
2. Go to Live View > Camera Settings > Now we are going to adjust the Exposure settings as follows.
Exposure Frequency: Auto Automatic
Exposure: 20
Exposure Time: 1/1000 ~ 1/1000 for cars going 40mph or more you may need to set this to 1/2000 ~ 1/2000
Gain: 1 ~8
Last, click the save button at the bottom of the page.
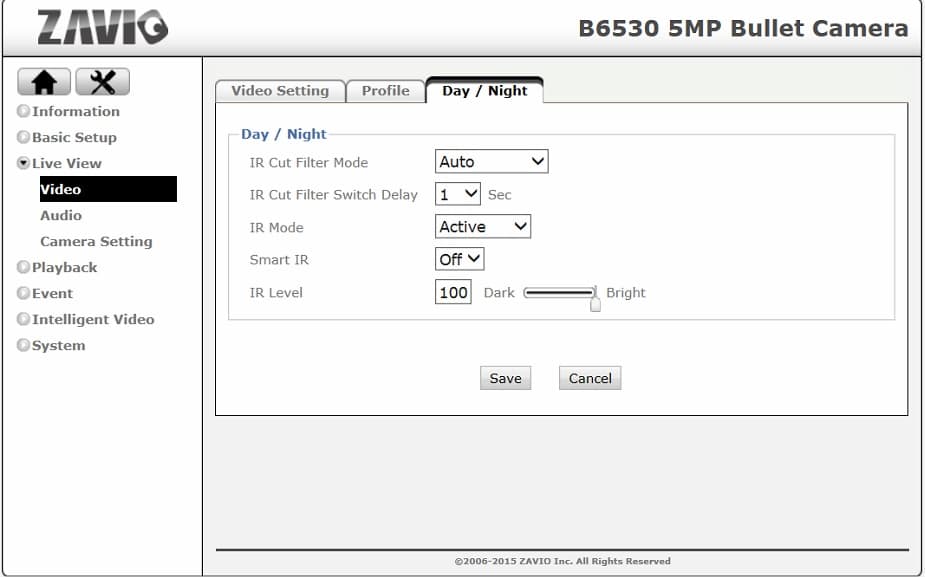
3. Once saved go to Live Video > Video > Day / Night Tab > Adjust as follows:
Set IR Mode to Active
Turn Smart IR Off
If the plates are white-out at night you will need to adjust the IR Level down. You typically need this down to around 50. Click the save button once set.
Your Zavio IP camera is now set up for license plate recognition!
About the Author

This article was written by Mike Haldas, co-founder and managing partner of CCTV Camera Pros. If you have any questions about how to wire a security camera system using premade camera cables, please email me at mike@cctvcamerapros.net.
|


