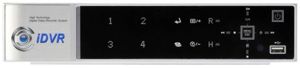
iDVR-E Series Surveillance DVR Dynamic DNS Setup (DDNS)
The iDVR-E Series Surveillance DVR's support Dynamic DNS (DDNS). Dynamic DNS allows the user to assign Internet domain names to IP addresses. It is specifically made to support dynamic IP addresses that can change every so often. By having a domain name assigned to the dynamic IP address, the user will never lose connectivity because the hostname is constantly updated with the latest IP address created by the Internet service provider.
Dynamic DNS Setup (DDNS)
1. The first requirement for remote access is confirming that the correct port is Open on your access point or router. This can be confirmed by visiting http://dvrport.net as seen below. Your IP Address will be populated in the IP Address / Hostname box. On the right side, select your DVR and select the Port Number for the device. Once selected the page will automatically scan for the status of the port.
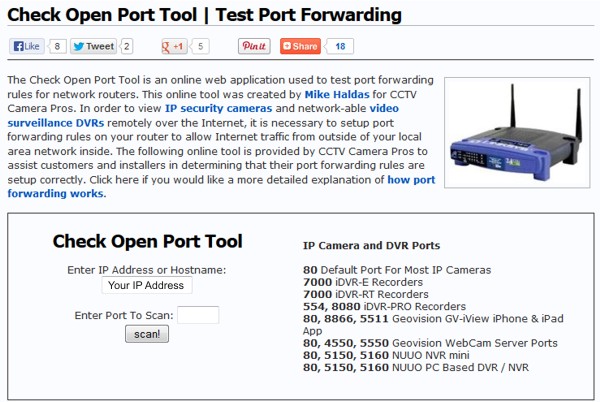
2. If the port is Open, proceed to the next step. If the port is Closed, the port forwarding settings will have to be adjusted in your router. For assistance with port forwarding, please visit our iDVR-E Network Setup Port Forwarding article.
3. Starting from the Main screen of your DVR, select Menu on your remote. The Menu button is located in the center of the arrow buttons on your remote.
Steps 4 - 7 cover our legacy iDVR-E recorder, proceed to Step 8 if the menu below does not match your unit.
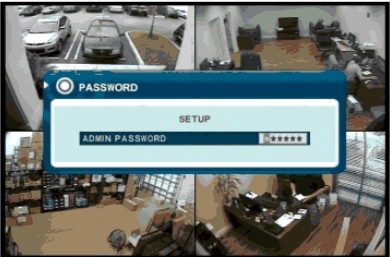
4. Once Menu is selected, you will be prompted to enter your password. The default password for the iDVR-E series is '000000'. After logging in you will see the main system menu. (Shown Below)
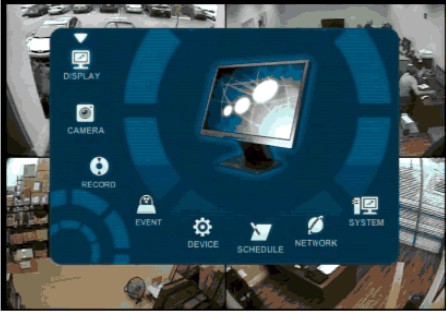
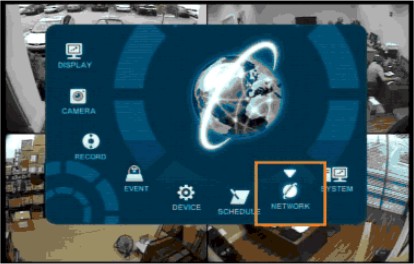
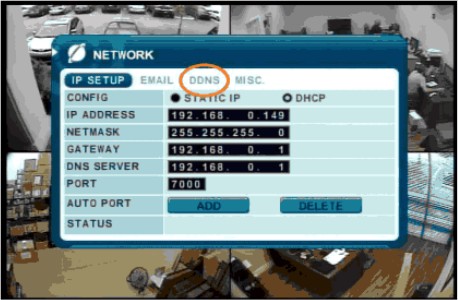
5. From the Main menu, navigate over to the Network option using the arrows buttons on the remote. On the Network menu, use the arrow buttons to select DDNS and press Enter. (Shown Below)
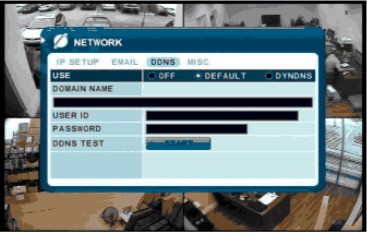
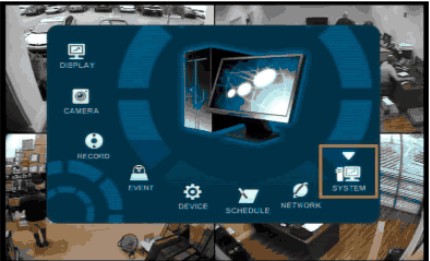
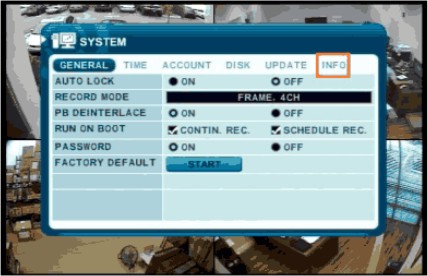
6. Scroll down to the first line, then using the '+' & '-' buttons select the Default option. Once Default is chosen, press Enter on the remote to return to the main menu. Then use the arrows on the remote to highlight the System option and press Enter. (Shown Below)
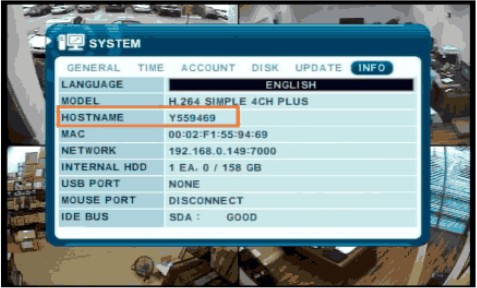
7. Using the arrows on the remote, select the Info tab. On the Info tab, notice the line labeled Hostname. Take note of the Hostname as this is what will be used to connect remotely. (Shown Below)
If your DVR's hostname is Y559469, your DVR's remote IP address is http://Y559469.dvrhost.com:7000.
BE SURE TO SUBSTITUTE YOUR HOSTNAME FOR THE ADDRESS USED IN THE EXAMPLE.
The remote address will be used in place of HOST / IP in your mobile app and / or web browser.
Port 7000 is the default port for the iDVR-E series, if you have changed the port any other number, please use that instead.
Step 8 - Newer DVR Model
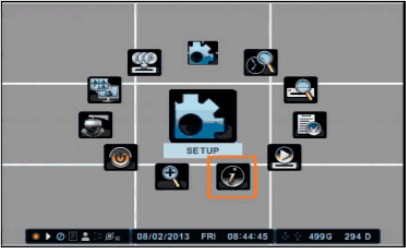
8. Using the arrows on the remote select the icon shown below.
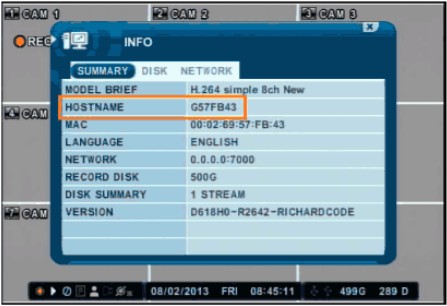
On the Info tab, notice the line labeled Hostname. Take note of the Hostname as this is what will be used to connect remotely. (Shown Below)
If your DVR's hostname is G57FB43, your DVR's remote address is http://G57BF43.dvrhost.com:7000
BE SURE TO SUBSTITUTE YOUR HOSTNAME FOR THE ADDRESS USED IN THE EXAMPLE.
The remote address will be used in place of HOST / IP in your mobile app and / or web browser.
Port 7000 is the default port for the iDVR-E series, if you have changed the port any other number, please use that instead.
|


