Audio Surveillance Microphone Installation How-to Wiring Guide
for Stand-Alone Mic and Security Camera (analog CCTV and HD CCTV) Add-on Applications
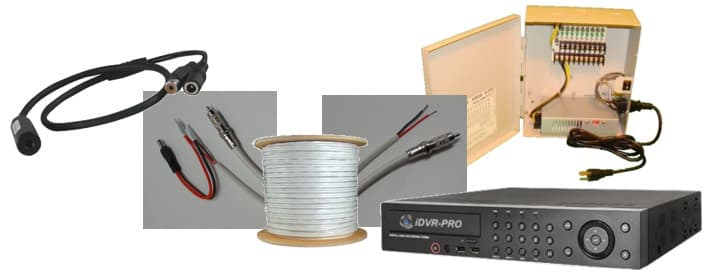
This guide discusses installation techniques for wiring audio surveillance microphones as a stand-alone application and as an add-on for security cameras. The
MIC-CCTV-02 surveillance microphone is used in the examples, however, these instructions can be applied to any low voltage / analog mic that runs over coax cable. CCTV Camera Pros typically supplies the MIC-CCTV-02 as an add-on for analog CCTV cameras and HD security cameras (HD-TVI, AHD, HD-SDI, HD-CVI). Our example installations also use the iDVR-PRO HD surveillance DVR which supports analog cameras, HD security cameras, and audio microphones. Again, installation concepts discussed in this article will apply to any similar DVR.
A stand alone / add-on audio surveillance microphone is one that can use its own audio cable and power supply cable. Stand-alone mics do not have to be paired with a security camera, but they can be. They do not need to be mounted near a security camera (if paired with one) but they can be. Stand-alone mics are extremely flexible in how they can be used. This installation guide will show the most typical ways that they are installed and wired.
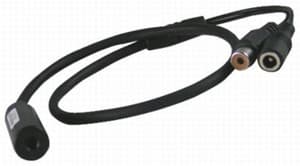
You can see a picture of the MIC-CCTV-02 stand-alone microphone above. Notice the 2.1mm power input and RCA audio output cables.
Using
spools of RG59 Siamese coax cable is the method of choice for professional installers to install analog CCTV and HD security camera systems. DIY installers also find the process of cutting RG59 cable and crimping connectors on the end fairly simple. RG59 Siamese cable can also be used to wire surveillance microphones. When adding one of these mics to a security camera system that is already using RG59 and a 12V DC power supply box, it makes sense to leverage the existing cable and power supply box that is being used for the microphone as well.

In the above wiring diagram, a male RCA connector is attached to each end of the RG59 coax. The methods used here to attach the RCA connector is to attach a
crimp-on F connector to the cable, then screw-on a F to RCA male screw connector. This enables the microphone to connect to the iDVR-PRO HD surveillance DVR and a power supply box. Typically there would also be security cameras connected to the DVR as well, but audio microphone installation is the focus of this article.
You can learn how to attach a crimp-on F connector to RG59 here.
You can also watch the below video to see how to attach the F connector to the coax cable.
In the video, a BNC screw-on connector is attached to the F connector, but the process is the same for the F to RCA screw on connector to attach.
Another available RCA connector is compression type. Installers use a coax compression tool to attach this type of RCA connector directly to the cable. Compression connections are a little more tricky than attaching the crimp-on F connector method. For beginner and DIY installers, CCTV Camera Pros recommends using the F connector method when using RG59 cable.
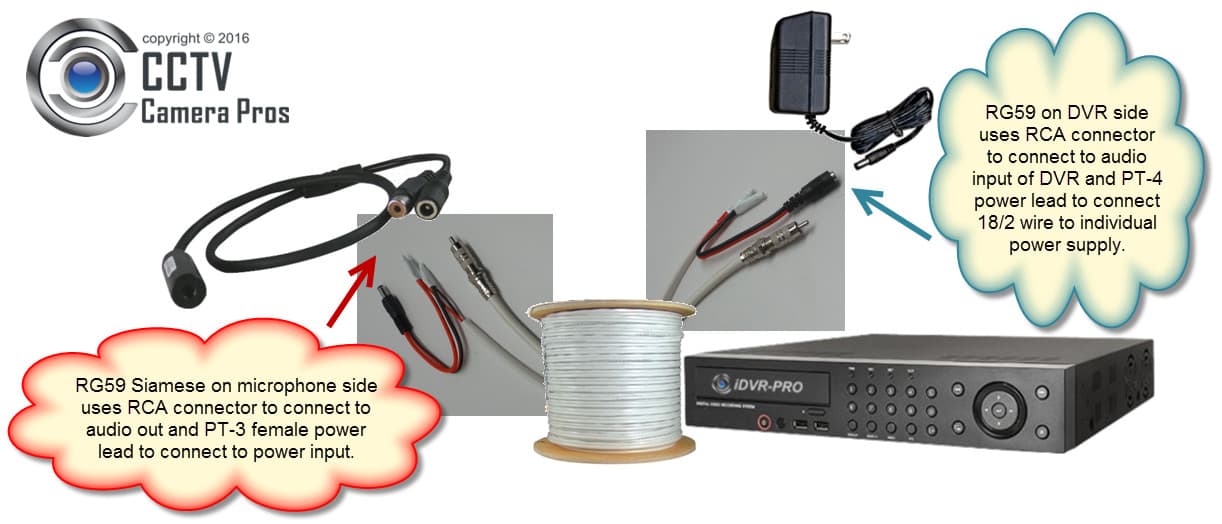
RG59 Siamese coax cable can also be used to wire surveillance microphones when individual power transformers are used to power the mic instead of power supply boxes. The connectors used on the microphone side of the cable run are the same, but on the DVR side, you must attach a
PT-4 male 2.1mm power lead to the 18/2 power cable in order to connect it to the 2.1mm female input of the power transformer. This can be used for 5V DC, 12V DC, 24VAC and other low voltage transformers.

Pre-made Siamese coax cables simplify installation quite a bit. These cables already have connectors attached to both ends, however, they are more typically used to wire security cameras, so there are BNC connectors on both ends. So, installers must simply attach a
BNC to RCA connector on each end of the cable to connect the audio of the microphone to a DVR. In the above wiring diagram, an individual 12V DC transformer is used to power the microphone. The standard 2.1mm plug on the pre-made cable simply pushes onto the power supply's plug. On the microphone side, the 2.1mm plug simply pushes onto the power input of the microphone.
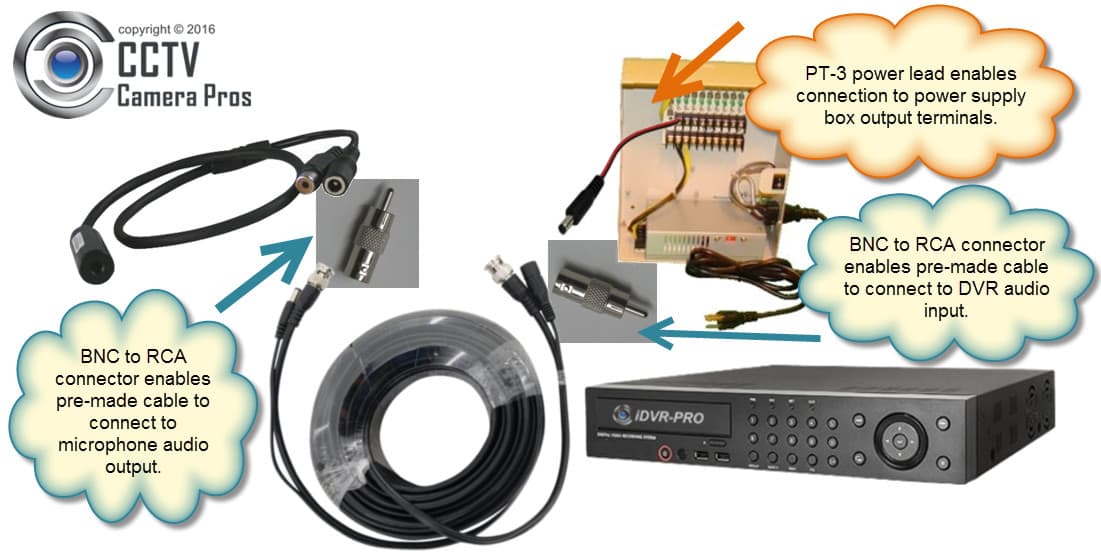
Using a power supply box instead of an individual power transformer requires use of a PT-3 power lead to attach the pre-made cable's power lead to the terminal blocks of a power supply box.
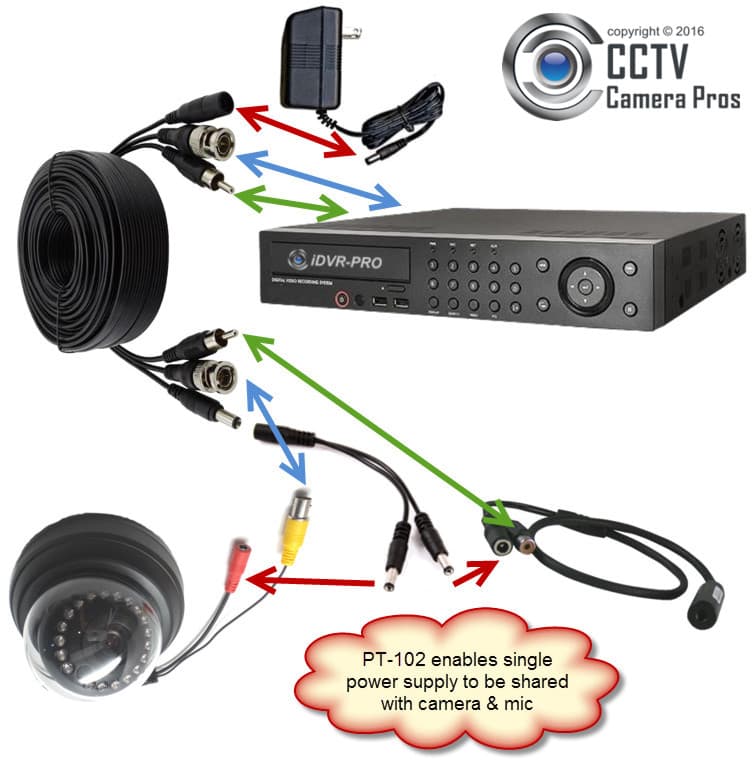
Pre-made audio video power cables allow a security camera and microphone to share the same cable and power supply. Of course, the camera and microphone must use the same type of power. For example, a 12 volt DC power transformer is used in the above diagram. This is a very common voltage for security cameras (analog CCTV and HD cameras) and microphones. A PT-102 power cable splitter is used to split the 2.1mm female power plug of the per-made cable to two 2.1mm female power plugs. This allows both the camera and mic to share the power supply.
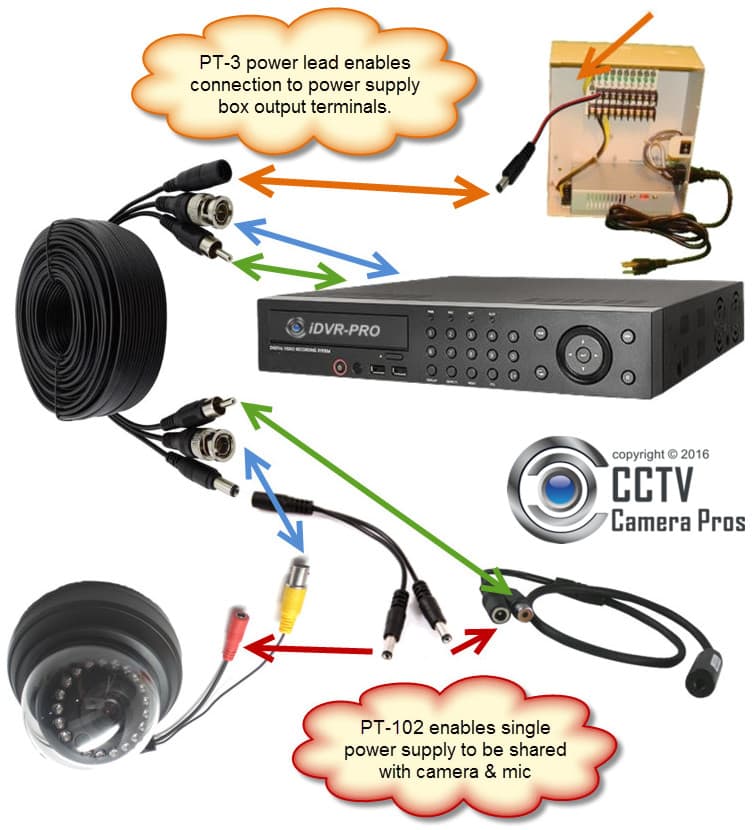
Pre-made audio video power cables are used in this example installation of a security camera and microphone, but this install uses a power supply box instead of an individual DC transformer. The PT-102 power cable splitter is still used to split the 2.1mm female power plug of the per-made cable to two 2.1mm female power plugs to allows both the camera and mic to share the power supply. A PT-3 power lead is used to connect the premade cable to a 12V DC power supply box on the DVR side of the cable run.
Available in CCTV Camera Pros Mobile App


This article, and many others, are also available in CCTV Camera Pros mobile app for iOS and Android. Please download the app to keep up with the latest installation discussions, product demonstration videos, and special offers / coupons.
About the Author

This article was written by
Mike Haldas, co-founder and managing partner of CCTV Camera Pros. If you have any questions about how to install audio surveillance microphone with security camera systems, please email me at mike@cctvcamerapros.net.
|


